Domestic Superhero

  • Recipes
  • DIY Projects
  • Travel
  • About Me
menu icon
go to homepage
  • Recipes
  • DIY Projects
  • Travel
  • About Me
search icon
Homepage link
  • Recipes
  • DIY Projects
  • Travel
  • About Me
×
Home » You searched for fall

Search Results for: fall

Coconut Almond Bites

Published Jan 16, 2014 by Allyson
This post may contain affiliate links. Read my disclosure policy.

Almond Joy Bites 1
I don’t know why, but I was at least in my 20’s before I tried an Almond Joy candy bar. For some reason I always thought that I didn’t like them. Maybe I tried them when I was a kid and forgot, but I had this weird negative association with them.  Finally one day I decided to try one…and I loved it. I love coconut, almonds, and chocolate so the combo makes sense to me. While they aren’t something I eat often, I do enjoy them once in a while. So, when I had a bag of left over coconut, I started brainstorming what I could do with it. I browsed Pinterest and didn’t find anything that really stood out, but then I thought I could do a play on Almond Joy bars!

Almond Joy Bites 2

These turned out really well! I served them to my friends who were actually skeptical to try them because ‘they don’t like almond joy’…but they loved these! My friend actually told me, “don’t associate these with Almond Joy!” but for me, they taste so similar! I guess everyone has different taste buds!  Anyway, it’s an easy recipe and definitely great to bring to a party or snack on at home!  The kids loved them too!

Almond Joy Bites 3

Print
Almond Joy Bites
Course: Dessert
Cuisine: American
Keyword: almond joy bites
Ingredients
  • 2 cups of shredded coconut
  • ½ cup toasted almonds chopped
  • ½ cup of semi-sweet chocolate chips
  • 4 ½ TBS sweetened condensed milk
  • ½ teaspoon vanilla extract
  • ¼ TBS butter
Instructions
  1. Chop the coconut flakes and add them to a mixing bowl. Add sweetened condensed milk and vanilla to the coconut, mix well until all incorporated. (I recommend using your hands here!)

  2. Add the toasted, chopped almonds and mix until combined.

  3. Form balls with the coconut mixture, pressing them together, hard.

  4. Place each bite on parchment paper (waxy side up) and chill for an hour.

  5. Melt the chocolate chips and butter in the microwave at half power for about a minute, stirring every 15-20 seconds.

  6. Drizzle chilled Almond Joy Bites with chocolate.

Recipe Notes

I recommend keeping them in the fridge, covered, until ready to serve. They taste great and stay together better after being chilled.

You can also connect with me here:

Thanks for visiting!

- Allyson

Creamy Jalapeno Ranch

Published Jan 8, 2014 by Allyson
This post may contain affiliate links. Read my disclosure policy.

Creamy Jalapeno Ranch - this is the perfect dip to accompany salad or chips, or anything!

Since 1992 Ranch has been the #1 salad dressing in the United States, and this is definitely for good reason.  Ranch is good on everything.  I remember back in my middle school cafeteria my friend, Holly, trying to convince me in that I should dip my pizza in ranch dressing. It sounded disgusting, and I didn’t do it. I liked my pizza how it was!  Over the weeks though, I noticed it wasn’t just Holly dipping her pizza in ranch, it was everyone. Reluctantly I gave it a try and since then I haven’t turned back.

Ranch is good on everything. Fact.  It can be made as a thin dressing or a thicker dip, but it HAS to be homemade. I literally cannot stomach ranch dressing that comes from a plastic bottle with a blue label. It’s not right. It’s not the real thing…it’s like a weird after-tasty impostor.  Once you have had good ranch dressing that’s been homemade (usually at restaurants), you will never turn back.  There are tons of ways to make it at home, too, and I love this Jalapeno version. Use this as a dip for Air Fryer Chicken Wings , Jalapeno Poppers, Spinach Tomato Ranch Pizza, or drizzle it on Loaded Nachos!

By adding some jalapenos and chilies to the ranch blend, it kicks up the flavor.  I love adding a little spice to my food, so this is perfect.  Let me warn you though, the longer this dressing sits in the fridge, the spicier it gets. I really think after a day or 2 it’s perfect, after 4 days you have one spicy dressing on your hands….still good though!  It’s seriously tasty on anything, not just chips as shown in the pictures. I love this on my pizza and also with breadsticks…yum!  Make this one day before you need it because although you can technically just let it chill and meld for a few hours, it’s SO much better if you give it a day. Trust me.  Make it today, use it tomorrow.

Creamy Jalapeno Ranch - this is the perfect dip to accompany salad or chips, or anything!

If you like dressings as much as I do, checkout these other amazing dressings:

  • Homemade Poppyseed Dressing
  • Blue Cheese Dressing
  • Chipotle Ranch Dip
  • Avocado Ranch
5 from 4 votes
Print
Creamy Jalapeno Ranch
Ingredients
  • 16 oz. sour cream
  • ½ cup buttermilk
  • ½ cup tomatilla salsa green salsa
  • ½ cup mayo
  • small handful cilantro
  • 5 TBS Ranch dressing mix or 1.5 packets
  • ½ cup pickled jalapeños
  • Juice of 1 lime
Instructions
  1. 1. Place all ingredients into a blender or food processor, and pulse until smooth
  2. 2. Refrigerate at least 2 hours (longer better), and then serve.
Recipe Notes

This dip can continue to be refrigerated, covered, for about a week. If you want it more runny for a dressing, add more lime juice

Dark Chocolate Peppermint Brownies

Published Dec 17, 2013 by Allyson
This post may contain affiliate links. Read my disclosure policy.

Dark Chocolate Peppermint Brownies

A few weeks ago we had our annual ‘Drinks and Desserts’ holiday party where we get together with friends before the craziness of the holidays really begins.  It was such a nice time, and I prepared 4 desserts, this one included.  This recipe was a new one for me, but I was excited to try it because I love candy canes!  I figured this would be a hit with the adults because of the richness of the dark chocolate and the bite of the peppermint, but it was also a hit with the kids.

Dark Chocolate Peppermint Brownies

These Dark Chocolate Peppermint Brownies are fairly easy to prepare, and they are like 100 times better the day after you make them.  I don’t know why, but they turn even more fudgy and delicious. The recipe does pack a lot of peppermint punch, so if you want to downplay that, just use less extract than the recipe calls for.  These are definitely a great seasonal treat, and I will be using this brownie recipe (sans the peppermint) for my go-to homemade brownie recipe from now on!

Print
Dark Chocolate Peppermint Brownies
Ingredients
  • 1 ½ cups flour
  • ¾ cup unsweetened cocoa powder
  • ½ teaspoon salt
  • ¼ teaspoon baking powder
  • 1 cup unsalted butter
  • 6 ounces bittersweet chocolate finely chopped
  • 1 ½ cups sugar
  • 5 large eggs
  • 1 ½ teaspoon vanilla extract
  • 1 teaspoon peppermint extract
  • 5 ounces dark chocolate finely chopped
  • Coarsely crushed peppermint candies very fine pieces sifted out
Instructions
  1. 1. Preheat oven to 300°. Grease a 9- by 13-in. baking pan and set aside.
  2. 2. Sift together flour, cocoa, salt, and baking powder into a bowl.
  3. 3. Microwave butter and bittersweet chocolate in a medium glass bowl, stirring often, until melted and smooth, about 1 ½ minutes.
  4. 4. Whisk together sugar and eggs in a large bowl until blended. Add extracts and whisk to blend. Stir melted chocolate mixture into egg mixture. Gently fold in flour mixture with a plastic spatula until no streaks remain. Pour batter into prepared pan and spread evenly.
  5. 5. Bake brownies until a toothpick inserted 2 in. from edge comes out with a few crumbs sticking to it, 25 to 30 minutes. Cool about 45 minutes.
  6. 6. Put dark chocolate in a microwave safe bowl and cook 15 seconds at a time, mixing, until melted (probably about 45 seconds-1 minute but mix every 15 seconds). Put melted chocolate in a resealable plastic bag, snip off a small corner tip, and drizzle half over brownies. Sprinkle with candies and drizzle with remaining chocolate.
  7. 7. Let cool until chocolate sets, 25 minutes, then cut into squares.
Recipe Notes

If you don't enjoy a large peppermint taste in the brownies, reduce the extract to ½ tsp. You can also leave that out and use this recipe for regular brownies!

Dark Chocolate Peppermint Brownies

You can also connect with me here:

Thanks for visiting!

- Allyson

Cranberry Walnut Bread with a Crumble Topping

Published Dec 10, 2013 by Allyson
This post may contain affiliate links. Read my disclosure policy.

Cranberry Walnut Bread is delicious and festive for the holidays. This bread is so tasty and wrapped up would make the perfect gift!

Growing up we always had cranberry sauce at our Thanksgiving table.  I am not talking homemade lumpy cranberry sauce, I am talking straight up from a can cranberry sauce.  I thought the indents on the cranberry blob/sauce were pretty cool and  that it allowed you to see how it looked from the inside of the can.  Why did it need those indentations on the can anyway?  This, I will never know (well, unless I hit up google, but I am not too concerned about it anymore).  Can or not, I always loved cranberry sauce.  My favorite thing to do was use it the day after and pile it on top of my left over turkey sandwiches.  There is just something really special about turkey and cranberry sauce.  It’s no coincidence that this is a combination served in restaurants now.

Cranberry Walnut Bread 2

Flash forward years and years later and now I don’t eat those left over sandwiches. Now we are a house of vegetarians, but I still like to enjoy delicious homemade cranberry sauce.  It’s really such an easy thing to whip up with fresh cranberries!  Even though Thanksgiving has already passed by us, I love to incorporate cranberries into December/holiday recipes too.  They are so festive and delicious!   I decided that a Cranberry Walnut bread would be a divine dessert or even breakfast on or around Christmas.  I love bread, it’s a fact.

I played around with making it, using a pretty basic sweet bread recipe, and then adding the little extras.  I thought this bread was amazing, and then I added the crumble topping and was blown away.  It adds a little extra sugary, crunchy goodness that accompanies the cranberries so well. It takes the bread from really good, to really great!

Cranberry Walnut Bread is delicious and festive for the holidays. This bread is so tasty and wrapped up would make the perfect gift!

When I made this, I ended up making 4 mini loaves and one regular loaf. I have given the loaves to family and friends, and everyone is loving it.  I can’t wait to make this again around Christmas!

Print
Cranberry Walnut Bread with a Crumble Topping
Ingredients
For Bread
  • ½ cup unsalted butter room temperature
  • ½ cup sugar
  • ½ cup brown sugar
  • 1 egg lightly beaten
  • ½ cup orange juice
  • 2 cups all-purpose flour
  • 1 ½ teaspoon baking powder
  • ½ teaspoon baking soda
  • 1 teaspoon kosher salt
  • 2 ½ cups fresh cranberries roughly chopped or pulsed in a food processor
  • ¾ cup walnuts toasted and chopped (this is optional, but it a great addition)
For Crumble Topping
  • ½ cup all-purpose flour
  • 1 ½ TBS light brown sugar
  • 1 TBS granulated sugar
  • ½ teaspoon baking powder
  • pinch salt
  • 3 TBS unsalted butter melted
Instructions
  1. For the Bread (use bread ingredients)
  2. 1. Preheat the oven to 350 degrees. Butter a 9x5 loaf pan or 4 mini-loaf pans.
  3. 2. In a large mixing bowl (I used a stand mixer), cream the butter and sugar together. Add the egg and orange juice and mix until combined. Sift together the flour, baking powder, baking soda and salt and beat slowly, a little at a time, into the butter mixture. Gently fold in the cranberries and walnuts until just mixed.
  4. 3. Spoon the batter into the 9x5 loaf pan or 4 mini-loaf pans. Set to the side.
  5. For the Crumble Topping (use topping ingredients)
  6. 1. Combine the flour with the brown sugar, granulated sugar, baking powder and salt. Stir in melted butter, and mix together with a fork, pressing and turning until little clumps form and all the butter is mixed well.
  7. 2, Using your hands, sprinkle the topping over the loaf/loaves until it is covered. There is no such thing as too much topping!
  8. 3. Place in center of the oven, and bake until golden and a tester has just a few moist crumbs on it (about 30 minutes for mini-loaves, 50-55 minutes for a big loaf). Make sure you use a toothpick to test them as cooking times may vary. Let cool for a few minutes and then move to a cooling rack to cool completely.
Recipe Notes

(makes 1 9x5 inch loaf or 4 mini-loaves)

Cranberry Walnut Bread is delicious and festive for the holidays. This bread is so tasty and wrapped up would make the perfect gift!

I hope y’all love this recipe as much as my family, and it earns a spot in your Thanksgiving or Christmas rotation! 

You can also connect with me here:

- Allyson from Domestic Superhero


Chocolate Almond Cheesecake Bars

Published Dec 8, 2013 by Allyson
This post may contain affiliate links. Read my disclosure policy.

As everyone knows, the holidays are an incredibly busy time of the year.  We have Thanksgiving and then a few weeks later are celebrating Christmas.  We even have my son’s birthday between the two holidays, which makes it even crazier.  While I love the holidays, I also like to take time to relax and enjoy our friends, before things get too stressful.  For the last few years we have taken a night off from all the stress, and had a little holiday party where we get together with our close friends, and just enjoy their company and be free of all holiday stress.  I usually use this time to do some holiday baking and cooking.  As my close friends know, I love cooking, so I love sharing that with them. While this year we only had around 12 people come over, it was the perfect number and we had a great time.

I decided that we would have a ‘Drinks & Desserts’ theme, and I would make some tasty baked desserts and whip up a signature cocktail. 

Before everyone arrived, I finished baking the 4 featured desserts, including the Chocolate Almond Cheesecake Bars (scroll to bottom for recipe).  Land O’ Lakes Butter was a star in this recipe and definitely helped in getting the most perfect buttery almond crust on these bars.

Chocolate Almond Cheesecake Bars #HolidayButter #Cbias #Shop

I also set up a signature cocktail area, moved the food to the serving table, and finished decorating our Christmas tree…

‘Drinks & Desserts’ to Celebrate Friends, the Holidays, and Cooking! #HolidayButter #Cbias #Shop

‘Drinks & Desserts’ to Celebrate Friends, the Holidays, and Cooking! #HolidayButter #Cbias #Shop  ‘Drinks & Desserts’ to Celebrate Friends, the Holidays, and Cooking! #HolidayButter #Cbias #Shop

Right as I set the cheesecake bars onto the table, I heard the doorbell ring! I was so excited for our friends to arrive and start celebrating! Everyone dug right into the desserts and drinks, and we had a great time.

 The kids kept sneaking desserts from the table and at one James had his plate overflowing! Audrey loved the chocolate truffles and there was no hiding it!

‘Drinks & Desserts’ to Celebrate Friends, the Holidays, and Cooking! #HolidayButter #Cbias #Shop  ‘Drinks & Desserts’ to Celebrate Friends, the Holidays, and Cooking! #HolidayButter #Cbias #Shop

After everyone was full of delicious desserts the adults chatted and watched football and the kids played and played.

‘Drinks & Desserts’ to Celebrate Friends, the Holidays, and Cooking! #HolidayButter #Cbias #Shop

Being behind the camera is sometimes a pain, because you never get to be in any photos with your friends in family! Luckily my husband volunteered to take a picture of me and my 2 friends in front of our tree.

‘Drinks & Desserts’ to Celebrate Friends, the Holidays, and Cooking! #HolidayButter #Cbias #Shop

Everyone thoroughly enjoyed the drinks and desserts, and everyone could not stop talking about the Chocolate Almond Cheesecake Bars! They were by far the biggest hit, and all the husbands wanted the recipe (for their wives to cook!). 

Chocolate Almond Cheesecake Bars #HolidayButter #Cbias #Shop


Print
Chocolate Almond Cheesecake Bars
Ingredients
For the crust
  • ¾ cup all-purpose flour
  • ¼ cup toasted almonds finely ground
  • ¼ teaspoon salt
  • ¼ cup unsalted and O' Lakes Butter chilled
  • Baking spray with flour
For the filling
  • 6 oz low fat or neufchâtel found by regular cream cheese cream cheese, softened
  • 4 oz regular cream cheese softened
  • ⅔ cup sugar
  • ½ cup plain fat-free Greek yogurt
  • 1 teaspoon vanilla extract
  • dash of salt
  • 1 egg
  • 3 oz semisweet chocolate chips
  • 1 TBS 2% milk whole or 1% would work as well
  • 2 TBS almonds chopped
Instructions
  1. Preheat oven to 350°.
For the crust
  1. 1. Combine flour, ¼ cup ground almonds, and ¼ teaspoon salt in a medium bowl. Cut in butter with a pastry blender, two knives, or a fork until mixture resembles coarse meal.
  2. 2. Coat a 8-inch square baking dish with baking spray. Sprinkle mixture into the dish and lightly press mixture into bottom of pan until firm.
  3. 3. Bake at 350° for 30 minutes or until golden. Cool crust completely on a wire rack.
  4. Reduce oven temperature to 325°.
For the rest
  1. 1. Place cream cheeses in a medium bowl; beat with a mixer at medium speed until smooth. Add sugar, yogurt, vanilla, and dash of salt; beat at low speed until combined. Add egg; beat 1 minute or until well combined.
  2. 2. Pour mixture over cooled crust.
  3. 3. Place chocolate chips and milk in a small microwave-safe bowl. Microwave for 30 seconds or until melted, stirring after every 15 seconds; stir mixture until smooth.
  4. 4. Dollop chocolate mixture by the spoonful over cheesecake mixture; swirl together using the tip of a knife. Sprinkle with 2 tablespoons chopped almonds.
  5. 5. Bake at 325° for 30 minutes or until almost set in the middle. Cool completely on a wire rack. Cover and refrigerate 6 hours or up to overnight. Cut and serve as bars.
  6. Enjoy!
Recipe Notes

By using lower fat cream cheese and milk in this recipe, it reduces the calories and fat. If you prefer the full fat version, go ahead and use regular cream cheese and whole milk. Using the lower fat versions did not change the taste what-so-ever in my opinion.

You can also connect with me here: 

Thanks for visiting!

- Allyson

M&M Cookie Ice Cream Sandwiches with Greek Yogurt and Ice Cream

Published Dec 6, 2013 by Allyson
This post may contain affiliate links. Read my disclosure policy.

M&M Cookie Ice Cream Sandwiches with Greek Yogurt and Ice Cream #BakingIdeas #cbias #shop

Earlier this week we celebrated my baby boy’s 3rd birthday (where did the time go?!), and even though we weren’t having a big party, I wanted to still make his actual day special.  We had celebrated with family over Thanksgiving weekend, because it was more convenient than celebrating on a random Tuesday night, but these birthdays only come around once a year, and I wanted Austin to live it up! Since he loves M&M’s, baking cookies, and ice cream, I wanted to put them all together for a fun treat.


M&M Cookie Ice Cream Sandwiches with Greek Yogurt and Ice Cream #BakingIdeas #cbias #shop

We started by baking the M&M cookies and then letting them completely cool.  Next up was turning them into ice cream sandwiches.  For my toddler I used regular vanilla bean ice cream and scooped about ⅓ of a cup onto one cookies, and then topped with the other cookie. 

M&M Cookie Ice Cream Sandwiches with Greek Yogurt and Ice Cream #BakingIdeas #cbias #shop

Since my husband and I wanted to indulge in the cookies, but not all the calories of the ice cream, we made ours with frozen vanilla Greek yogurt! I love using Greek yogurt in place of various creamy things because it adds a lot of nutritional value, and I can hardly ever tell a difference.  I popped the little container of Vanilla Greek yogurt into the freezer for about 30 minutes, then spooned onto the cookie, and topped with the other cookie.

M&M Cookie Ice Cream Sandwiches with Greek Yogurt and Ice Cream #BakingIdeas #cbias #shop

Both cookies turned out to be a HUGE hit with everyone! I made about 8 more to have on hand and stored them wrapped tight in the freezer! Now, we have M&M Cookie Ice Cream Sandwiches available all the time! Total score!  Not only did my son devour the sandwich, but then he sneakily ate about 10 M&M’s and an extra cookie!!!! I couldn’t really get upset though…they are totally delicious!

M&M Cookie Ice Cream Sandwiches with Greek Yogurt and Ice Cream #BakingIdeas #cbias #shop   M&M Cookie Ice Cream Sandwiches with Greek Yogurt and Ice Cream #BakingIdeas #cbias #shop


Print
M&M Cookie Ice Cream Sandwiches with Greek Yogurt & Ice Cream
Ingredients
  • One 12-ounce package of plain M&Ms
  • 2 cups all-purpose flour
  • 1 TBS cornstarch
  • ¾ teaspoon salt
  • 1 teaspoon baking soda
  • ¾ cup brown sugar
  • ¾ cup unsalted butter softened
  • ½ cup granulated sugar
  • 1 large egg
  • 1 TBS vanilla extract
  • Container of vanilla ice cream size is dependent on how many sandwiches you would like to make
  • Container of vanilla greek yogurt partially frozen* (size is dependent on how many sandwiches you would like to make)
Instructions
For the cookies
  1. 1. In a bowl, mix together flour, cornstarch, salt and baking soda and set aside.
  2. 2. In a stand mixer (or using a hand mixer), cream together butter and both sugars on medium speed until light and fluffy (2-3 minutes). With the mixer on low, add in egg and vanilla. Return mixer to medium and mix until incorporated. Scrape sides if needed.
  3. 3. With the mixer on low, add dry ingredients gradually until dough forms. Fold in M&Ms by hand. 4. Refrigerate dough for at least 30 minutes. Preheat oven to 350 degrees F and line baking sheets with parchment paper or baking mat and set aside.
  4. 4. Form balls from approximately 1 tablespoon of dough. Bake for 9-11 minutes or until edges are just barely golden. Remove from oven and let cool for a couple of minutes on baking sheet before removing and placing on wire rack to finish cool.
  5. 5. Scoop about ⅓ cup of ice cream or yogurt onto cookie bottom side up, and then top with 2nd cookie (bottom side to ice cream). Repeat for desired number of cookies.
  6. 6. Eat and enjoy, or wrap tightly with foil or plastic wrap and store in freezer for later consumption.
Recipe Notes

*for a small container of greek yogurt, pop into freezer for 30 minutes to an hour to make it partially frozen. You don't want it so hard that you can't scoop it, but you don't want it so loose that it doesn't hold the weight of the cookies.


You can also connect with me here: 

Thanks for visiting!

- Allyson

Skinny Tomato Basil Soup

Published Nov 6, 2013 by Allyson
This post may contain affiliate links. Read my disclosure policy.

Skinny Tomato Basil Soup

Look familiar?  This soup probably doesn’t look familiar, but if you follow my blog it might

I have a confession…. I actually posted this recipe 11 months ago, but I was always a little embarrassed to share it, because the pictures were really bad. I know no one likes looking at pictures of food that doesn’t look appetizing, and that was a problem I was having.  I will even share my embarrassing photo with you….

tomatosoup2

Maybe it’s not the worst picture ever, but it sure isn’t great!  Having bad light or a bad camera can really be a disadvantage.   Back then I didn’t know much about photography, light, and good camera equipment and that’s fine, but I have come a long way since then.  Now I try to get the best pictures possible; ones that will really capture just how delicious the food is. 

Moving on to the main point, this Skinny Tomato Basil Soup is delicious.  It’s a sure winner around our house!  Not only does it taste fabulous, but it is so healthy.  There isn’t even any tricks to make it ‘skinny’, it just is naturally low calorie.  With a blend of veggies, some stock, and spices, there really isn’t much to it.  If you are on weight watchers, this might even be a ‘free’ food because it’s basically all veggies (and I think those are ‘free’ foods? I’m not positive).  It’s also incredibly easy to make. I make huge batched at a time, and then freeze them in QT. size freezer bags. Once you try this, you will never go back to canned condensed soup! 

Cook up some biscuits or a fancy grilled cheese to go along with this soup, and get eating!

Tomato Basil Soup 2

Print
Skinny Tomato Basil Soup
Ingredients
  • 1 tablespoon butter
  • 1 medium onion
  • 1 cup chopped carrots
  • 1 celery stalk
  • 3 cloves garlic
  • 30 oz fresh plum tomatoes peeled (or you can use canned tomatoes)
  • 32 oz vegetable broth
  • 3 sprigs parsley
  • 10 basil leaves
  • 2 bay leaves
  • Parmesan cheese for serving optional
Instructions
  1. 1. Chop onions, carrots, celery and garlic using a *mini food processor or chopper.
  2. 2. Melt butter in a large soup pot over medium heat. Add butter until melted, then add chopped onions, carrots, celery and garlic. Cook stirring often until soft, about 8-10 minutes. Add broth and tomatoes, stirring well.
  3. 3. Using a string, tie herbs together and drop into the soup**. This will make it easy to remove later. Add salt and fresh pepper, reduce heat to low and simmer covered for 30 minutes.
  4. 4. Remove herbs and discard, blend with a hand blender until smooth. (A regular blender would work, but be sure to let the soup cool before blending and fill only halfway in the blender so it doesn't explode on you).
  5. 5. Ladle into bowls and top with freshly grated cheese and fresh basil.
Recipe Notes

**From the beginning I used my food processor to chop all the vegetables. I let them process for a minute to get them as chopped/pureed as possible. I skipped using the hand blender at the end because I didn't mind that my soup wasn't super smooth. It's up to you!
Makes 8 cups. About 115 calories per 2 cup serving.

Tomato Basil Soup 1

Like healthy soups? Check out all my skinny soup recipes:

Skinny Lasagna Soup
Skinny Cheesy Enchilada Soup
Hot & Sour Soup
Skinny Creamy Cauliflower Soup
Fire-Roasted Tomato and Red Pepper Soup with Grilled Cheese Croutons
Winter Squash Soup
Skinny Cheesy Vegetable Chowder
Skinny French Onion Soup
InLinkz.com


You can also connect with me here:

Thanks for visiting!

- Allyson

Monsters University Tasty Monster Treats

Published Nov 4, 2013 by Allyson
This post may contain affiliate links. Read my disclosure policy.

Monsters University Viewing Party and tasty Monster Treats #shop #ScareEdu #cbias

Last week I was given the opportunity to host a viewing party for a great new Disney movie that has just been released to DVD, Monster’s University.  I knew right away that I was going to have my son, and his 3 favorite friends over to watch it.  I picked up the brand new special Monsters University 2-Disc Blu-ray + DVD + Infinity Figure Combo Pack (which included a little toy, for nearly the same price!), and I also grabbed a Monster’s U toy to get my little guy excited beforehand.  Now, most kids wouldn’t need a toy to entice them, but my son has never watched more than 45 minutes of anything at a time, and I knew I would have to get him hyped up and excited for Sully and Mike.  I picked a little race car that came with a pop up Mike (Monsters University Roll-a-Scare Ridez), and he loved it; seriously perfect for a car obsessed toddler!

I whipped up a quick and easy treat that played on the Monster’s theme, and the kid’s loved it.  I did a fun play on regular rice crispy treats, and then added little monster eyes for fun (see bottom for recipe)!

Monsters University Viewing Party and tasty Monster Treats #shop #ScareEdu #cbias

The kids were so excited to watch the movie, eat the treats, and hang out.  My friend and I watched along with them, and I was blown away by the vivid colors in this movie.  The blue-ray quality is seriously exceptional, and the execution of the animation in Monster’s University is really impressive.

Monsters University Viewing Party and tasty Monster Treats #shop #ScareEdu #cbias

Monsters University Viewing Party and tasty Monster Treats #shop #ScareEdu #cbias

The kids had fun playing with the Monsters University toys and watching the movie! Can’t wait for our next movie party!

Print
Monsters University Rice Crispy Treats
Ingredients
  • ½ cup butter
  • 8 cups miniature marshmallows
  • 10 cups rice crispy cereal
  • 1 package of candy eyes I used Wilton brand
  • neon green and neon blue food coloring
Instructions
  1. 1. Melt half of the butter (¼ cup) in large sauce pan over low heat. Add 4 cups of marshmallows and stir until melted and well-blended. Cook 2 minutes longer, stirring constantly. Remove from heat.
  2. 2. Add several drops of green food coloring, mix.
  3. 3. Add 5 cups cereal. Stir until well coated.
  4. 4. Using buttered spatula or waxed paper, press mixture evenly and firmly in buttered 13 x 9 inch pan.
  5. 5. Repeat steps 1-3, using blue food coloring.
  6. 6. Press blue rice crispy layer flat on top of the green layer. Press firmly.
  7. 7. Press candy eyes into treats in random spots.
  8. 8. Cool, cut, and serve.

Monsters University Viewing Party and tasty Monster Treats #shop #ScareEdu #cbias

Homemade Taco Seasoning

Published Oct 30, 2013 by Allyson
This post may contain affiliate links. Read my disclosure policy.

Homemade Taco Seasoning is simple to make, easy to store, and extremely cheap! This will be your go-to seasoning blend!

Homemade Taco Seasoning is simple to make, easy to store, and extremely cheap! Done in less than 5 minutes, it's perfect for whenever a recipe calls for it!

Taco seasoning is one of those things that is used all the time, but do you really know what’s in it?  Making homemade taco seasoning is so easy! Seasoning packets add a lot of extra salt, empty calories, and mystery ingredients. When you season dishes yourself it doesn’t lock you into one flavor, but allows you to adjust the flavor of the dish to your taste.  If you like things spicy, add more chili powder, if you like things milder, take some away. 

Use this delicious Homemade Taco Seasoning in these Taco Stuffed Burgers or One Pot Mexican Quinoa Bowls! It's also great sprinkled on Air Fryer Frozen French Fries or Air Fryer Fried Pickles for a great snack!

You may think that making Taco Seasoning yourself is difficult, but it’s not.  In fact, it’s very easy and will save you a ton of money in the long run!  To make your dollar stretch the furthest possible, buy spices from a bulk bin, or spice store. They often have great deals and can be found for a $1 or less per bottle.  I have also been able to find great, inexpensive spices at Aldi, the Natural Food Warehouse, and Indian Markets.

Homemade Taco Seasoning is simple to make, easy to store, and extremely cheap! Done in less than 5 minutes, it's perfect for whenever a recipe calls for it!

I wanted to share this tried and true recipe with you, so you can make your spices at home, and keep you and your family healthy! I hope y'all like it as much as we do!

How to store homemade taco seasoning:

Add seasoning to an air tight container, then store in a cool dry place. Keeps for 6 months.

Dishes to use Homemade Taco Seasoning:

  • Mexican Baked Eggs (One Skillet)
  • One Pot Cheesy Mexican Pasta
  • One Pot Mexican Quinoa Bowls
  • Taco Stuffed Burgers

Make sure you don’t miss a thing! Follow Domestic Superhero on:

Facebook | Instagram | Pinterest | TikTok | Email

For NEW RECIPES delivered straight to your inbox, signup for our email list! 

Print
Homemade Taco Seasoning
Prep Time
5 mins
Total Time
5 mins
 

Homemade Taco Seasoning is simple to make, easy to store, and extremely cheap! This will be your go-to seasoning blend!

Course: Side Dish
Cuisine: Mexican
Keyword: homemade taco seasoning
Servings: 10 servings
Ingredients
  • 1 tablespoon chili powder
  • 1 ½ teaspoons ground cumin
  • 1 teaspoon sea salt
  • 1 teaspoon black pepper
  • ½ teaspoon paprika
  • ¼ teaspoon garlic powder
  • ¼ teaspoon onion powder
  • ¼ teaspoon crushed red pepper flakes
  • ¼ teaspoon dried oregano
Instructions
  1. In a small bowl mix everything together. Store in an airtight container.

Recipe Notes
  • Makes 10 servings.
  • About 2.5 TBS equals one packet.

Skinny Pumpkin Cream Cheese Muffins

Published Oct 26, 2013 by Allyson
This post may contain affiliate links. Read my disclosure policy.

Skinny Pumpkin Cream Cheese Muffins

In case you haven’t heard, it’s fall! Not only is it fall, but it’s almost Halloween and all the delicious pumpkin treats are in full swing.  I should have probably posted these Skinny Pumpkin Cream Cheese Muffins a while ago, but to be completely honest I just made them last weekend….I am a little behind on my pumpkin cooking.  Well, I wouldn't say I’m exactly late, but, better now then never! Use my Homemade Pumpkin Puree Recipe for the ultimate flavor in this recipe!

I was originally making this recipe as a bread, and had some left over batter because, well, I only have one loaf pan (note to self: buy more cooking supplies).  The recipe I followed was for 2 loaves, but I figured I could make some muffins to go along with it.  Luckily I made the muffins, because the bread didn't turn out so hot.  I thought it was done, but after slicing into the middle I realized it wasn't…and no one likes raw pumpkin bread.  Not my most domestic moment, but at least these little muffins swooped in and saved the day.  Even my picky toddler devoured these muffins!

I love this recipe because it's a lot healthier than your typical muffin.  By replacing butter with applesauce, it saves lots of calories and makes the muffins incredibly moist.  It's up to you if you want to substitute some of the sugar with the Stevia, but I find it bakes just as well, and I don't mind saving even more calories when possible.

Print
Skinny Pumpkin Cream Cheese Muffins
Ingredients
Batter
  • 1-½ cup pureed pumpkin
  • ½ cup unsweetened applesauce
  • 1 whole egg
  • 3 egg whites
  • 1 cup all-purpose flour
  • ⅔ cup whole wheat flour
  • ½ cup Stevia Cup For Cup sweetener
  • ½ cup granulated sugar
  • 1 teaspoon baking soda
  • ½ teaspoon ground cinnamon
  • ½ teaspoon ground nutmeg
Cream filling
  • 8 oz. reduced fat cream cheese
  • ¼ cup granulated sugar
  • 1 TBS all-purpose flour
  • 2 egg whites
  • 1 teaspoon vanilla extract
Instructions
  1. For the Batter
  2. 1. With an electric mixer, beat the pumpkin, applesauce, egg (1), and egg whites (3) on medium speed until smooth.
  3. 2. In a separate bowl, combine the flours, Stevia, sugar, baking soda, cinnamon and nutmeg. Slowly mix the flour mixture into the pumpkin mixture.
For the cream cheese filling
  1. 1. Beat the cream cheese, sugar, vanilla, egg whites (2) and flour until creamy and smooth.
  2. 2. Grease 2 muffin tins. Put a small amount of batter in the bottom of each muffin, enough to cover the bottom. Place 1 generous TBS of cream filling on top of the first layer, press down with the back of a spoon to even it out. Top with more batter to cover cream cheese filling. Liners should be ½-3/4 full.
  3. 3. Bake in a 350 degree oven for about 25-30 minutes, or until a toothpick inserted comes out clean. Cool and remove from pans.
Recipe Notes

Store in the refrigerator in an airtight container.

Skinny Pumpkin Cream Cheese Muffins

I can cross another thing off my Fall Bucket List! What kind of fall baking are you doing these days?

You can also connect with me here:

Thanks for visiting!

-Allyson

Copycat Outback Bloom Sauce

Published Oct 23, 2013 by Allyson
This post may contain affiliate links. Read my disclosure policy.

This Zesty tasty sauce made popular by Outback Steakhouse is easy to whip up! Pair this Copycat Outback Bloom Sauce with a Bloomin' Onion or Onion rings for the perfect snack!

This Zesty tasty sauce made popular by Outback Steakhouse is easy to whip up! Pair this Copycat Outback Bloom Sauce with a Bloomin' Onion or Onion rings for the perfect snack!

My husband always says that (insert whatever food here) is just a vehicle for the sauce….whatever the sauce may be.  I love the sauce that gets served with the Bloomin’ Onion at Outback Steakhouse, so I wanted to get to the bottom of that recipe.  It’s tangy and spicy, and really would be delightful on anything you can dip….not just a bloomin’ onion.  Serve this Copycat Outback Bloom Sauce with Outback Bloomin' Onion Petals or Air Fryer Green Bean Fries for the perfect snack!

This Zesty tasty sauce made popular by Outback Steakhouse is easy to whip up! Pair this Copycat Outback Bloom Sauce with a Bloomin' Onion or Onion rings for the perfect snack!

The base for the outback bloom sauce is very similar to the Zax Sauce, but the additions are different.  The bloom sauce packs a spicy punch of horseradish, where the Zax Sauce is very mild.  After playing around with a couple different ingredients, I think this sauce is nearly identical to the actual sauce that is served at Outback.  Give it a try and let me know what you think! Try dipping these  Air Fryer Asparagus Fries into the sauce- YUM! Want something less spicy? Try the Copycat BIG MAC SAUCE, In-n-Out Sauce or Copycat Chick-fil-A Sauce!

This Zesty tasty sauce made popular by Outback Steakhouse is easy to whip up! Pair this Copycat Outback Bloom Sauce with a Bloomin' Onion or Onion rings for the perfect snack!

How to make Copycat Outback Bloom Sauce:

  • Get all the ingredients together: mayonnaise, creamy horseradish, ketchup, paprika, cayenne pepper, dried oregano, salt, and ground black pepper. Add everything to a medium bowl and then whisk well to combine.
  • Place the mixture covered in the ridge for at least 3 hours to let the flavors meld together.
  • Serve with your favorite dippers such as Outback Bloomin' Onion Petals, Air Fryer 'Fried' Pickles, or on top of a delicious Air Fryer Burger.

If you like COPYCAT RECIPES as much as I do, you might be interested in these:

  • Copycat Big Mac Sauce - perfect for burgers or dipping!
  • Copycat Zaxby's Sauce
  • Copycat Chick-fil-A Sauce
  • Copycat Outback Bloom Sauce and Bloomin' Onion Petals
  • Copycat Big Mac Salad
  • Copycat Taco Bell Mexican Pizzas
  • PF Changs Spicy Green Beans
This Zesty tasty sauce made popular by Outback Steakhouse is easy to whip up! Pair this Copycat Outback Bloom Sauce with a Bloomin' Onion or Onion rings for the perfect snack!

Make sure you don’t miss a thing! Follow Domestic Superhero on:

Print
Copycat Outback Bloom Sauce

The perfect zesty dipping sauce made popular by Outback Steakhouse and served with the boomin' onion!

Ingredients
  • ½ cup mayonnaise I used reduced fat
  • 2 TBS creamy horseradish
  • 1 TBS ketchup
  • ⅓ teaspoon paprika
  • ⅓ teaspoon cayenne pepper
  • ⅛ teaspoon dried oregano
  • ¼ teaspoon salt
  • 1 pinch ground black pepper
Instructions
  1. In a bowl, combine all ingredients and mix well. Cover and put in the fridge for at least 3 hours to let flavors meld.

Recipe Video

Recipe Notes

Store in fridge up to 1 week.

Guest Post: Punk Princess - Fast & Cheap Franken-Shirt Tutorial (no sew!)

Published Oct 7, 2013 by Allyson
This post may contain affiliate links. Read my disclosure policy.

Today we have an awesome Guest Post from Homegrown & Healthy! I am excited to share her awesome tutorial with you, so lets check it out!

____________________________________________________________

I hate to be the bearer of bad news, but did you know that Halloween is soon? Like, really really soon? Are you ready for it? In my family we are all about Halloween. It's not just a day to be celebrated once a year, but an event that begins with the first signs of fall and continues on every single weekend in October. And at Homegrown & Healthy we are all about being frugal and crafty, so I'm completely fine with the uber-Halloween celebration. Here's a little something to help you get in the spirit as well: frankenshirt

This Franken-shirt is a crowd pleasure because it combines my favorite traits: it takes only a little bit of time, costs just a little bit of money, and the only skills required are that you know how to sew and to *iron. (*And really, it's only about 20 seconds of ironing, so don't worry if you're lacking in that department) IMG_4961

What you'll need:

  • a tshirt that you'd like to Halloweenify.
  • cotton fabric.
  • a pattern. (I did a google search for "Frankenstein Silhouette")
  • scissors.
  • iron on transfer paper (I used "Thermoweb Heat'n Bond Ultra Hold Iron-On Adhesive", and please, if you use a different kind then make sure to read the instructions to make sure that the system is similar).
  • an iron.

IMG_4962

IMG_4963

First things first: Print your pattern and trace it onto the transfer paper, making sure that the shiny side is facing down. The transfer paper lines will be your guide, but they will not show on your finished t-shirt, so don't worry if you make a little mistake. IMG_4967

Do NOT cut your transfer paper yet! Iron the transfer paper, in its entirety, onto the fabric where your silhouette will be. IMG_4969

It takes about 15 seconds. Easy peasy.

IMG_4970

Now you will have your pattern put directly onto your fabric. It'll be so much easier to cut it out now!

IMG_4971

Start hacking away. You know those little details that are kind of a pain to cut? Those little details are what will make this look extra cool, so don't skimp. All done cutting? Now flip it over.

IMG_4975 

  Pretty cool, huh? Not flip it back over.

IMG_4978

You'll be able to remove the white backing from the transfer paper, and all that will remain will be a translucent coating. Remove the white paper and put your fabric down on the shirt, making sure that the coating is facing the shirt. Line everything up to where you want it.

IMG_4979

Iron it again, making sure to get all the little spots down. It only takes a few seconds to melt the coating, but you want to ensure that all those details are locked into place.

IMG_4981

Ta-da! Nice and smooth. Now get your model.

frankenshirt2

Look how sweet she is! When it gets dirty-- and you know it will, especially if you have a little cutie like this wearing it --turn it inside out and just wash and dry like you do your regular clothes. frankenshirt3

And that's it! It probably takes just as long to make this shirt as it does to actually read through the tutorial, so go knock out a few while you still have time. When you're done with that come visit me at Homegrown & Healthy where we share recipes, DIYs, gardening advice, and all other aspects of natural living. We even have a whole section on crafts!

Guest Post: Basil Walnut Pesto Recipe

Published Sep 30, 2013 by Allyson
This post may contain affiliate links. Read my disclosure policy.

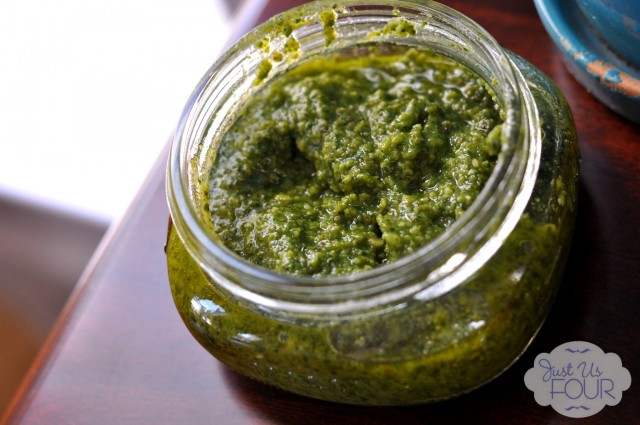
I am so excited to have Shannah from Just Us Four guest posting for Domestic Superhero today!! I have followed Shannah’s blog since I started blogging a year and a half ago, so I it’s really cool that she is now writing this post for me!  She came up with a delicious recipe (like always), so lets check it out below!

_____________________________________________________________

Hi everyone! I am Shannah from Just Us Four. I am thrilled to be here posting at Domestic Superhero...thanks so much to Allyson for having me 🙂 Today, I am going to share with you one of my absolute favorite recipes that is so easy but so versatile.

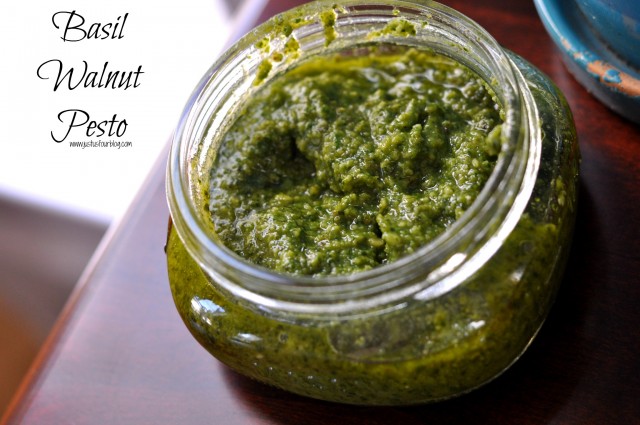
Basil Walnut Pesto

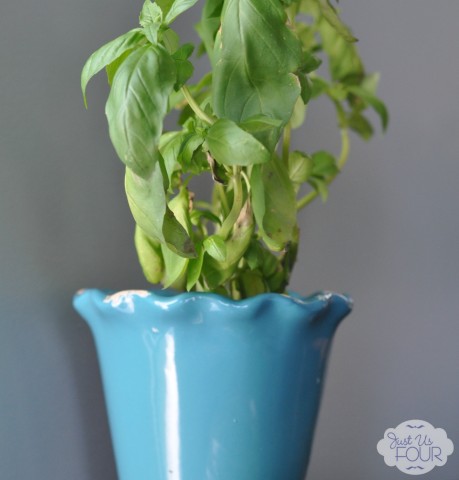
Towards the end of summer/beginning of fall, I start to have small bit of panic about what to do with all the basil from my basil plant before it stops producing for the winter. It is a pretty small plant but produces A LOT of basil. Basil Walnut PestoSo, each fall, I like to make a few batches of pesto to store for the winter so we can skip buying the store bought stuff. I love pesto because you can use it on so many things beyond the standard pasta. One of my favorites is pesto meatball subs. YUMMY.

What You'll Need

3 packed cups of basil leaves

½ cup of walnut pieces

2 garlic cloves

1 teaspoon lemon juice

⅓ cup olive oil

½ cup grated parmesan cheese

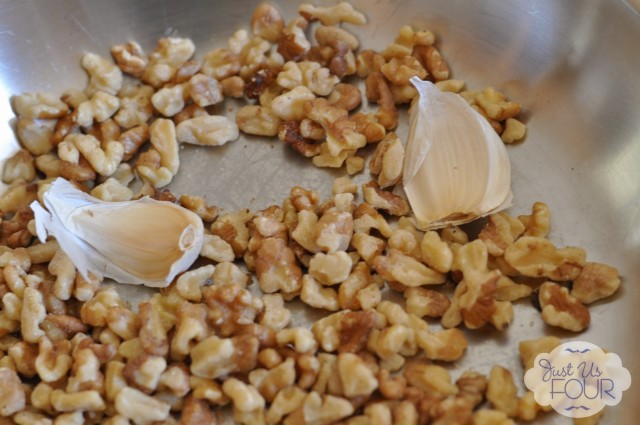
Let's Make It: 1) In a skillet, toast the walnuts and unpeeled garlic cloves for a few minutes until fragrant. Peel the garlic. Basil Walnut Pesto

2) In food processor, pulse the walnuts and garlic until finely chopped. Add the basil leaves and lemon juice and turn on the processor. With the process running, pour in the olive oil and run for about 30 seconds to a minute until it is well mixed/combined. Scrape down the sides of the bowl and pulse a few more times to ensure everything is chopped and combined.

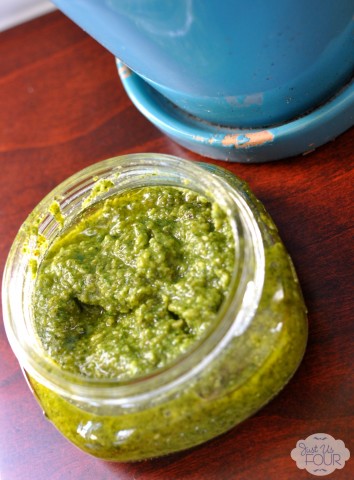
3) Pour into bowl and stir in grated parmesan cheese. Basil Walnut Pesto

Basil Walnut PestoOnce your pesto is made, you can use it immediately, store it in the fridge for 3-5 days or freeze it. I typically reserve some for a dish I am going to make that week and then spoon the rest into ice cube trays and freeze. Once they are frozen, I pop out the cubes and store in a plastic freezer bag. Each cube equals about 1 tablespoon of pesto.

I hope you've enjoyed the recipe for Basil Walnut Pesto I shared with you today. If you'd like to see more recipes or crafts I have to share, please stop by my blog, Just Us Four, and say "hi". You can also connect me with on Twitter, Facebook, Pinterest and Instagram.

Thanks again to Allyson for having me here! I appreciate her letting me come by and highjack her blog for the day 😉

Guest Post: Mother Goose Popcorn

Published Sep 16, 2013 by Allyson
This post may contain affiliate links. Read my disclosure policy.

Today we have a great guest post from Britney! She is sharing a recipe for Mother Goose Popcorn, and I love how playful it looks! 

_______________________________________________________________________

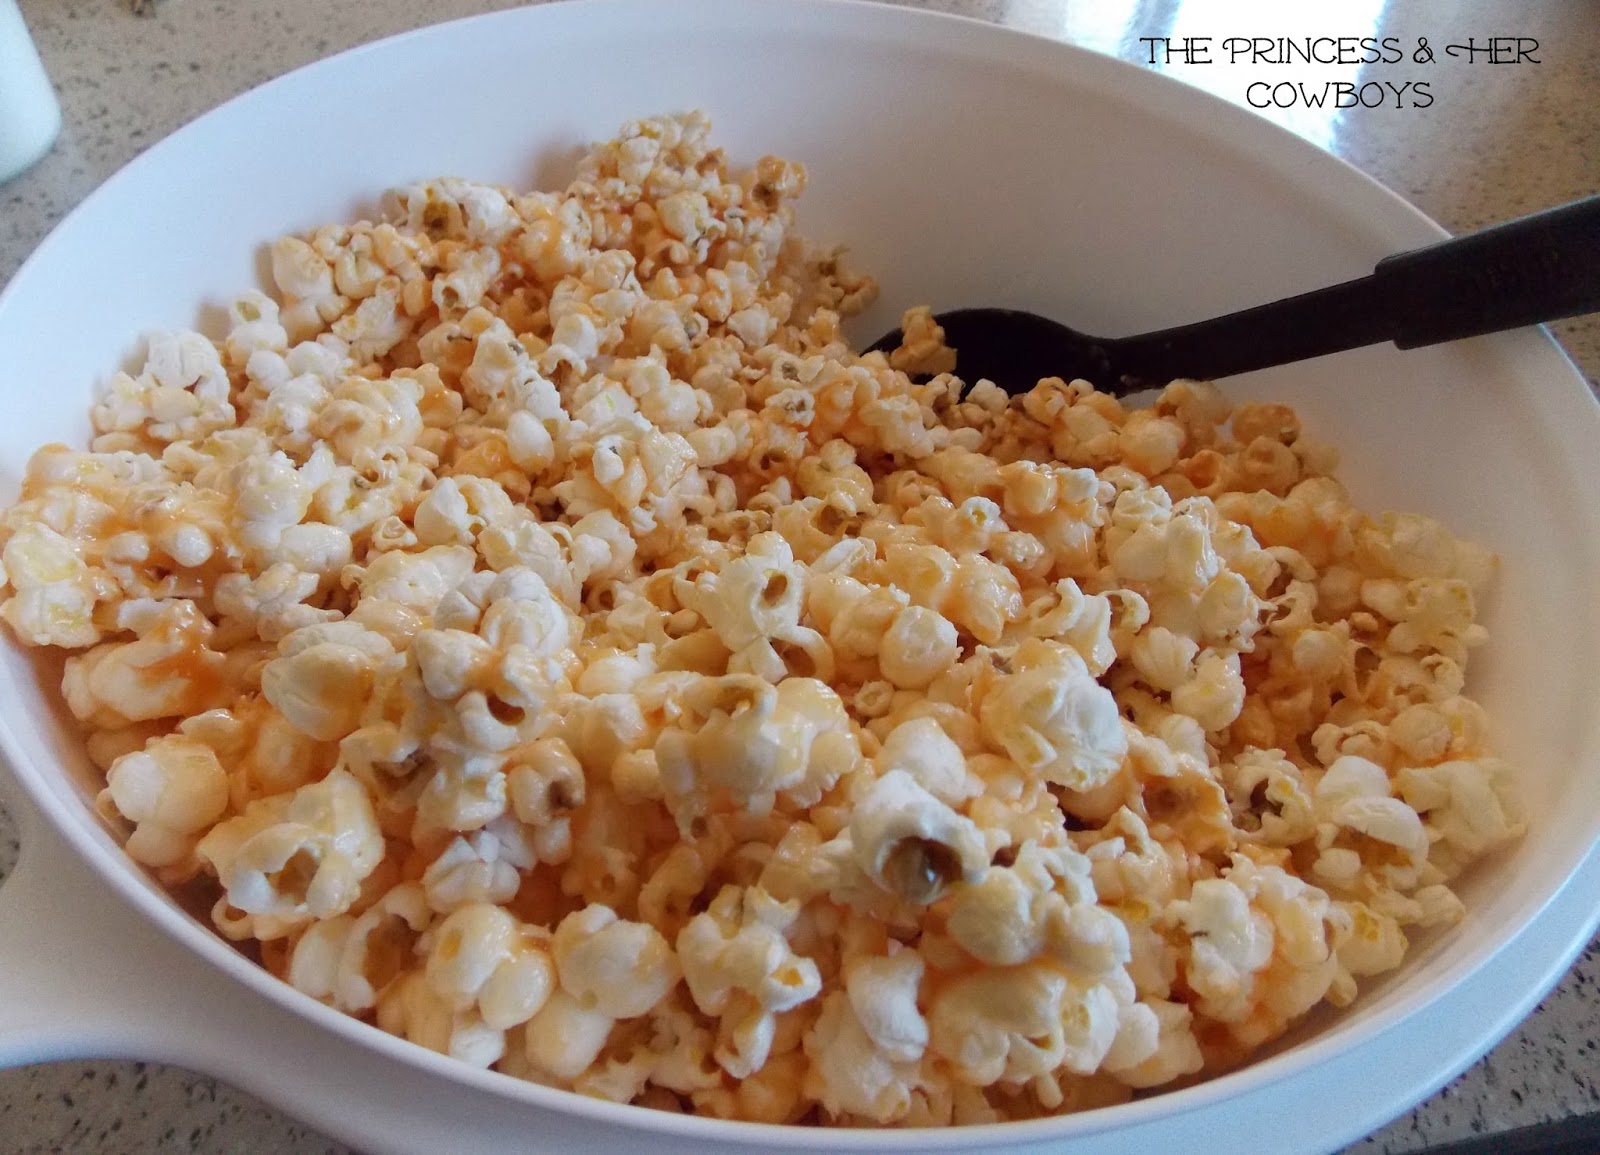
Hi all! I'm Britney from The Princess & Her Cowboys and I'm excited to share this fun family treat with you today!

 I wish I had some great story as to why we call this Mother Goose popcorn but I don't. That's just what we've always called it!

 To start, combine 2 cubes of butter, ¾ c sugar and ½ c Karo syrup (the clear kind). You're going to cook it until it reaches a soft ball, or 240 degrees on your candy thermometer.

 I need to get myself a candy thermometer so I had to look up ways to tell if it had made it to a soft ball. Get yourself some really cold water and spoon a little bit in. If you can mold it, then it's done.

 Pour over a large batch of popped popcorn, stir it up and there you go.

My favorite part of this is that we always got to choose the color of it, adding just a few drops of food coloring. Because it's fall/almost Halloween, I went with the orange.

Mother Goose Popcorn

2 cubes butter
¾ c plus 1 T sugar
½ c Karo syrup
Food coloring

Bring first three ingredients to a soft ball, or 240 degrees Fahrenheit. Pour over a large batch of air-popped popcorn and mix well.

Enjoy!

Britney blogs at The Princess & Her Cowboys all about crafts, DIY projects, thoughts and recipes. She loves to be with her family and doing anything active, preferably outdoors. She loves to get to know people from all over so stop on by and say hello!

One Pot Mexican Quinoa Bowls

Published Aug 25, 2013 by Allyson
This post may contain affiliate links. Read my disclosure policy.

One Pot Mexican Quinoa Bowls are healthy, delicious, and come together super fast - perfect healthy dinner!

I’m not going to lie, these Mexican Quinoa Bowls are amazing.   I saw this recipe months ago over on Pinterest, and I knew I had to make it immediately.  A few months later one of my friends sent me the recipe saying she had made it, and was currently shoveling it into her mouth.  Must be good, right?  I ended up making it that same week, and I was annoyed with myself for not making it sooner!  It is so good.  I love Mexican food, but not the calories that usually come with it.  This Mexican Quinoa has a dash of cheese, which is just enough to satisfy those cheesy Mexican cravings and not add a bajillion calories.  Top it with heart healthy avocado (or don’t, if you are allergic like me) and a dollop of Greek yogurt or sour cream.  So delicious.

One Pot Mexican Quinoa Bowls are healthy, delicious, and come together super fast - perfect healthy dinner!

I still talk to people daily who haven’t tried quinoa or say they didn’t like it when they made it (usually plain).  If you fall into one of these categories I urge you to try it again, with one of the recipes on my blog.  Head all the way to the end of this post and you can see a compiled list of all the yummy quinoa recipes I have shared.  Give one a try!  Also, if you are like my family and eat tons of quinoa, I suggest buying it at a place like Costco or Sams.  Costco has huge 4lb bags for $10.99 (prices may vary depending on location), which breaks down to $2.75 per pound.  At normal grocery stores a 1lb box/bag is anywhere from $7-$12….this is a huge savings.

Print
Mexican Quinoa Bowls
Ingredients
  • 2 cloves garlic minced
  • 2 jalapeños seeded and finely chopped
  • 1 cup uncooked quinoa rinsed well and drained
  • 1 ¼ cups vegetable or chicken broth
  • 1 can 1 ½ cups black beans, rinsed and drained
  • 1 14.5 oz can diced tomatoes (with juice)
  • ¾ cup corn
  • ½ teaspoon kosher salt
  • ¼ cup chopped fresh cilantro optional
  • 1 quarter of a lime juiced
  • To serve: salsa sour cream/Greek yogurt, shredded cheese, tortilla chips, and avocado
Instructions
  1. 1. Add a small bit of oil to a medium-sized pot set over medium heat. Add garlic and jalapeños; cook just until fragrant (about a minute).
  2. 2. Add quinoa, broth, beans, tomatoes, corn, and salt. Bring to a boil. Reduce heat, cover and let simmer for 25 minutes, or until quinoa is cooked and liquid is absorbed.
  3. 3. Remove from heat; stir in cilantro and lime juice.
  4. 4. Spoon into bowls and serve with desired toppings.
Recipe Notes

Makes: 4-6 servings
Recipe from kitchensimplicity.com

One Pot Mexican Quinoa Bowls are healthy, delicious, and come together super fast - perfect healthy dinner!

Want more quinoa recipes?!  Check these out:

Quinoa Fried Rice

Spinach and Feta Quinoa Cakes with Lemon Dill Sauce 2

Buffalo Quinoa Mac and Cheese 4

You can also connect with me here:

Thanks for visiting!

- Allyson

Loaded Buffalo Bleu Cheese Fries

Published Aug 18, 2013 by Allyson
This post may contain affiliate links. Read my disclosure policy.

Loaded Buffalo Bleu Cheese Fries

This recipe pretty much had me at hello.  My husband and I are crazy about buffalo sauce, and anytime you can add bleu cheese, cheddar cheese, and potatoes to it, it’s going to be amazing. Being a vegetarian though, it’s harder to find good ‘buffalo’ recipes.  Most people cover chicken and wings in buffalo sauce, but I have found it’s more about the sauce, and less about the vehicle.  You know what tastes great with buffalo sauce?  Broccoli. Shocking? Not really…it’s all about the sauce!

Typically if you ordered something like this at a restaurant, it would include bacon. This recipe does not.  If you would like to add bacon, I am sure it would make a tasty addition. 

Loaded Buffalo Bleu Cheese Fries

The hardest part of this recipe is making your own fries. It’s not hard, but it is time consuming.  I would say it’s worth it to try to make them yourself, but if you are short on time, I’d suggest just using frozen steak fries.  Have you tried Alexia fries? They are delicious.  I think next time I make this I will use frozen fries…it’s just such a time saver.  This combination would be perfect in a baked potato too! Wow, I am totally trying that next time.  Bake your potato, top with all this cheesy buffalo goodness. RIP.

Loaded Buffalo Bleu Cheese fries are perfect for game day or Breaking Bad Sunday nights (or whatever your guilty pleasure show is at the moment).  Also, if for some crazy reason you dislike bleu cheese, just leave it off.  Serve these with homemade ranch. You can thank me later.

Use this Homemade Buffalo Sauce Recipe as well!

Loaded Buffalo Bleu Cheese Fries

Print
Loaded Buffalo Bleu Cheese Fries
Prep Time
5 hrs
Cook Time
1 hr
 
Course: Side Dish
Cuisine: American
Servings: 4
Ingredients
  • 3 pounds unpeeled russet potatoes cut into wedges
  • 3 tablespoons vegetable grapeseed or canola oil
  • 1 teaspoon salt
  • 1 teaspoon pepper
  • ½ teaspoon garlic powder
  • 1 cup buffalo wing sauce I like Franks Wing Sauce
  • 2 tablespoons butter
  • 4 ounces freshly grated sharp cheddar cheese
  • 4 ounces crumbled bleu cheese
  • 4 green onions sliced
Instructions
For Fries
  1. Preheat oven to 450 degrees F.

  2. Place cut potatoes in a large stock pot and cover with cold water. Bring to a boil and once bubbling, only boil for 5 minutes. After 5 minutes, drain potatoes.

  3. Place in a large bowl and drizzle with oil, salt, pepper and garlic powder. Gently toss with your hands or two spatulas to evenly coat.

  4. Spread on a baking sheet in one layer. Roast for 25-30 minutes, then flip and roast for 25-30 minutes more. You want the potatoes to be deeply golden and crunchy on the outsides!

  5. Remove potatoes from the oven and switch on your broiler to the highest setting.

For topping
  1. Heat buffalo wing sauce and butter in a small saucepan over low heat until combined.

  2. Drizzle a bit of wing sauce over the potatoes and sprinkle both cheeses evenly over the top.

  3. Place under the broiler for 2-3 minutes, until cheese is bubbly and golden. Remove immediately and sprinkle with scallions.

  4. Serve with ranch and remainder of buffalo sauce on the side.

Loaded Buffalo Bleu Cheese Fries

Skinny Mushroom Stroganoff

Published Aug 11, 2013 by Allyson
This post may contain affiliate links. Read my disclosure policy.

Skinny Mushroom Stroganoff
I am going to be honest and tell you right off the bat that I have never actually tried Beef Stroganoff.  It wasn't a meal that was ever cooked for me, and the only time I have ever seen someone eat it was while I was on vacation in Russia (it’s quite popular over there)…but it didn't really appeal to me.  By the time I really started cooking, I was a vegetarian and I never gave it a second thought.  Flash forward to now, and in comes Mushroom Stroganoff (skinny style!).  I frequent Skinny Taste, do you?  If you answered yes, we are on the same page, if you said no, you should probably add that to your list of food blogs to check out.  All of Gina’s recipes are made over to be lower calorie and still taste delicious at the same time.  She uses nutritious ingredients and makes over traditional recipes along with coming up with new recipes as well.  Check it out, she’s awesome.

Anyway, I saw this recipe for Mushroom Stroganoff and I figured I had to try it.  It’s vegetarian and includes mushrooms, a creamy sauce, and pasta too…totally up our alley.  I added it to the menu plan and never looked back.

Bear with me because it’s sort of difficult to make this look appetizing, but trust me, it tastes delicious! I made a couple substitutions just because I wanted to use a couple things on hand and it came out great. It really felt like I was eating a calorie heavy sauce (aka totally creamy), but I knew it wasn't which made it taste even better.  I ended up using wheat noodles, and part of me wished I used the white noodles…I will likely try those next time.  This comes out to less than 270 calories (and 7 points+ on WW!) for a cup and a half of pasta…total score!

Skinny Mushroom Stroganoff

Print
Skinny Mushroom Stroganoff
Ingredients
  • 1 tablespoon butter
  • ½ cup chopped onion
  • 2 tablespoon unbleached all-purpose flour
  • 2 cups fat-free less-sodium vegetable broth (or beef if you're a carnivore)
  • 1 tablespoon Worcestershire sauce
  • 1 teaspoon tomato paste
  • 12 oz sliced baby Bella cremini mushrooms*
  • 3.5 oz Shiitake mushrooms*
  • ¼ teaspoon thyme
  • salt and pepper to taste
  • 2 tablespoon white wine or sherry
  • ¼ cup reduced-fat sour cream or Greek yogurt
  • 8 oz uncooked noodles Ronzoni Smart Taste, Healthy Harvest or No-Yolk
  • 1 tablespoon minced fresh flat-leaf parsley for garnish
Instructions
  1. 1. Cook noodles in a pot of salted water according to package directions, I like to under-cook them a bit so I can mix it with the sauce and let it finish cooking.
  2. 2. While the water starts to boil for the noodles, heat a large nonstick skillet over medium-high heat. Melt butter over medium heat, add onions to the pan and cook 2-3 minutes over medium-low heat.
  3. 3. Add flour and stir with a wooden spoon for 30 seconds. Gradually add broth, Worcestershire sauce, and tomato paste, stirring constantly. Add mushrooms, thyme, salt and pepper; stir and cook 4-5 minutes or until thickened and bubbly, stirring constantly.
  4. 4. Add wine and bring to a boil. Reduce heat, and simmer 4 minutes. Remove from heat and let stand 30 seconds.
  5. 5. Stir in sour cream (or Greek yogurt), add noodles and mix well. Garnish with parsley if desired.
Recipe Notes

*feel free to use whatever mushroom blend you want

Skinny Mushroom Stroganoff

You can also connect with me here:
      
Thanks for visiting!
-Allyson
 

Skinny Mini Key Lime Pies

Published Aug 6, 2013 by Allyson
This post may contain affiliate links. Read my disclosure policy.

Skinny Mini Key Lime Pies are the perfect individual dessert! Quick and easy to make, with a ton of flavor!

Skinny Mini Key Lime Pies are the perfect individual dessert! Quick and easy to make, with a ton of flavor!

These Skinny Mini Key Lime Pies are going to be the STAR of your next party, event, or potluck! They are so simple to make, and super delicious! Everyone will be asking you for the recipe!

Skinny Mini Key Lime Pies are the perfect individual dessert! Quick and easy to make, with a ton of flavor!

You may have noticed from the recipes I usually post, I am not a baker. I don't claim to be a baker, in fact, I usually warn anyone who is going to eat anything I've baked.  However, there are a couple things I can do well, so I just do them over and over.  The best banana bread? Check. Various muffins? Check. The occasional themed dessert (Sopapilla anyone...)? Check.  However, things usually stop there.  Another reason I don't bake a lot is because we don't eat a lot of sweets at my home.....we'd much rather break into some chips and salsa, but with all that said, I love key lime pie....but am I really going to eat a whole key lime pie (don't answer that)?  Cue individual pies, and this recipe...

Skinny Mini Key Lime Pies are the perfect individual dessert! Quick and easy to make, with a ton of flavor!

I didn’t want to feel too guilty eating these little mini pies, so I skinnied them up (well, as skinny as you can make a pie, come on!), and made them into individual servings so I couldn’t serve myself half a pie.  They turned out great, I didn’t notice anything different with the taste of the skinny version compared to the regular full fat version. Honestly, 'I’m not going to be calling them healthy, but it’s worth a splurge once in a while.  These Skinny Mini Key Lime Pies are the perfect summer treat!

These were soooo easy to make! Pretty fast, minimal ingredients, inexpensive, and so tasty!

Skinny Mini Key Lime Pies are the perfect individual dessert! Quick and easy to make, with a ton of flavor!

If you like Key Lime then be sure to checkout these Key Lime Pie Shots (mini desserts) and Key Lime Pie Dip!

More desserts from Domestic Superhero that you might like:

  • Waffle Iron Caramel Apple Pies (10 minute recipe)
  • Carrot Cake Trifle (shortcut and homemade recipes)
  • Butterfinger Cheesecake (Slow Cooker)
  • Instant Pot Almond Joy Cheesecake
  • S’mores Stuffed Brownie Bites

Make sure you don’t miss a thing! Follow Domestic Superhero on:

Facebook | Instagram | Pinterest | TikTok | Email

For NEW RECIPES delivered straight to your inbox, signup for our email list! 

Print
Skinny Mini Key Lime Pies

Skinny Mini Key Lime Pies are the perfect individual dessert! Quick and easy to make, with a ton of flavor!

Servings: 12 pies
Ingredients
For Graham Cracker Crust
  • 1 ½ cups graham cracker crumbs
  • 5 TBS butter melted
  • 1 teaspoon lime zest
  • 2 TBS of sugar
For Key Lime Cream Cheese Filling
  • 2 ounces cream cheese softened (could also use neufatchel cheese to lighten up more)
  • 1 TBS lime zest
  • 1 egg yolk
  • ½ cup key lime juice or lime
  • ⅛ teaspoon salt
  • 14 ounce can low fat sweetened condensed milk
Instructions
  1. Preheat the oven to 350º.

  2. In a small bowl mix graham cracker crumbs, sugar, melted butter, and 1 tsp. lime zest. Mix until completely combined.

  3. Place cupcake liners in cupcake tins.

  4. Add 2 TBS of the graham cracker mixture and press down in each cupcake liner.

  5. Bake for 8 minutes, remove from oven, and let completely cool.

  6. With a stand or hand mixer combine softened cream cheese, salt, and lime zest. Mix until combined.

  7. Add low fat sweetened condensed milk and mix until incorporated and no lumps of cream cheese remain.

  8. Mix in egg yolk and key lime juice until incorporated.

  9. Pour mixture into cooled graham cracker cupcake liners ¾ of the way full.

  10. Bake for 15 minutes at 350º.

  11. Remove from oven and place in refrigerator for at least 1 hour. Top with fresh lime zest and lime garnish if desired. Serve.

Recipe Notes

This recipe yielded 12 mini pies for me, however depending on how much graham cracker mixture you put into the tins, you could make more or less. I did have a bit of extra filling, so if you go ahead and use 2 cups of graham cracker crumbs, you could probably yield 15 mini pies!

Blueberry Basil Margaritas

Published Jul 22, 2013 by Allyson
This post may contain affiliate links. Read my disclosure policy.

Blueberry Basil Margaritas - only a few ingredients and super delicious!

During the summer I love going to BBQ's and outings where special cocktails are in abundance.  I love coming up with new combinations for fun drinks, and this summer I am on a total Margarita kick.  I decided to make a margarita similar to my Strawberry Basil Margaritas and it did not disappoint.  Some of my friends actually said they liked this one better than the Strawberry version!  Like the Strawberry Basil Margaritas, these are super easy to make, and only require a couple ingredients.  I am a huge believer in the frozen cans of limeade, they seriously are perfect for making pitchers of margaritas.

Anyway, for this recipe I browsed around Pinterest for some inspiration, but all the drinks with blueberries were all using/making a simple syrup type of thing with the blueberries. I didn't have time for that, and thought it probably wasn't necessary for what I had in mind.  I just put the blueberries in the bowl, sprinkled a bit of sugar over the top, and then smashed it all together with the potato masher (if you don't use this thing, you should!).  Luckily I was right and my method worked great, and it was quick!

Blueberry Basil Margaritas - only a few ingredients and super delicious!

Also, if for some reason you have an aversion to tequila, I have made this drink with vodka as well. I used the exact same ingredients/instructions, just substituted vodka as the alcohol.Blueberry Basil Margaritas - only a few ingredients and super delicious!

Print
Blueberry Basil Margaritas
Ingredients
  • 1 can 12 ounces frozen limeade concentrate (+2.5 cans of water)
  • 1 cup blueberries rinsed
  • ¼ cup sugar
  • 8 basil leaves
  • 2 to 2 ½ cups tequila gold or silver (or vodka if you prefer)
  • lime for garnish
Instructions
  1. 1. Place rinsed blueberries in bowl and top with sugar. Use potato masher or muddler to mash the berries with the sugar until well mashed. Pour blueberry mixture into the pitcher (or you could strain if you don't like a lot of fruit bits in your drinks, personally I don't mind).
  2. 2. Empty the limeade concentrate into a pitcher. Add 2 ½ cans of water. Add 16-20 ounces (your preference), or 2 ¼ cups cans of tequila
  3. 3. Crumple the basil a little in your hands or muddle it a bit (this will help the basil flavor release into the drink) and add it to the pitcher, too.
  4. 4.Place the pitcher, covered, in the fridge for at least 2 hours. Serve in glasses garnished with lime and basil if desired.
Recipe Notes

These drinks do end up having lots of fruit bits in them. Personally I like it, but I know some people might not. You could avoid this by straining the blueberry mixture before you pour it into the pitcher. If you do that, I would put some additional whole blueberries into the pitcher before putting it into the fridge.
Also, you can use vodka in the recipe instead of tequila if you desire.

Blueberry Basil Margaritas - only a few ingredients and super delicious!

Like summer cocktails as much as I do? Check out these other drinks from Domestic Superhero:

basil lemonade (12) edited   blueberry basil margaritas 6 (2)   Watermelon Marg 1

IMG_6832   Peach Margarita 3   Strawberry Moscow Mule

Pomegranate Limeade 1    cranberry margs  Strawberry-Basil-Margaritas-3.jpg

Mixed-Berry-Mojitos-1_thumb.jpg  Blackberry-Mojito.jpg

You can also connect with me here:

Thanks for visiting!

- Allyson

Artichoke and Tomato Frittata

Published Jul 17, 2013 by Allyson
This post may contain affiliate links. Read my disclosure policy.

Full of vegetables and eggs, this Artichoke and Tomato Frittata is fresh, healthy, and delicious! It's the perfect one skillet breakfast!

Full of vegetables and eggs, this Artichoke and Tomato Frittata is fresh, healthy, and delicious!

I really love making frittatas because they are so easy and you can pretty much throw anything into them.  We always have eggs around our house, so if some night I have no clue what to make for dinner, I can usually turn to some sort of frittata.  This Artichoke and Tomato Frittata is perfect!

Artichoke and Tomato cooking

For this particular frittata, I knew I wanted to use tomatoes because I had a bunch in the fridge that would have gone bad otherwise, and I hate wasting food.  I didn't see much else to use in our fridge, but I knew we had some canned artichoke hearts in the pantry. Score! I LOVE artichokes!  Mixing them together with a little Parmesan cheese and we had a winning dish!  Serve this with some toast or English muffin on the side (I love making a little frittata egg sandwich), and you have a perfectly easy and delicious weeknight dinner.

Artichoke and Tomato Frittata in the skillet

If you have never made a frittata, don't be intimidated! It is pretty much one of the easiest things to make!  Don't like some of the ingredients in this one? No problem, put in whatever you want! As long as you have the egg base down, you can make a frittata with anything (I really love spinach and feta, too!).

Full of vegetables and eggs, this Artichoke and Tomato Frittata is fresh, healthy, and delicious!

More EGG recipes you might like:

  • Egg Salad Lettuce Wraps (KETO/low carb)
  • The Best Egg Salad Recipe
  • Air Fryer Hard Boiled Eggs (no boiling)
  • Mexican Baked Eggs (One Skillet)
  • Make-Ahead Egg & Cheese Breakfast Sandwiches

Make sure you don’t miss a thing! Follow Domestic Superhero on:

Facebook | Instagram | Pinterest | TikTok | Email

For NEW RECIPES delivered straight to your inbox, signup for our email list! 

Artichoke and Tomato Frittata sliced
Print
Artichoke and Tomato Frittata
Prep Time
5 mins
Cook Time
20 mins
 

Full of vegetables and eggs, this Artichoke and Tomato Frittata is fresh, healthy, and delicious!

Servings: 8 servings
Ingredients
  • 7 eggs beaten
  • 1- ounce Parmesan freshly grated
  • ½ teaspoon black pepper
  • Pinch salt
  • 1 teaspoon butter
  • 1 can artichoke heats chopped
  • 2 to tomatoes chopped (I used plum, but any type is fine)
Instructions
  1. Preheat oven to broil setting.
  2. In medium size bowl, using a fork, blend together eggs, Parmesan, pepper, and salt. Heat 12-inch non-stick, oven safe saute pan over medium high heat. Add butter to pan and melt. Add artichokes and tomatoes and cook for 2-3 minutes, stirring frequently. Pour egg mixture into pan and stir with rubber spatula. Cook for 4 to 5 minutes or until the egg mixture has set on the bottom and begins to set up on top.
  3. Place pan into oven and broil for 3 to 4 minutes, until lightly browned and fluffy. Remove from pan and cut into 6 servings (or however many desired). Serve immediately with pepper and salt on the side for additional seasoning.
Recipe Notes

Don't want to ditch the meat? Add sliced ham to the egg mixture for a nice addition.

The Best Chocolate Chip Banana Muffins

Published Jul 15, 2013 by Allyson
This post may contain affiliate links. Read my disclosure policy.

The Best Chocolate Chip Banana Bread and Muffins

If you haven't tried The Best Banana Bread or Muffin recipe, (you are seriously missing out) this is the perfect time to go ahead and make it!  If you happen to have a small sweet tooth, like I do, then you might like the addition of chocolate chips to this recipe.  The recipe is the same, however you toss in a couple handfuls of chocolate chips to liven them up!  This recipe can be made in muffin tins, or as a loaf.  A loaf will take more time to cook, but is equally delicious.  These make the perfect housewarming gift!

Print
The Best Chocolate Chip Banana Muffins
Ingredients
  • 3 or 4 ripe bananas smashed
  • ⅓ cup melted butter
  • 1 cup sugar can easily reduce to ¾ cup
  • 1 egg beaten
  • 1 teaspoon vanilla
  • 1 teaspoon baking soda
  • Pinch of salt
  • 1 ½ cups of all-purpose flour
  • 1 cup chocolate chips
Instructions
  1. No need for a mixer for this recipe.
  2. Preheat the oven to 350°F (175°C). With a wooden spoon, mix butter into the mashed bananas in a large mixing bowl.
  3. Mix in the sugar, egg, and vanilla.
  4. Sprinkle the baking soda and salt over the mixture and mix in.
  5. Add the flour last, mix. Fold in chocolate chips.
  6. Pour mixture into a buttered 4x8 inch loaf pan or muffin tin. Bake for 1 hour for the loaf, or 22-25 minutes for the muffins. Cool on a rack. Remove from pan and slice to serve.

The Best Chocolate Chip Banana Bread and Muffins

Spinach and Feta Quinoa Cakes with Lemon Dill Sauce

Published Jul 9, 2013 by Allyson
This post may contain affiliate links. Read my disclosure policy.

Spinach and Feta Quinoa Cakes with Lemon Dill Sauce are the perfect healthy easy meal!

Today I have yet another quinoa recipe, because really, do they ever get old?! No way!  If you haven't jumped on the quinoa bandwagon yet, you are totally slow, but it's never too late!  While quinoa seems to be a fad food right now, it's definitely going to stick around. It's one of the most complete foods, and is super healthy and great for your body.  It's also so versatile and can be used in so many dishes!  Don't believe me?  Check out this Buffalo Quinoa 'Mac' and Cheese, for a healthy spin on the traditional favorite. Or how about some Strawberry Goat Cheese Quinoa Salad as a perfect side for those summer dinners?  Want more inspiration? See more quinoa recipes at the bottom of this post.  In particular I really like Bob's Red Mill Organic Whole Grain Quinoa.

Anyway, like I said, I am going to share another quinoa recipe with you- Spinach and Feta Quinoa Cakes.  I love quinoa cakes because they are quick and easy, and so filling. I have made them several different ways, but my husband agreed with me that this is one of the best recipes we have tried.  The spinach and feta go perfect together (the Greek were onto something here!), and topped with the cold lemon dill yogurt sauce, they taste amazing!  These would definitely freeze up well if you wanted to make a large batch and save some for dinner another time.  Serve these quinoa cakes alongside some roasted veggies or a heap of steamed broccoli and you have an awesome meal!

Spinach and Feta Quinoa Cakes with Lemon Dill Sauce are the perfect healthy easy meal!

5 from 2 votes
Print
Spinach and Feta Quinoa Cakes with Lemon Dill Sauce
Ingredients
  • ½ cup plain Greek yogurt reduced-fat or whole
  • 2 tablespoons finely chopped scallions
  • 2 teaspoons freshly squeezed lemon juice
  • 1 tablespoon + 2 teaspoons chopped fresh dill divided
  • Coarse salt and freshly ground black pepper
  • 1 tablespoon extra-virgin olive oil
  • ½ cup finely chopped onion
  • 2 garlic cloves finely chopped
  • 5 ounces chopped baby spinach
  • 2 large eggs beaten
  • 1 ¼ cups cooked quinoa
  • 2 ounces crumbled feta cheese
  • ¼ teaspoon grated lemon zest
  • ½ cup bread crumbs
Instructions
Directions for Sauce
  1. Whisk together the yogurt, scallions, lemon juice, and 2 teaspoon dill in a small bowl. Season to taste with salt and pepper. Cover and refrigerate the sauce for at least 1 hour to allow the flavors to meld.
Directions for Quinoa Cakes
  1. Heat the olive oil in a large skillet over medium heat. Add the onion and garlic and cook, stirring often, until softened, about 4 minutes. Add the spinach and cook, stirring often, until wilted, about 3 minutes. Transfer the mixture to a medium-size bowl.
  2. Add the eggs, quinoa, feta, 1 TBS dill, lemon zest, and ¼ teaspoon black pepper and mix well. Mix in the bread crumbs and let the mixture sit for a few minutes to allow the bread crumbs to absorb some of the moisture.
  3. Wipe out large skillet, and add 1 TBS oil. Heat for a few minutes.
  4. Form quinoa patties about 2 ½ inches in diameter and ½ inch thick. Place the patties in skillet, in batches if necessary. Cook the patties until they’re browned on the outside, 4 to 5 minutes per side, and then flip.
  5. Serve warm with lemon-dill yogurt sauce.
Recipe Notes

You could bake these too if you would like!

Spinach and Feta Quinoa Cakes with Lemon Dill Sauce are the perfect healthy easy meal!Love quinoa like I do? Check out these other great quinoa recipes!


You can also connect with me here:

Thanks for visiting!

- Allyson

Honey Baked Goat Cheese

Published Jun 26, 2013 by Allyson
This post may contain affiliate links. Read my disclosure policy.

While living in Greenwich, CT there was this little restaurant that we would frequent called Bang.  We mostly went there just for their fried goat cheese because it was a.m.a.z.i.n.g.  Well, eventually I moved, and I figured out that a lot of restaurants make delicious fried goat cheese. I've seen them in ball form and log form, and I don't discriminate based on shaped...they all taste the same {delicious}.  After we moved to Atlanta, my husband took me to this great restaurant, Ecco, where they are known for their Honey Goat Cheese Balls.  Of course I ordered that, I would never miss out on my beloved goat cheese!  Now, these balls were amazing...definitely the best I have ever had.  The delicate and sweet honey drizzled over the fried goat cheese balls and topped with cracked pepper....um, make it a double!  These balls were to die for.  Anyway, I had to try to recreate them, but I didn't want to actually fry the goat cheese. I've seen various methods of baking the goat cheese and still having great results, so I went ahead and tried that.  They ended up coming out really tasty!

*Tip- Quality honey is a MUST. I love the Savannah Bee Company! Their honey is thebomb.com

Savannah Bee Company

Anyway, this recipe is easy! Try it out for a great appetizer or salad topper!

Honey Baked Goat Cheese

Honey Baked Goat Cheese

Honey Baked Goat Cheese

Print
Honey Baked Goat Cheese Balls
Ingredients
  • 1 log goat cheese honey variety or plain, slightly frozen
  • ½ cup panko bread crumbs
  • 1 egg beaten
  • 1 TBS basil chopped
  • 2 teaspoon fresh cracked pepper divided
  • 1.5 TBS honey you can be more liberal here if you like
Instructions
  1. 1. Preheat oven to 475 degrees.
  2. 2. In a bowl, place the goat cheese log, basil, 1 teaspoon pepper, ½ TBS honey. Mix together with a fork until well combined. Using a TBS measuring spoon, spoon out little balls and roll in hands to form balls. Once all the balls are formed, set aside.
  3. 3. Beat the egg in a medium bowl and set aside. In another medium bowl place panko bread crumbs.
  4. 4. Dunk the cheese balls into the egg wash, then coat them in the breadcrumbs and set on slipmat on baking sheet. Continue until all balls are coated.
  5. 5. Place the baking sheet in to freezer and freeze them for 30 minutes. Remove and then brush the tops with olive oil to prevent from drying out while baking.
  6. 6. Bake for 8 minutes, checking at 6 minutes and every 30 seconds after to prevent burning.
  7. 7. Drizzle remaining honey over cheese balls and then sprinkle remaining pepper over top.

Honey Baked Goat Cheese


One Pot Wonder Tomato Basil Pasta

Published Jun 24, 2013 by Allyson
This post may contain affiliate links. Read my disclosure policy.

One Pot Wonder Tomato Basil Pasta made in just one pot and in less than 20 minutes! It is the easiest and tastiest dinner ever!

Tomato Basil Pasta made in just one pot and in less than 20 minutes! The easiest dinner ever!

When I saw this recipe for one pot tomato basil pasta a few months ago, I was very skeptical.  I mean, I have never seen a pasta dish cooked in 1 pot, without even having to strain the pasta.  However, if Martha Stewart is putting it in her magazine as an 'amazing' recipe, then I am going to believe that the people over there have tested it out and approved.  So, I added it to my menu plan a few weeks ago and never looked back.  

A great thing about this one pot tomato basil pasta is that it's likely you already have all the ingredients in your pantry and fridge.  It's also very inexpensive, doesn't use a lot of ingredients, and it's done in under 30 minutes, which, in my book, classifies it as a quick meal.

One Pot Wonder Tomato Basil Pasta

Like I said, I was skeptical, but as this was cooking, it was literally filling my house with a delicious aroma, and it looked so good.  Not only did it look good though, it tasted 'amazing' , just as Martha Stewart said.  By cooking the pasta in the vegetable broth, it really took on a nice flavor and it came out with a super different texture (the pasta).  

It wasn't hard, yet it wasn't mushy...it was pasta perfection.  I still think it's crazy that you just throw everything into the pot and let it do it's thing...but it works, trust me!  I have eaten a lot of pasta in my 29 years, and this was good....really good.

One Pot Wonder Tomato Basil Pasta

I'll probably be cooking this once every couple weeks, that's how good it was.  Try this now, you won't regret it. 

Speaking of One Pot pastas, you HAVE to get yourself a skillet/pot like the one I have – it’s amazing. No longer do I have to use a HUGE pot, and then worry about washing it, nor do I have to squeeze everything into my shallow sided skillet and have the sauce bubble over – this high side skillet is seriously made for these one pot pasta dishes. The cleanup is a breeze too – you can toss it in the dishwasher, but I really prefer to hand wash because it takes 15 seconds max, and then it doesn’t cramp up my dishwasher!

I love serving this pasta with Baked Chicken Meatballs or even these Air Fryer Meatballs!

One Pot Wonder Tomato Basil Pasta

Do you like ONE POT recipes as much as I do?! See these these other amazing recipes:

  • Spicy Basil Chicken {One Pot }
  • One Pot Spicy Thai Zoodles
  • One Pot Spaghetti with Meat Sauce
  • One Pot Cheesy Pumpkin Pasta
  • Quinoa Fried Rice (One Pot)
  • One Skillet Lemon Artichoke Chicken
  • Hamburger Casserole (one skillet)
  • One Skillet Spicy Pasta (Jalapeno Parmesan)

Make sure you don’t miss a thing! Follow Domestic Superhero on:

Facebook | Instagram | Pinterest | TikTok | Email

For NEW RECIPES delivered straight to your inbox, signup for our email list! 

5 from 2 votes
Print
One Pot Wonder Tomato Basil Pasta
Prep Time
2 mins
Cook Time
15 mins
 

Tomato Basil Pasta made in just one pot and in less than 20 minutes! The easiest dinner ever!

Course: Main Course
Cuisine: American
Keyword: one pot wonder tomato basil pasta
Servings: 6 servings
Ingredients
  • 12 ounces linguine pasta however, I think you could just do the 16oz box and be fine
  • 1 can 15 ounces diced tomatoes with liquid ( I used fire roasted for a little kick)
  • 1 large sweet onion sliced thinly
  • 1 TBS minced garlic
  • ½ teaspoon red pepper flakes or a lot more if you like it spicy!
  • 2 teaspoon dried oregano leaves
  • 2 large sprigs basil chopped
  • 4 cups vegetable broth
  • 2 TBS extra virgin olive oil
  • Parmesan cheese for garnish
Instructions
  1. Place pasta, tomatoes, onion, garlic, basil, in a large stock pot. Pour in vegetable broth. Sprinkle on top the pepper flakes and oregano. Drizzle top with oil.
  2. Cover pot and bring to a boil. Reduce to a low simmer and keep covered and cook for about 10 minutes, stirring every 2 minutes or so. Cook until almost all liquid has evaporated – I left about a half ince of liquid in the bottom of the pot – but you can reduce as desired .
  3. Season to taste with salt and pepper , stirring pasta several times to distribute the liquid in the bottom of the pot. Serve garnished with parmesan cheese.
Recipe Notes
  1. I ended up cooking mine for a total of around 20 minutes. I brought it to a boil, and then let it simmer until almost all the 'sauce' was soaked up into the noodles. There was a tiny bit left, which in my opinion was the perfect amount. This time is really going to depend on how low/high you have the simmer. Watch it closely.
  2. You can add other veggies to this as well, and probably even add meat if you don't want to leave it out. However, this dish was perfect with the above ingredients, so try it out!

Cookies and Cream Cheesecake Cupcakes

Published Jun 12, 2013 by Allyson
This post may contain affiliate links. Read my disclosure policy.

Cookies and Cream Cheesecake Cupcakes

For as long as I can remember, I have never liked Oreos.  They get stuck in my teeth, they have a weird chalky feeling in my mouth, and they are just too sweet.  Then, I got pregnant, and all those feeling disappeared.  Suddenly I loved chocolate (wasn't a big fan before), and wanted to eat anything sweet I could get my hands on!  It wasn't until late in my pregnancy I had something Oreo flavored, and I loved it.  Flash forward 3 years later, and I don't really eat Oreos anymore...but, when I saw a recipe for an Oreo Cheesecake Cupcake, I knew I had to make it! First off I love cheesecake, and it seemed like a delicious mix.

So I whipped up these Cookies and Cream Cheesecake Cupcakes and didn't look back. I always thought it was hard to make cheesecake (it's not!), so I have never tried it, but boy was I wrong (and totally missing out!).  This recipe made about 35 cupcakes for me, but it would depend on how high you fill the wrapper.  I just used a standard muffin tin, which allowed a whole Oreo to fit at the bottom.  I loved how you could see the Oreo through the bottom of the wrapper too!  I had to give a ton of these away, or else I would have eaten them all!  Everyone raved about them (even my husband who generally doesn't like cheesecake!), so I hope you like them as much as we did!

Cookies and Cream Cheesecake Cupcakes

Cookies and Cream Cheesecake Cupcakes

Print
Cookies and Cream Cheesecake Cupcakes
Servings: 30 cupcakes
Author: Allyson
Ingredients
  • 42 cream-filled sandwich cookies 30 left whole, and 12 coarsely chopped
  • 2 pounds 4 8-oz packages cream cheese, room temperature (I used 2 low fat and 2 regular)
  • 1 cup sugar
  • 1 teaspoon vanilla extract
  • 4 large eggs room temperature, lightly beaten
  • 1 cup sour cream
  • Pinch of salt
Instructions
  1. 1. Preheat oven to 275°F. Line standard muffin tins with paper liners. Place 1 whole cookie in the bottom of each lined cup.
  2. 2. With an electric mixer on medium high speed, beat cream cheese until smooth, scraping down sides of bowl as needed. Gradually add sugar, and beat until combined. Beat in vanilla.
  3. 3. Drizzle in eggs, a little at a time, beating to combine and scraping down the sides of the bowl as needed. Beat in sour cream and salt.
  4. 4. Stir/fold in chopped cookies by hand.
  5. 5. Divide batter evenly among cookie-lined cups, filling each almost to the top. Bake, rotating pan halfway through (around 11-12 minute mark), until filling is set, about 22-25 minutes.
  6. 6. Transfer to wire racks to cool completely. Refrigerate at least 4 hours (or up to overnight). Remove from tins just before serving.
Recipe Notes

Cupcakes should be refrigerated if not eating/serving. They will spoil if left out for a long period of time. These should keep well in the fridge for up to a week (though, the longer they sit, the soggier the cookie gets on the bottom-but it still tastes good!).

Cookies and Cream Cheesecake Cupcakes

Like this recipe? Head over to Domestic Superhero on Facebook for more!

Recipe from Martha Stewart's Cupcakes

You can also connect with me here:
      
Thanks for visiting!
-Allyson


Sriracha Glazed Brussels Sprouts

Published May 29, 2013 by Allyson
This post may contain affiliate links. Read my disclosure policy.

Up until last year, I had never even had Brussels sprouts, but for some reason I had a bad mental image of them.  People always talk about how they aren't very tasty, or grew up hating them.  Well, I think things have changed, or maybe cooking styles have changed, because if you cook these little green vegetables right, they are so delicious!  First I tried roasting them with olive oil, salt, and pepper.....success!  I think the key is letting them get a little brown and crisp on the outer layers.  A little burn is good in the case of Brussels sprouts!  Next, I tried roasting them again, but this time tossed in a Caesar dressing.....success!  These were little explosions of flavor and I highly recommend that method of preparing.  More recently, I wanted to spice them up...so where did I turn?  Sriracha!  Have you jumped on the Sriracha bandwagon yet? No?  Yes? Regardless, this is the perfect recipe to try.  

This dish blends sweet (honey!) and spicy (sriracha) for the perfect flavor combination.  Even if you are a Brussels sprouts hater, try this out and let me know what you think...I *think* you might be swayed in the other direction.  This Sriracha glaze would be perfect for other things as well...chicken, tofu, fish, other veggies...you name it, I bet it would be tasty.

Sriracha Glazed Brussels Sprouts

Oh, by the way, The Savannah Bee Company is the bomb.com.  Their honey is so so so good! If you can't make a trip to Savannah, pop on over to their website and order some.  I love the Sourwood, but all the flavors are to die for.  AND, if you do by chance make it to Savannah, bee (haha) sure to stop at their store and do a honey sampling. LOVE! 

Sriracha Glazed Brussels Sprouts

Print
Sriracha Glazed Brussels Sprouts
Ingredients
  • 1 bag of Brussels Sprouts or about 3 cups, cut in half
  • 1 tablespoon extra virgin olive oil
  • 1½ tablespoons honey
  • ½-1 teaspoon sriracha
  • ½ of lime the juice
Instructions
  1. Heat the oven to 375 degrees.
  2. 1. Trim the ends off the brussels sprouts and then slice them in half.
  3. 2. On a baking sheet, toss the brussels sprouts with the oil and season lightly with salt.
  4. 3. Place in the oven and roast for 10 minutes. Toss and roast for 10 more minutes.
  5. 4. Meanwhile, whisk together the honey, sriracha and lime juice until combined. After the brussels sprouts have roasted for 20 minutes, pour the glaze over them, toss to combine, and roast for 2 minutes more.
  6. Serve immediately

Recently I made some Sriracha Popcorn...ch-ch-check it out!


Crispy Pressed Tofu with Garlic & Mint

Published May 19, 2013 by Allyson
This post may contain affiliate links. Read my disclosure policy.


Crispy Pressed Tofu with Garlic & Mint

After pressing the water out of the tofu, the marinade is made, and then the tofu sits in the marinade for as long as you want (preferably over an hour-I did mine overnight).   

Mint Tofu 1

Then you cook it up, and it's done.  It's really easy, and tasty.

Print
Crispy Pressed Tofu with Garlic and Mint
Ingredients
  • 2 14-ounce packages extra-firm tofu
  • 4 large garlic cloves smashed
  • 1 ½ teaspoons sea salt or kosher salt plus more to season
  • ½ cup packed fresh mint leaves chopped
  • zest of 1 lemon
  • 3 tablespoons fresh lemon juice
  • ½ teaspoon red pepper flakes
  • 2 TBS extra-virgin olive oil
Instructions
  1. 1. Drain tofu with EZ Tofu Press or between books/towels if you have no press.
  2. 2. Slice each piece of tofu crosswise into 4 (½-inch) thick slabs.
  3. 3. Mash the garlic to a paste with the salt. In a large bowl, whisk together the mint, lemon zest, lemon juice, garlic paste, and pepper flakes. Whisking constantly, drizzle in the olive oil.
  4. 4. Toss the tofu with the marinade, cover with plastic wrap, and let it sit at room temperature for 30 minutes, or refrigerate it for up to 12 hours.
  5. 5. When you are ready to cook, preheat a large skillet over medium-high heat for several minutes. Lift the tofu from the marinade and place it in the pan. Reserve the marinade. Press tofu down with spatula while cooking. Some liquid will come out, that is good. Cook for 5 minutes, then reduce the heat to medium and continue to cook until the tofu is well browned, a few more minutes. Flip the tofu over, and cook until the tofu is browned on the second side and cooked through.
  6. 6. Transfer the tofu to a serving platter. Pour the oil out of the pan, then add the reserved marinade. Stir and simmer for 1 to 2 minutes, scraping up the browned bits from the bottom of the pan; pour over the tofu and serve.


Lemon Blueberry Breakfast Cake

Published May 14, 2013 by Allyson
This post may contain affiliate links. Read my disclosure policy.

Lemon Blueberry Breakfast Cake is delicious and super moist! Perfect for breakfast or a snack!

Look good? I promise you, it's to die for!   Head on over to Alderberry Hill and check out the Guest Post I wrote for her today! 

Need a quick fix? Print the recipe below!

Print
Lemon Blueberry Breakfast Cake
Ingredients
  • ½ cup unsalted butter room temperature
  • Zest from 1 large lemon
  • ¾ cup + 3 tablespoons Sugar set 1 TBS aside for sprinkling on top
  • 1 egg room temperature
  • 1 tsp. vanilla
  • 2 cups flour set aside ¼ cup of this to toss w/blueberries
  • 2 tsp. baking powder
  • 1 tsp. kosher salt
  • 2 cups fresh blueberries
  • ½ cup buttermilk
Instructions
  1. 1. Preheat the oven to 350ºF. Cream butter with lemon zest and the sugar (keep 1TBS separate) until light and fluffy.
  2. 2. Add the egg and vanilla and beat until combined. Meanwhile, toss the blueberries with ¼ cup of flour, then whisk together the remaining flour, baking powder and salt.
  3. 3. Add the flour mixture to the batter a little at a time, alternating with the buttermilk. Fold in the blueberries.
  4. 4. Grease a 9-inch square baking pan (or something similar) with butter or coat with non-stick spray. Spread batter into pan. Sprinkle batter with remaining tablespoon of sugar. Bake for 35 to 45 minutes. Check with a toothpick for doneness. If necessary, return pan to oven for a couple of more minutes.
  5. (Note: Baking for as long as 10 minutes more might be necessary.)
  6. Let cool at least 15 minutes before serving.

Lemon Blueberry Breakfast Cake is delicious and super moist! Perfect for breakfast or a snack!


Buffalo Quinoa Bites with Bleu Cheese Dip

Published Apr 29, 2013 by Allyson
This post may contain affiliate links. Read my disclosure policy.

Buffalo Quinoa Bites with Bleu Cheese Dip

Quinoa is seriously one of my favorite foods in the world. It is so versatile  and can be used in recipes that call for other ingredients such as rice, cous cous 0r some sort of filling.  I recently saw a recipe where it was used in making lasagna, in place of real noodles...genius!  Another one of my favorite things ever, is buffalo sauce.  At points in my life I have contemplated opening a restaurant with just buffal0 flavored foods...I think it would be a great success, because it seems like anything can be turned 'buffalo' style, and it's always delicious.  I would definitely have these little Buffalo Quinoa Bites on my menu...probably under the appetizer section.   At my house we ate these as a main dish, but they seem perfect for an appetizer, or dish to pass at a party or potluck.  I'll likely bring these to parties from now on, because they totally replace the idea of buffalo wings...and they are way healthier, too.

I make tons of Quinoa Cakes, and these are like a little mini version.  However, instead of lightly pan frying them, I tried baking them in a mini muffin tin, which turned out to be the best idea ever.  It was way faster than cooking them on the stove top, and healthier too (hey, every calorie counts!).  Baking them in the tin also made them crisp all over the outside, which was way better than being soggy on the sides.  If you have tried my Buffalo 'Mac' and Cheese (clue, it's not macaroni, it's quinoa!), then you would definitely love these.  In general, if you like buffalo flavor, you are going to love these...trust me.

Mix everything together....

Buffalo Quinoa Bites with Bleu Cheese Dip

Scoop into mini muffin tins.....

Buffalo Quinoa Bites 01

Bake & Serve...

Buffalo Quinoa Bites with Bleu Cheese Dip

Buffalo Quinoa Bites with Bleu Cheese Dip

Print
Buffalo Quinoa Bites with Bleu Cheese Dip
Ingredients
  • Cooking spray
  • 2 cups quinoa cooked
  • 2 large eggs
  • 3 green onions thinly sliced
  • ½ cup Franks buffalo sauce
  • 2 small celery stalks diced small
  • ½ cup shredded cheddar cheese I used extra sharp white
  • 4 ounces Neufchâtel cheese softened (also sold as ⅓ Less Fat Cream Cheese, or you can use regular cream cheese)
  • 2 tablespoons whole wheat flour
  • Salt and pepper to taste
Ingredients For the dip
  • 1 cup low-fat plain Greek Yogurt
  • 2 tablespoons fresh chopped parsley
  • ½ cup crumbled blue cheese
  • 2 tablespoons milk
  • 2 green onions sliced thin
  • Salt and pepper to taste
Instructions
  1. In a small bowl, mix together all the dip ingredients until well incorporated. Place in the fridge while you prepare the bites.
  2. Preheat the oven to 350°. Spray the cups of a mini muffin tin with cooking spray and set aside.
  3. In a large bowl, mix together all remaining quinoa bite ingredients until well mixed.
  4. Spoon about two tablespoons of the mixture into each of the cups of the mini muffin tin. (for me it was helpful using the actual tablespoon) Press bites down with back of a fork.
  5. Bake for 15-20 minutes or until the bites are set and beginning to brown on top.
  6. Let cool for five minutes in the pan, then remove from pan and serve warm with the dip.
Recipe Notes

Serving size: About 3 bites and 2 tablespoons dip.
Servings per recipe: 8
Nutrition per serving (about): 213 calories, 13g fat, 14g carbs, 10g protein

Love quinoa like I do? Check out these other great quinoa recipes!


Strawberry Goat Cheese Quinoa Salad

Published Apr 22, 2013 by Allyson
This post may contain affiliate links. Read my disclosure policy.

Strawberry Goat Cheese Quinoa Salad

Around this time of the year, I love shopping for berries at the local Asian Farmers Market.  They are so cheap ($1 per container of strawberries), and while they won't last for days, if you have a recipe in mind they are perfect.  I went a little overboard that weekend with my strawberry purchases.  We were hosting a brunch and I had decided to make a strawberry danish, and I had also made fresh Strawberry and Basil Margaritas the night before. So I stocked up, and had some left over.  

With perfect timing, my friend shared a recipe with me for a Seasonal Strawberry Feta and Quinoa Salad.  She knows how much I adore quinoa.  It looked delicious, and since I had nearly all the ingredients on hand, I decided to make it the next day.  While the original recipe called for walnuts, I didn't have any, so I left those out. It also suggested feta, however I had barely any feta left, but a whole container of goat cheese.  I am sure it would be delicious as it was first written, but we absolutely loves the salad with the few modifications...even my husband, who doesn't usually like strawberries all that much.

Strawberry Goat Cheese Quinoa Salad

This Strawberry Goat Cheese Quinoa Salad is perfect for summer. It's light and sweet, and filled with protein from the nutrient packed quinoa.  Make this and take it along to your neighborhood BBQ, everyone will be asking you for the recipe.

Love quinoa like I do? Check out these other great quinoa recipes!

  • Quinoa Fried Rice (One Pot)
  • Loaded Quinoa Chili (One Pot or Crock Pot Recipes)
  • Buffalo Quinoa Mac and Cheese
  • One Pot Mexican Quinoa Bowls

Make sure you don’t miss a thing! Follow Domestic Superhero on:

Facebook | Instagram | Pinterest | TikTok | Email

For NEW RECIPES delivered straight to your inbox, signup for our email list! 

Print
Strawberry Goat Cheese Quinoa Salad
Course: Salad, Side Dish
Cuisine: American
Ingredients
  • 1 cup quinoa dry
  • 2 cups water
  • 2 cups sliced strawberries
  • ¼-1/2 cup crumbled goat cheese however much you like
  • 1 Tbs fresh basil chopped
  • 2-3 Tbs honey
  • 1 Tbs olive oil
Instructions
  1. In a small pot, bring quinoa and water to a boil. Reduce heat to low, cover, and let simmer for about 15 minutes or until the water is absorbed. Fluff with fork, and remove from heat. Refrigerate to cool (I only did this for about 15 minutes)

  2. In a large bowl mix together quinoa, sliced strawberries, goat cheese, and basil.

  3. In small bowl, mix honey and olive oil with a fork, then drizzle over quinoa mixture and toss.

  4. Serve cold or at room temperature.

Skinny French Onion Soup

Published Apr 17, 2013 by Allyson
This post may contain affiliate links. Read my disclosure policy.

Skinny French Onion Soup


If there is one soup that I love, it's French Onion.  It's rich, decadent, and delicious.  However, since I became a vegetarian, I realized that this soup is actually made with a beef broth base (no!!), and although I may have had it a few times since becoming a veggie (give me a break!), I wanted to find a way to make it using a vegetable base.  Turns out making it with vegetable broth is just as delicious, as long as you give the onions the time it takes to carmalize and brown.  

I also decided to lighten it up a bit, and make it into a super low calorie meal.  Adding bread and cheese adds around 200 calories, but this soup is only about 70 calories to begin with, so it's an addition you can afford even when you are watching what you are eating.  BUT, trust me when I say, this does not taste like a low calorie soup. It is rich even after the healthy modifications.  

Skinny French Onion Soup

If you aren't a vegetarian, you can surely use beef broth. It probably adds a bit of depth that is difficult to achieve with the veggie broth (not gonna lie!), but even when made with the veggie broth, there is little left to be desired.

Skinny French Onion Soup

More soups you might love:

  • Hamburger Soup (Instant Pot & Stove Top)
  • Healthy Instant Pot Lasagna Soup (vegetarian and meat option)
  • Instant Pot Potato Soup (with bacon and cheese)
  • Instant Pot Loaded Cauliflower Soup (low carb)
  • Chicken Tortilla Soup (Crock Pot)

Make sure you don’t miss a thing! Follow Domestic Superhero on:

Facebook | Instagram | Pinterest | TikTok | Email

For NEW RECIPES delivered straight to your inbox, signup for our email list! 

5 from 1 vote
Print
Skinny French Onion Soup

This Skinny French Onion Soup is vegetarian and low calorie! It is decadent even with the healthy modifications!

Course: Soup
Cuisine: French
Keyword: skinny french onion soup
Calories: 74 kcal
Ingredients
  • 4 sweet onions onions sliced
  • 2 TBS butter
  • 1 TBS Worcestershire sauce
  • 1 TBS balsamic vinegar
  • 3 garlic cloves minced
  • 2 teaspoon brown sugar
  • ½ teaspoon pepper
  • ½ teaspoon salt
  • 3 TBS all-purpose flour
  • 64 ounces beef or vegetable I used vegetable
  • 2 TBS fresh thyme
  • French bread add calories
  • Low fat cheese I used Havarti, but swiss is good too....add calories
Instructions
  1. Place a large stock pot over medium heat. Add onions, butter, Worcestershire sauce, vinegar, garlic, brown sugar, salt, and pepper. Cook until onions begin to brown and caramelize, stirring occasionally (about 30 minutes for me, slow is good here).
  2. Stir in the flour and let cook for 2-3 more minutes.
  3. Add the broth and thyme. Cook on low for at least 20 minutes (I let simmer for 45 minutes, the longer the better)
  4. Place in individual bowls, and slice a small piece of bread and place on top of the soup. Cover with one slice of cheese and broil for 3 minutes or until browned and bubbly.
Recipe Notes

Servings: 8 cups
Serving Size: 1 cup
Nutritional Info: 74.1 calories, 3.7g of fat, 7.4g of carbohydrates, 1.1g of fiber, 3.2g of protein
2 WW points per cup

Spicy Steamed Bok Choy

Published Apr 5, 2013 by Allyson
This post may contain affiliate links. Read my disclosure policy.

Spicy Steamed Bok Choy is the perfect easy side dish. Taking less than 5 minutes to make, it's quick, easy, and packs a punch of flavor!

Spicy Steamed Bok Choy is the perfect easy side dish. Taking less than 5 minutes to make, it's quick, easy, and packs a punch of flavor!

Being vegetarians, we are always looking for interesting new recipes to try. This spicy steamed bok choy is healthy, delicious, and easy to make. Pair it with Quinoa Fried Rice (One Pot), Instant Pot Asian Meatballs, or Instant Pot Asian Pork for the perfect meal!

I love going to our local Asian Farmers Market (which i will be writing another post about in the near future), and finding new vegetables and things to try.  If you haven't found your local Asian Farmers Market, you need to get on Google or Yelp and look for it right now.  

Not only do they have an incredible amount of produce, meat, and exotic foods, but I guarantee the prices on produce are the cheapest you will see anywhere. You will find things for half the price you would pay at your grocery store. One of my favorites lately has been bok choy.  It's a type of vegetable that is much like spinach, but has some crunchier parts to it.  The base of the stalk is more crunchy, and the leaves when cooked are wilted just like spinach.  

Spicy Steamed Bok Choy is the perfect easy side dish. Taking less than 5 minutes to make, it's quick, easy, and packs a punch of flavor!

You can throw it into soups, stir fry's, or serve it all by itself.  I have been making it as a side to go with other Asian food and it's so tasty!

This recipe for Spicy Steamed Bok Choy takes less than 5 minutes to make, it's really healthy, and it's super cheap as well.  At my Asian Farmers Market they had 1lb of bok choy for only .99 cents.  I was able to get 6 bok choy for only $1!! That's a great deal.  Most of the other ingredients you likely have on hand in your pantry.  You can also make this recipe with baby bok choy or regular bok choy. If you use regular bok choy they are bigger, and will take longer to steam.

Also, although this recipe is 'spicy', I will say it's not that spicy.  This would be totally fine for kids, but if you like more spice, you can add more pepper to kick it up.

I just love how vibrant the bok choy is! It's a very beautiful side dish!

Spicy Steamed Bok Choy is the perfect easy side dish. Taking less than 5 minutes to make, it's quick, easy, and packs a punch of flavor!

Pair this Spicy Steamed Bok Choy with these other meals for the perfect dinner:

  • Asian Spaghetti Squash
  • Asian Chicken Lettuce Wraps (One Pot)
  • Spicy Asian Eggplant & Tofu Bowls
  • Easy Asian Noodles

Make sure you don’t miss a thing! Follow Domestic Superhero on:

Facebook | Instagram | Pinterest | TikTok | Email

For NEW RECIPES delivered straight to your inbox, signup for our email list! 

Print
Spicy Steamed Bok Choy
Prep Time
1 min
Cook Time
5 mins
 

Spicy Steamed Bok Choy is the perfect easy side dish. Taking less than 5 minutes to make, it's quick, easy, and packs a punch of flavor!

Course: Side Dish, Snack
Cuisine: asian
Keyword: Spicy Steamed Bok Choy
Servings: 4 servings
Ingredients
  • 4 or more baby bok choy or regular bok choy
  • 1 TBS roasted sesame oil
  • 2 TBS soy sauce
  • 2 garlic cloves crushed
  • ½ teaspoon chili flakes
  • 2 TBS sesame seeds
Instructions
  1. In a small bowl, combine sesame oil, soy sauce, cloves and chili flakes. Set aside.

  2. Cut bok choy length ways in halves. Place into a steamer, cut-side up. Steam covered until tender, about 3 minutes or 4-5 minutes if using larger bok choy

  3. Transfer to serving bowl. Drizzle over the dressing. Garnish with sesame seeds. Serve immediately.

Recipe Notes

Serves 4

  • « Previous Page
  • 1
  • …
  • 16
  • 17
  • 18
  • 19
  • 20
  • Next Page »

Hi! I’m Allyson

Welcome to Domestic Superhero where you will find lots of recipes & food goodness! Let's connect on social media, and be sure to subscribe to my email so you won’t miss a post!

More About Me →

  • Facebook
  • Instagram
  • Pinterest
  • Twitter
  • TikTok

Footer

↑ back to top

About

  • About Me
  • Contact
  • Disclosure & Privacy Policy
  • Featured On

Social

  • Facebook
  • Instagram
  • Pinterest
  • Twitter
  • TikTok

Recipes

  • Dinner Ideas
  • Desserts
  • Drinks
  • Appetizers

Disclaimer

Domestic Superhero is a participant in the Amazon Services LLC Associates Program, an affiliate advertising program designed to provide a means for sites to earn advertising fees by advertising and linking to amazon.com

Copyright © 2025 Domestic Superhero. Privacy