Domestic Superhero

  • Recipes
  • DIY Projects
  • Travel
  • About Me
menu icon
go to homepage
  • Recipes
  • DIY Projects
  • Travel
  • About Me
search icon
Homepage link
  • Recipes
  • DIY Projects
  • Travel
  • About Me
×
Home » You searched for fall

Search Results for: fall

The Best Ever Party Dip - Creamy Chipotle Bean Dip

Published Mar 9, 2015 by Allyson
This post may contain affiliate links. Read my disclosure policy.

The Best Ever Party Dip - Creamy Chipotle Bean Dip

We are big dip eaters at our house. Whenever we have people over or go somewhere, I love making dips to share. There are so many dip recipes, the options are endless!  This dip came to mind because whenever I make Copycat Healthy Taco Bell Mexican Pizzas, I always use the left over refried beans and mix them with the left over enchilada sauce to make a quick dip. I make my enchilada sauce using chipotle chilis in adobo sauce (like this), so it really kicks up the dip with some spice. My husband and I love it.  Anyway, that’s how I came up with the idea for this Creamy Chipotle Bean Dip.

The Best Ever Party Dip - Creamy Chipotle Bean Dip

This Creamy Chipotle Bean Dip combines cream cheese, refried beans, chipotle chilis and a bit of pepperjack cheese. It’s super easy to make and is a huge crowd pleaser. Minimal ingredients makes for a quick and easy dip.

The Best Ever Party Dip - Creamy Chipotle Bean Dip

This dip can also be heated or served cold – both are great options! If you do heat it in the oven, I would add a layer of pepperjack cheese to the top, because you really cant go wrong with more cheese, you know?

Print
The Best Ever Party Dip–Creamy Chipotle Bean Dip
Ingredients
  • 1 can 15 ounces fat free vegetarian refried beans
  • 4 ounces low fat cream cheese softened or room temperature
  • 4 chipotle peppers in adobo sauce found in international aisle
  • ¼ cup + 2 TBS pepperjack cheese grated
  • 2 green onions chopped
Instructions
  1. 1. In the bowl of a food processor, combine beans, cream cheese, chilis, and ¼ cup pepperjack cheese. Process for 30 seconds or until well combines. Scrape sides of bowl, and process again for a few seconds.
  2. 2. Scoop dip into a serving bowl and top with remaining cheese and green onions.
  3. Enjoy!
Recipe Notes

Serve with chips, crackers, tortillas, veggie sticks, or whatever you want!

The Best Ever Party Dip–Creamy Chipotle Bean Dip

You can also connect with me here:

Thanks for visiting!

- Allyson

Garlic Ginger Spinach

Published Feb 25, 2015 by Allyson
This post may contain affiliate links. Read my disclosure policy.

Garlic Ginger Spinach is the perfect blend of Garlic and Ginger, sauteed with delicious healthy fresh spinach.

Over the last few weeks we have been doing a lot of juicing at my house. Most of our juices contain tons of spinach and ginger.  While I love ginger, if you put too much ginger in the juicer it seriously ruins the juice. It’s crazy because I LOVE ginger, but if you put too much in the juice, it’s way too over powering…to the point it actually burns my throat.  Anyway, so we have had our fridge stocked with healthy veggies and when I decided it was time to eat actual food, instead of just drink juice all day, I decided to make this delicious Garlic Ginger Spinach. We had tons of extra spinach and ginger around the kitchen, and I didn’t want it to go bad. Total genius recipe.

Garlic Ginger Spinach is the perfect blend of Garlic and Ginger, sauteed with delicious healthy fresh spinach.

Not only was this dish easy peasy, but it was so delicious I almost ate it all at once…there are worse things, right? At least it’s not like eating a whole box of cookies at once.  There are only a few ingredients needed to whip this up, and if you shop at a local Asian grocery store, this would be a super inexpensive side dish (or main dish in my case).

You can serve this along side  Air Fryer Asian Chicken Wings, General Tso’s Tofu, Bang Bang Shrimp Rice Bowls, Copycat Panda Express Orange Chicken, Mongolian Chicken (One Pot), or some Easy Asian Noodles.

Garlic Ginger Spinach is the perfect blend of Garlic and Ginger, sauteed with delicious healthy fresh spinach.

Print
Garlic Ginger Spinach
Ingredients
  • 1 bag fresh baby spinach or 1 pound fresh spinach leaves
  • 1 inch fresh ginger minced
  • 1 teaspoon sesame oil
  • 2 garlic cloves minced
  • 1 TBS black or white sesame seeds
  • salt to taste
Instructions
  1. 1. In a large non stick skillet heat sesame oil over medium heat. Add garlic and ginger and saute for 1 minute or until fragrant. Add spinach, sauteing frequenting. Once spinach is wilted, remove from heat and garnish with sesame seeds. Add a sprinkle of salt to the top and serve.

Garlic Ginger Spinach is the perfect blend of Garlic and Ginger, sauteed with delicious healthy fresh spinach.

Like Asian inspired food? Check out these delicious recipes!

General-Tsos-Tofu-1.jpg

Quinoa-Fried-Rice_thumb.jpg

Spicy Steamed Bok Choy 01

Easy-Asian-Noodles_thumb.jpg

You can also connect with me here:

Thanks for visiting!

- Allyson

Strawberry Biscones with Sweet Orange Glaze

Published Feb 23, 2015 by Allyson
This post may contain affiliate links. Read my disclosure policy.

Strawberry Biscones with Sweet Orange Glaze are a hybrid between biscuits and scones - the perfect melt in your mouth Saturday morning treat!

For the last few weeks we have been doing a lot of juicing at my house. I decided I wasn’t such a fan of strawberries in the juice recipes, so I had a couple pints of strawberries hanging out in the fridge. I woke up on Saturday morning with the urge to use them, because they were on the brink of going bad, and I hate wasting food.  So I decided to make some strawberry scones, which I thought was a great idea…until I was in the middle of making them, and realized I added way too much heavy cream.  I was about to toss them because I figured they would be nasty, but I just rolled with it because hey, I hate wasting food.  I dubbed these ‘biscones’, because they seemed to be a hybrid of a scone and a biscuit.  I was thinking I was totally awesome and I invented this new cool ‘biscone’…but then I googled the term and it turns out I didn’t make it up.  Oh well, still awesome.  I topped these bad boys with an orange glaze and called it a day. They are delicious, and so much less fussy than making scones or biscuits! You can’t mess these up, which is totally awesome when you a terrible baker, like me.  Add these Strawberry Biscones with Sweet Orange Glaze to your weekend menu, because I swear, sitting down with one of these bad boys and a delicious hot cup of coffee will be the highlight of your weekend.

Strawberry Biscones with Sweet Orange Glaze are a hybrid between biscuits and scones - the perfect melt in your mouth Saturday morning treat!

I actually think you should serve these to guests, because when you tell them it’s a biscone, I bet they will think you invented it and how awesome is that? Genius.

Strawberry Biscones with Sweet Orange Glaze are a hybrid between biscuits and scones - the perfect melt in your mouth Saturday morning treat!

If you aren’t a big fan of strawberries, you could really use any berry in this recipe and they would be fabulous. Trust me, you will love them!

Print
Strawberry Biscones with Sweet Orange Glaze
Ingredients
  • 2 cups all-purpose flour
  • ½ cup sugar
  • 1 teaspoon salt
  • 1 TBS baking powder
  • 1 TBS grated orange zest
  • 1 stick frozen butter grated
  • 1 large egg lightly beaten
  • ¾ cup heavy cream
  • 1 cup diced strawberries
  • 1 egg beaten (for egg wash)
  • ½ cup powdered sugar for glaze
  • 1 TBS freshly squeezed orange juice for glaze
Instructions
  1. 1. Preheat the oven to 400 degrees F.
  2. 2. In the bowl of a stand mixer, using the paddle attachment; mix flour, sugar, baking powder, salt and orange zest. Add grated butter slowly and mix at the lowest speed.
  3. 3. Combine the egg and heavy cream in a small bowl, then slowly pour into the flour and butter mixture continuing to mix on the lowest speed. Mix until just blended. The dough will be lumpy but wet seeming.
  4. 4. Add the strawberries to the dough, and mix on low speed until just blended.
  5. 5. Line a baking sheet with parchment paper or a silpat. Using a ¼ measuring up, scoop up dough and drop onto baking sheet. Place 1-2 inches apart.
  6. 6. Brush the tops of the biscones with egg wash. Place in oven and bake for 20-22 minutes or until browned on the top.
  7. 7. In a small bowl whisk powdered sugar and orange juice. Drizzle over biscones and serve.
Recipe Notes

Feel free to try different berries in this recipe.

Baking these on a silpat is key here - they get evenly baked and don't stick to the pan! Win win!

You can also connect with me here:

Thanks for visiting!

- Allyson

Roasted Vegetable Frittata

Published Feb 16, 2015 by Allyson
This post may contain affiliate links. Read my disclosure policy.

Roasted Vegetable Frittata is the perfect weeknight meal to clean out your fridge - eggs, whatever veggies you have on hand, and cheese! Takes less than 30 minutes to cook up and lasts for days!

I really love making frittata’s for several reasons, however, the main reason would be that they are absolutely delicious.  Frittatas can pretty much handle whatever veggies or meats you want to throw at them, and I often find myself making them when I have extra eggs, vegetables, or cheese. I’ve never met a frittata I haven’t liked.  The key to making a great frittata is adding a bit of dairy – full fat, not watery skim milk. I have made them using whole milk, cream, half and half, and also greek yogurt. Whatever you use, make sure it has fat.  A frittata is very healthy, so adding a bit of this fat shouldn’t be intimidating if you are trying to eat healthy.  When I had a ton of veggies about to go bad in the fridge, I decided to make this delicious Roasted Vegetable Frittata.

Roasted Vegetable Frittata is the perfect weeknight meal to clean out your fridge - eggs, whatever veggies you have on hand, and cheese! Takes less than 30 minutes to cook up and lasts for days!

I love using my cast iron pans for frittatas because the cleanup is really easy and I feel like they cook them the best.  Make sure that you take the frittata our just a minute or 2 before you think it’s totally done, because the pan will hold heat and keep cooking the frittata. I added goat cheese to the top of this frittata (yummmm), but it would also be great with feta, gruyere, swiss, or even ricotta chunks…point is, you can’t go wrong with the cheese…pick your favorite and let it ride.

Roasted Vegetable Frittata is the perfect weeknight meal to clean out your fridge - eggs, whatever veggies you have on hand, and cheese! Takes less than 30 minutes to cook up and lasts for days!

Another reason I LOVE frittatas is because they are virtually great for any meal. I usually make a big one for dinner, than I eat the leftovers the following days for breakfast and lunch. Often I will toast up some bread and throw a slice between the slices as a lunch sandwich – so good.

Print
Roasted Vegetable Frittata
Ingredients
  • 12 eggs
  • ½ cup whole milk or greek yogurt, 2%, cream, half and half
  • ½ teaspoon dried basil
  • ¼ teaspoon dried oregano
  • ¼ teaspoon dried thyme
  • ½ pound asparagus ends trimmed and cut into 1 inch pieces
  • 1 pint cherry or grape tomatoes
  • 1 large onion chopped roughly
  • 2 handfuls fresh spinach leaves about 3-4 cups
  • 2 TBS olive oil
  • ½ teaspoon sea salt
  • ½ teaspoon black pepper
  • ¼ cup goat cheese crumbles
  • non stick spray
Instructions
  1. 1. Preheat oven to 400 degrees F. In a large baking sheet, add asparagus, tomatoes, and onion. Drizzle Olive oil over the top, and then sprinkle salt and pepper over top. Toss well with hands to coat evenly. Place into oven and roast for 15 minutes. Stir vegetables and then add the spinach into the baking dish, stirring once and then roasting an additional 5-7 minutes, or until spinach is wilted and vegetables are cooked through. Remove from oven and set aside.
  2. 2. In a large bowl, add 12 eggs; whisk. Add milk, basil, oregano, thyme, and a dash of salt and pepper to the bowl. Whisk well to combine.
  3. 3. In a large oven safe skillet (if it has a metal handle, you can just cover it with foil), heat over medium high heat and coat with non stick spray. Pour egg mixture into the skillet, and then pour roasted vegetables into the skillet. Stir with a wooden spoon until vegetables are evenly distributed. Cook for 3-4 minutes over medium high heat, then remove from heat and place into 400 degree oven. Cook for 20-25 minutes or until eggs are just set. Remove from oven and top with goat cheese crumbles.
  4. Serve and enjoy!

I also have the PERFECT bread recipe to serve along side this frittata...

Leftover-Herb-Butter-13.jpg

Easy Leftover Herb Butter

Published Feb 11, 2015 by Allyson
This post may contain affiliate links. Read my disclosure policy.

Easy Leftover Herb Butter - this is such a great way to save left over herbs without having to waste them!

I love cooking with fresh herbs, but I often find myself tossing the leftovers once they go bad. It’s hard to use them all up when you just need a bunch for one recipe.  I decided to solve this problem by blending my leftover herbs into butter, and then freezing it.  Easy leftover herb butter is super quick to make, and if you freeze it, you can cut off a chunk whenever you need it.

Easy Leftover Herb Butter - this is such a great way to save left over herbs without having to waste them!

I love slicing off a few medallions and throwing them on top of a loaf of bread while it bakes. You get the most delicious herb buttered bread once it’s cooked.  You can use the herb butter on whatever you want, really, but some of my favorite things to throw it on top of are eggs, frittatas, roasted veggies, bread, and grilled cheese. The herbs just add an extra layer of deliciousness to anything.

Easy Leftover Herb Butter - this is such a great way to save left over herbs without having to waste them!

I tend to stick to Italian herbs while making this butter, because that is usually what I have a lot left over.  For this specific butter I used rosemary, thyme, and basil. So delicious. After I mash everything together, I use plastic wrap to form a nice log shape, and then throw it into the freezer.

Print
Easy Leftover Herb Butter
Ingredients
  • 1 stick butter softened
  • left over herbs rosemary, thyme, basil
  • pinch of salt
Instructions
  1. 1. In your food processor, add herbs and pulse until well chopped. Add butter in chunks, processing until fully mixed.
  2. 2. Lay out a long sheet of plastic wrap (about 12 inches), and scoop the butter into the center, making a somewhat log shape. Wrap the plastic wrap up on the sides, and then squeeze butter into log shape. Twist ends, place in freezer or fridge and use as desired.
Recipe Notes

I have had this in my friend for up to 2 weeks before we used it all, and it was still good.
Use whatever herbs you have leftover!

You can also connect with me here:

Thanks for visiting!

- Allyson

Oreo Bomb Truffles

Published Feb 9, 2015 by Allyson
This post may contain affiliate links. Read my disclosure policy.

Oreo Bomb Truffles are Delicious oreo crumbles mixed with creamy cream cheese and coated in a chocolate shell.

A couple of weeks ago, I decided to make these Oreo Truffle Bombs for a Super Bowl Party we were attending. I actually had them for the first time a few years prior, at the same friend’s house while they were hosting a party. I asked the girl who had made them her recipe, and it’s turned out to be SO easy. I’ve made Oreo Bomb Truffles several times since, and they are always a big hit.
Oreo Bomb Truffles are Delicious oreo crumbles mixed with creamy cream cheese and coated in a chocolate shell.

Some of these are a little crazy with the sprinkles, because of course my 4 year old helper LOVES sprinkles.  The truth is, you can top these balls with anything or nothing. I’ve made them with crushed Oreo pieces as a topping, nuts, sprinkles, graham cracker crumbles, chocolate, and other various things. You really can’t go wrong.

Oreo Bomb Truffles are Delicious oreo crumbles mixed with creamy cream cheese and coated in a chocolate shell.

Like I said, these are super easy to make, and would be the perfect treat for your Valentine. I have made these bad boys with a red velvet center too, which would be perfect for your sweetheart. The blend of Oreo cookies and cream cheese makes the perfect texture and most delicious moist center. These also keep in the fridge for a long time (If you have any to keep!), so they definitely can be made ahead of time and then used a day or more later. I have kept them in the fridge for more than a week at times and they have still been good.

Print
Oreo Bomb Truffles
Ingredients
  • 1 box oreo cookies processed into crumbs
  • 4 oz cream cheese softened
  • 1 package white chocolate bark/candy coating chocolate
  • 1 package milk chocolate bark/candy coating chocolate
  • various sprinkles
Instructions
  1. 1. In your food processor, combine Oreo crumbs and softened cream cheese. Mix well.
  2. 2. Place mixture into the freezer for 20-30 minutes.
  3. 3. Cover a cookie sheet with parchment paper, set aside. Remove mixture from freezer and taking TBS chunks at a time, roll into balls. Set onto the cookie sheet; repeat until mixture is all used.
  4. 4. Place cookie sheet into freezer and allow to freeze for at least 2 hours (I usually just let them go overnight).
  5. 5. Melt white chocolate according to package directions. In a separate bowl, melt milk chocolate according to package directions.
  6. 6. Dip ball into chocolate of choice (I use a fork and just set it on the fork and dunk), coat well, let excess chocolate drip off, and then set back onto parchment. Repeat until all balls are covered.
  7. 7. Using remaining chocolate, drizzle contrasting colors over the top.
  8. **Add various sprinkles or toppings while the chocolate is still 'wet', otherwise they won't stick. The best way is to dip into the chocolate and then add the topping right away!
Recipe Notes

Store in the fridge in an airtight container for up to a week.

Oreo Bomb Truffles are Delicious oreo crumbles mixed with creamy cream cheese and coated in a chocolate shell.
You can also connect with me here:

Thanks for visiting!

- Allyson


Warm Blueberry Compote Banana Bread

Published Feb 4, 2015 by Allyson
This post may contain affiliate links. Read my disclosure policy.

Using the Best Ever Banana Bread recipe, then topping it with delicious warm blueberry compote makes the most amazing snack or dessert - Warm Blueberry Compote Banana Bread!

Using the Best Ever Banana Bread recipe, then topping it with delicious warm blueberry compote makes the most amazing snack or dessert - Warm Blueberry Compote Banana Bread!

Last weekend I noticed we had 3 bananas that had clearly lost their luster.  Have no fear, this is when bananas are their best for banana bread!  The browner the bananas are the better (...well not so brown that they are leaking out liquid, okay?), and if you have at least 2, you are good to go with making banana bread.  I posted The Best Ever Banana Bread recipe long ago, and still, years later, it doesn't disappoint.  Everyone loves this bread.  Is it healthy? No! Is it delicious? Yes!  Should you make this right now? Yes!

Last month I started preparing meals for the week on the weekend, so that I can freeze things, and have them more readily available for dinner during the week.  I get home from work fairly late, and the last thing I want to do is cook dinner after I put my son to bed around 8pm.  So, I was making a couple soups and a chili, and then I noticed those brown bananas....yesssss, banana bread time. I had already made a huge mess in the kitchen, so why not dirty up a few more bowls and pans?  After making the bread and a couple muffins, I remembered the blueberries we had just picked up earlier in the day.  I wondered, "would banana bread be good topped with blueberries? "  Only one way to find out!  I whipped up an easy Blueberry Compote (see recipe below), and then spooned a generous portion over the top of the muffin.  The outcome?  Simply divine.

Using the Best Ever Banana Bread recipe, then topping it with delicious warm blueberry compote makes the most amazing snack or dessert - Warm Blueberry Compote Banana Bread!

Print
Banana Bread with Warm Blueberry Compote
Ingredients
For the bread
  • 2-4 ripe bananas smashed
  • ⅓ cup melted butter
  • ¾ cup sugar
  • 1 egg beaten
  • 1 teaspoon vanilla
  • 1 teaspoon baking soda
  • Pinch of salt
  • 1 ½ cups of all-purpose flour
For the Blueberry Compote
  • 1 cup blueberries
  • ¼ cup apple juice or other juice, or can be left out
  • ¼ cup granulated sugar
  • 1 TBS butter
Instructions
For the Bread
  1. No need for a mixer for this recipe. Preheat the oven to 350°F (175°C). With a wooden spoon, mix butter into the mashed bananas in a large mixing bowl. Mix in the sugar, egg, and vanilla. Sprinkle the baking soda and salt over the mixture and mix in. Add the flour last, mix. Pour mixture into a buttered 4×8 inch loaf pan or muffin tin. Bake for 1 hour for the loaf, or 22-25 minutes for the muffins. Cool on a rack. Remove from pan and slice to serve.
For the Blueberry Compote
  1. In a small sauce pan over medium heat, stir together blueberries, juice, butter, and sugar until the sugar is dissolved. Bring to a boil then lower heat and simmer for about 10-15 minutes, or until the sauce has thickened. Some blueberries will burst, but you don’t want all of them to burst. Whatever you don’t devour, store in an airtight container in the refrigerator.
  2. After you slice up the bread, spoon a generous portion of the blueberry compote over the banana bread. Serve. Enjoy!

Using the Best Ever Banana Bread recipe, then topping it with delicious warm blueberry compote makes the most amazing snack or dessert - Warm Blueberry Compote Banana Bread!

Like dessert as much as I do? Check out these other recipes:

Best-Ever-Banana-Bread-1_thumb.jpg

Slow-Cooker-Butterfinger-Cheesecake.jpg

Twix-Cheesecake-Bars-with-Chocolate-Caramel-Drizzle-5_thumb.jpg

Turtle Cheesecake Brownie Bars

Published Feb 2, 2015 by Allyson
This post may contain affiliate links. Read my disclosure policy.

Turtle Cheesecake Brownies - layers of brownies, cheesecake, and nuts- topped with drizzled caramel and chocolate. So delicious!

A couple weeks ago I made these delicious Turtle Cheesecake Brownie Bars as a contributor post for my friend, Shannah. I posted them on her blog, Just Us Four, and they were a big hit. Now that it’s been a while since I shared them over there, I wanted to share them with all of my readers! This dessert is super easy to make, and SO tasty! Everyone loves them!

Turtle Cheesecake Brownies - layers of brownies, cheesecake, and nuts- topped with drizzled caramel and chocolate. So delicious!

If you are in a time crunch, you can even used boxed brownies for the base brownie layer, although I think they are best homemade. I am sure no one would notice the difference though, because the top is so decadent and delicious.

Turtle Cheesecake Brownies - layers of brownies, cheesecake, and nuts- topped with drizzled caramel and chocolate. So delicious!


5 from 1 vote
Print
Turtle Cheesecake Brownie Bars
Ingredients
  • Ingredients for Brownie Layer
  • 1 cup butter melted
  • 1 teaspoon vanilla
  • 4 large eggs
  • 2 cups sugar
  • ¾ cup cocoa
  • 1 cup flour
  • ½ teaspoon baking powder
  • ¼ teaspoon salt
  • ½ cup chopped walnuts
  • Ingredients for Cheesecake Layer
  • 16 oz cream cheese softened (2 packs)
  • ⅔ cup sugar
  • 1 teaspoon vanilla
  • 2 eggs
  • Ingredients for Toppings
  • ½ cup caramel sauce
  • ⅓ cup milk chocolate chips
  • ¾ cup pecans chopped roughly
Instructions
  1. *Preheat oven to 350 degrees F.
  2. 1. In a stand mixer or with a hand mixer combine melted butter with sugar and vanilla. Add eggs one at a time, beating well after each one. Add the cocoa and mix well. Then add the flour, baking powder and salt, walnuts, and mix until just combined, do not over mix.
  3. Set aside one cup of the brownie batter and smooth the rest into a foil lined 7×11 baking dish.
  4. Now for our next layer...
  5. 2. With your stand mixer or hand mixer (cleaned off), begin making your cheesecake layer by beating cream cheese and sugar until smooth.
  6. 3. Add the vanilla and then the eggs one at a time, beating well after each one.
  7. 4. Pour the cream cheese mixture on top of the brownie mixture. Using a spatula, smooth it evenly over the brownie batter.
  8. 5. Drizzle ¼ cup of caramel sauce over the top of the cream cheese layer. Then, using the reserved cup of brownie batter, drop spoonfuls over the top of the cheesecake/caramel. Use your spatula or a butter knife to gently swirl the batters. This will combine the cream cheese layer and top brownies layer a bit. This does not need to be perfect.
  9. 6. Bake at 350 for 45-55 minutes. Start checking at 45 minutes and look for the cheesecake to be just set.
  10. 7. Allow to cool for 10 minutes, then using the sides of the foil, pull the brownies up and out of the dish. Set on a wire rack and allow to cool for at least 1 hour, and then place into the fridge for at least 2 hours.
  11. 8. Remove from fridge, and drizzle 2 TBS caramel sauce over the top of the brownies. Then sprinkle the chopped pecans over the caramel, covering the top.
  12. 9. Place chocolate chips in a small microwave safe bowl and microwave for 30 seconds. Remove and stir with a spoon or fork, then continue to microwave in 15 second increments, stirring every 15 seconds, until the chocolate is melted. This shouldn't take more than 90 seconds at the most (probably more like 60 seconds).
  13. 10. Drizzle melted chocolate over the top of the nuts. Drizzle remaining caramel sauce over the nuts as well.
  14. 11. Cut into squares and serve!
Recipe Notes

Be sure to refrigerate the brownies when you are done serving.
I like these best served cold so I allow them to cool for an hour on the counter, and then refrigerate another hour before serving. It's up to you!

Do you like cheesecake bars as much as I do?  If so, check out all these other recipes…

Milky Way Simply Caramel Cheesecake Brownies 7

Milky Way Caramel Cheesecake Brownies

TWIX Cheesecake Bars with Chocolate & Caramel Drizzle

TWIX Cheesecake Bars with Chocolate and Caramel Drizzle

Snickers Cheesecake Bars

Snickers Cheesecake Bars

You can also connect with me here:

Thanks for visiting!

- Allyson

Spicy Black Bean Barbecue Avocado Burgers

Published Jan 29, 2015 by Allyson
This post may contain affiliate links. Read my disclosure policy.

Spicy Black Bean Barbecue Avocado Burgers are spicy yet sweetened up with delicious honey BBQ sauce! Topped with a fresh avocado and pepper jack cheese - these are the perfect burgers!

Now that we are well into winter, it doesn’t really occur to most people that they should still utilize their grill! I love grilling, no matter what time of the year.  One problem I do occasionally run into though, is my hand freezing while grilling! Luckily for me, Kraft has solved this ongoing problem. They recently created a line of custom, over-the-top grilling innovations to help America's well-known grilling gurus, "Evergrillers," endure the outdoor elements while grilling year-round. The Evergriller Grill 'N' Flip Mitt was created to inspire Evergrillers to develop new winter grilling traditions just in time for the big game.  Want your own Evergriller Grill 'N' Flip Mitt??!! Make sure you read all the way to the bottom of this post to see how you can win one for yourself (and a year’s supply of Kraft Barbecue Sauce)!

Spicy Black Bean Barbecue Avocado Burgers 3

 I chose the Sweet Honey Sauce for these Spicy Black Bean Barbecue Avocado Burgers because I wanted to balance out the spicy kick in the burgers, with the sweet honey taste from the Kraft Barbecue Sauce.

   Spicy Black Bean Barbecue Avocado Burgers 5

While I was grilling the burgers, I ended up sliding a piece of foil under them. They are really delicate and sometimes can break apart on the grill rack easily. By adding this foil you prevent that from happening.

Spicy Black Bean Barbecue Avocado Burgers are spicy yet sweetened up with delicious honey BBQ sauce! Topped with a fresh avocado and pepper jack cheese - these are the perfect burgers!

After you are done grilling the black bean burgers, add a few slices of avocado, a slice of pepper jack cheese, and drizzle the Kraft Sweet Honey Barbecue Sauce over the top. Delicious.  

Spicy Black Bean Barbecue Avocado Burgers are spicy yet sweetened up with delicious honey BBQ sauce! Topped with a fresh avocado and pepper jack cheese - these are the perfect burgers!

These burgers are perfect any time of the year. I love mixing up the toppings and trying new sauces and veggies on top. Whether you are a vegetarian or not, this Spicy Black Bean Burger is incredibly tasty and will be enjoyed by all!

Print
Spicy Black Bean Barbecue Avocado Burgers
Prep Time
6 mins
Cook Time
7 mins
chill
2 hrs
Total Time
2 hrs 13 mins
 

Spicy Black Bean Barbecue Avocado Burgers are the perfect BBQ'ed burger!

Course: Main Course
Cuisine: American
Keyword: Spicy Black Bean Barbecue Avocado Burgers
Ingredients
  • Ingredients for spicy black bean burger patties
  • ½ onion chopped
  • 1 jalapeno seeded and chopped
  • 3 garlic cloves
  • 14.5 ounces black beans rinsed and drained (I used canned, but you can also use cooked dry beans as well)
  • ½ cup rolled oats
  • ½ cup corn at room temperature (frozen or fresh is fine)
  • 1 green onion chopped
  • 2 teaspoon cumin
  • ½ teaspoon curry powder
  • ¼ teaspoon cayenne pepper
  • ¼ cup breadcrumbs plain
  • salt and pepper
  • Toppings
  • 8 TBS Kraft Sweet Honey Barbecue sauce
  • 4 pepper jack cheese slices
  • 1 avocado thinly sliced
  • 4 rolls lightly toasted and cut in half
Instructions
  1. Put onion, jalapeno and garlic into a food processor and pulse for a few seconds. Add beans, oats, corn, green onion, cumin, curry powder, and cayenne pepper. Season with salt and pepper and pulse for about 20 seconds or until fully mixed. Scrape downs sides of the bowl and process for 10 seconds.

  2. Place mixture into a bowl, cover, and refrigerate for at least two hours.

  3. Remove chilled mixture from refrigerator and stir in breadcrumbs. Adjust seasonings to taste.

  4. Form the mixture into 4 patties.

  5. Heat grill and spray the grill with non-stick spray. You may use a foil under the burgers if desired (they crumble easily). Grill for 5 to 7 minutes on each side or until a crust develops and the patties are heated through.

  6. Add 1 TBS barbecue sauce to the bottom bun, then add the cheese slice, burger, avocado slices (about 3 per burger), and remaining 1 TBS of barbecue sauce to the top. Top with remaining bun top.

Recipe Notes

These burgers can also be cooked in a skillet - use a couple TBS of olive oil, heat, and then cook about 4 minutes per side.

Perfect Game Day Dips- Sriracha Aioli, Avocado Ranch, and Basil Aioli

Published Jan 27, 2015 by Allyson
This post may contain affiliate links. Read my disclosure policy.

Dip Trio Sriracha & Basil Aiolis and Avocado Ranch Dips

Over the last few weeks I have been brainstorming about what to make for the big game coming up in a few weeks. We love dips at our house, as well french fries, air fryer asparagus fries, and green bean fries! I wanted a little variety, so I decided to ship up 3 different dips, a trio!

The dips are really easy to throw together, and don’t take many ingredients, which make cooking on game day a lot less stressful.

Dip Trio Sriracha & Basil Aiolis and Avocado Ranch Dips 2

I whipped up the Avocado Ranch for my husband, because he LOVES avocados and ranch. I love avocados, but 4 years ago my body decided it didn’t like them and now I am deathly allergic…weird, right? Anyway, my husband said he loved the way the creamy avocado ranch balanced the spicy chipotle sweet potato fries. Perfect combo!

Avocado Ranch Dip

Then I decided to make a creamy spicy sriracha aioli. I lightened it up a bit by using greek yogurt instead of all mayo.  This is a spicy one, but if you like less spice, you can just use less sriracha! It was SO good with the crispy onion rings!

Sriracha Aioli

Lastly I made a cool and creamy basil aioli. I absolutely love fresh basil, and blending it together to make an aioli was perfect! It paired well with both the onion rings and the spicy chipotle sweet potato fries.

Basil Aioli

If you love dips as much as I do, checkout these other popular dips and sauces from Domestic Superhero:

  • Copycat In-N-Out Sauce (easy recipe)
  • Buffalo Sauce (homemade recipe)
  • Chick-fil-A Sauce (copycat recipe)
  • Copycat Zax Sauce Recipe (Zaxby’s Sauce)
  • Copycat Outback Bloom Sauce

Make sure you don’t miss a thing! Follow Domestic Superhero on:

Facebook | Instagram | Pinterest | TikTok | Email

For NEW RECIPES delivered straight to your inbox, signup for our email list! 

Print
Avocado Ranch
Ingredients
  • 1 large avocado pitted and removed from shell, sliced
  • ½ cup plain Greek yogurt
  • ¼ cup milk
  • 1 teaspoon rice vinegar
  • 2 cloves garlic minced
  • 1 TBS lemon juice fresh is the best!
  • 2 TBS dried parsley minced
  • ¼ teaspoon salt
Instructions
  1. In the bowl of a food processor add avocado, Greek yogurt and milk; mix for 30 seconds. Then add lemon juice, vinegar, garlic, parsley, and salt; mix for 30 seconds or until well combined. Scrape down the sides and then mix again for a few seconds.

  2. Store in an air tight container in the fridge for 30 minutes before serving.

Print
Sriracha Aioli

Sriracha Aioli is the perfect french fry dip!

Course: Side Dish
Cuisine: American
Keyword: Sriracha Aioli
Ingredients
  • 2 TBS mayonnaise I used light
  • ¼ cup plain Greek yogurt I used non fat
  • 2 TBS Sriracha sauce less if you don't like it so spicy
  • salt and pepper to taste
Instructions
  1. In a small bowl mix all ingredients with a whisk or fork. Add salt and pepper to taste.

  2. Refrigerate for 30 minutes before serving.

Print
Basil Aioli

Basil Aioli is the perfect game-day dip!

Course: Side Dish
Cuisine: American
Keyword: Basil Aioli
Ingredients
  • ¼ teaspoon salt
  • 1 cup fresh basil leaves
  • ½ cup mayonnaise
  • ½ cup Greek yogurt I used non fat
  • 2 TBS extra-virgin olive oil
  • 1 teaspoon Dijon mustard
  • 1 TBS water
Instructions
  1. 1. In a small sauce pot, fill halfway with water and bring to a rolling boil. Dip basil leaves into the water to blanch, for 15 seconds each.** Place leaves on a few layers of paper towels, and squeeze to dry out the water.
  2. 2. In a food processor bowl, add all the ingredients, and process for 30 seconds or until everything is well combines. Scrape down the side and mix for 30 more seconds.
  3. 3. Refrigerate for 30 minutes to meld the flavors. Serve.
Recipe Notes

**Step 1 prevents basil from turning black after you cut it. This will keep your dip looking green, instead of disgusting 🙂

Copycat Bang Bang Tofu

Published Jan 19, 2015 by Allyson
This post may contain affiliate links. Read my disclosure policy.

Copycat Bang Bang Tofu is a delicious vegetarian version of Bonefish Grill's Bang Bang Shrimp!

Copycat Bang Bang Tofu is a delicious vegetarian version of Bonefish Grill's Bang Bang Shrimp!

I used to love ordering the most amazing Bang Bang shrimp from Bonefish Grill.  The sauce is spicy yet sweet, and so delicious! I wanted a vegetarian style dish though, so I decided to make the sauce with a delicious battered style tofu. This copycat Bang Bang Tofu is a match made in heaven!

I've shared several 'bang bang' recipes with you such as Bang Bang Shrimp Rice Bowls (Bonefish Grill copycat), Air Fryer Bang Bang Shrimp (with lightened sauce), Bang Bang Shrimp Quesadillas, and Bang Bang Chicken (Instant Pot) and they have all been a hit.

Copycat Bang Bang Tofu is a delicious vegetarian version of Bonefish Grill's Bang Bang Shrimp!

I love tofu. I love how many different ways you can cook it. I love that people say they hate tofu, but then when I make them one of MY tofu recipes, they all of a sudden like it.

Tofu, like most other things, is very dependent on how you cook it, and most people just don’t know how. So, if you can learn to cook tofu correctly (which is NOT hard), I promise you that you will like it and even eat it regularly.

Once you learn how to cook the tofu, then you can make this amazing sauce and have your own Copycat Bang Bang Tofu at home!

Copycat Bang Bang Tofu is a delicious vegetarian version of Bonefish Grill's Bang Bang Shrimp!

The thing I love most about the Bang Bang Tofu sauce, is that it is so spicy, yet not mouth burning. It has just the right amount of spice, and it blends with the tofu and crispy tofu crust perfectly.

You can use this sauce in so many recipes, including my popular ones; Bang Bang Chicken, Bang Bang Shrimp Tacos, Bang Bang Shrimp Quesadillas, Bang Bang Shrimp Rice Bowls, and Bang Bang Shrimp Egg Rolls!

Copycat Bang Bang Tofu is a delicious vegetarian version of Bonefish Grill's Bang Bang Shrimp!

I ended up serving this Bang Bang Tofu over rice, because I had lots of extra sauce, and then I added more sauce to the rice. It was amazing. Everything is just a vehicle for sauce, right?!

You could also serve this tofu over vegetables, cauliflower rice, quinoa, or just by itself. The options are endless.

Like tofu as much as I do? Check out these other recipes from Domestic Superhero

  • General Tso’s Tofu (Vegetarian)
  • Crispy Honey Sesame Tofu
  • Spicy Asian Eggplant & Tofu Bowls
  • Buffalo Tofu Salad
  • Buffalo Tofu Wraps
  • Easy Baked Tofu

Make sure you don’t miss a thing! Follow Domestic Superhero on:

Facebook | Instagram | Pinterest | TikTok | Email

For NEW RECIPES delivered straight to your inbox, signup for our email list! 

5 from 1 vote
Print
Copycat Bang Bang Tofu
Prep Time
25 mins
Cook Time
10 mins
Total Time
35 mins
 

Copycat Bang Bang Tofu is a delicious vegetarian version of Bonefish Grill's Bang Bang Shrimp!

Course: Main Course
Cuisine: asian
Keyword: Copycat Bang Bang Tofu
Ingredients
  • 2 egg yolks
  • 1 ½ cups cold water
  • 1 ¾ cups white flour sifted
  • ¼ cup mayonnaise
  • ¼ cup Sriracha
  • 1 TBS rice vinegar
  • 2 TBS sugar
  • 1 block of extra firm tofu
  • Canola or vegetable oil; about ⅓ inch deep in a large nonstick pot or skillet
  • Green onions chopped
Instructions
  1. Drain the tofu: place a clean dish towel on a cutting board, folded in thirds. Place the tofu on top of the towel. Now, fold another clean dish towel into thirds, and place that on top of the tofu. Place something very heavy on top of the dish towel/tofu (I use a cast iron skillet), and let 'drain' for at least 20 minutes. The longer, the better.

  2. Cut the tofu into bite size pieces and set aside.

  3. Pour oil into a large stock pot (with tall sides)- it should be about ⅓-1/2 inch deep. Turn heat on medium/low.

  4. Place the egg yolks in a large bowl. Slowly add the ice water and using a whisk, blend well. Add the flour and quickly stir to mix- it should still have clumps.** Turn heat up to medium/high under the pot.

  5. Dip each tofu cube into the batter, and drop into very hot oil. Fry for about 2 minutes, flip and fry the other side; about 1 minute. Remove from the pan and place on paper towels to let some of the grease drain. Continue until tofu is all cooked. Do not overcrowd tofu while cooking.

  6. In a bowl mix mayonnaise, Sriracha, rice vinegar, and sugar. Toss the mixture with the tofu; coat evenly. Scatter green onions over the top.

  7. Serve with extra sauce for dipping, over rice or quinoa, and enjoy!
Recipe Notes

**Make this batter as soon as you are ready to start cooking - you don't want it sitting around.

Slow Cooker Creamy Coconut & Strawberry Steel Cut Oats

Published Jan 12, 2015 by Allyson
This post may contain affiliate links. Read my disclosure policy.

This shop has been compensated by Collective Bias, Inc. and Quaker. All opinions are mine alone. #MyOatsCreation #CollectiveBias

Slow Cooker Creamy Coconut & Strawberry Steel Cut Oats

As a working mom with two kids, I always struggle to get breakfast in the morning. I am usually up by 6am at the very latest, and then by the time 11am rolls around, I realize I still haven’t eaten, and I’m starving.  Finding a breakfast that would keep me full until lunch time was no easy task.  So, after I had my second son in July, I started looking for easy solutions. I heard about Quaker Steel Cut Oats and thought it would be a great option for me. I headed to Target to pick up some of the Quaker Steel Cut Oats.

Slow Cooker Creamy Coconut & Strawberry Steel Cut OatsSlow Cooker Creamy Coconut & Strawberry Steel Cut Oats

In Target there was even a display featuring Quaker Steel Cut Oats along with several recipe cards. They all looked delicious, but I had a recipe of my own in mind; Slow Cooker Creamy Coconut & Strawberry Steel Cut Oats.

Slow Cooker Creamy Coconut & Strawberry Steel Cut Oats

Seeing that time is really important to me (working full time, 2 kids, a blog..you know, the usual!), I decided to whip these up in the slow cooker. This way, I set it right before bed, and woke up to a delicious meal! I had no excuses not to dig in and enjoy!

Slow Cooker Creamy Coconut & Strawberry Steel Cut Oats

I prepared these steel cut oats with low fat coconut milk, which take these oats to the next level. It adds such a decadent creaminess that is so good.  After the oats were done in the morning, I topped them with some delicious toppings; strawberries, toasted coconut, and low fat sweetened condensed milk.  I read somewhere a while ago about using sweetened condensed milk with oatmeal, and I happened to have some left over from another recipe, so I tried it.  I am so glad that I did, because it pairs perfectly with this recipe and really brings everything together.  Of course, you could use other fruit; blueberries, raspberries, peaches (ohhh, peaches and cream!), bananas…they would all be great options. Or you could use them all! Target also has some fun options (chia seeds, goji berries, fried fruits, nuts) to add to the Steel Cut Oats, so I would love to try those as well.

Slow Cooker Creamy Coconut & Strawberry Steel Cut Oats

All in all, this recipe is quick, easy, and good for you! What more could you ask for? I love these Quaker Steel Cut Oats and now I have no excuses to skip breakfast! 

Print
Slow Cooker Creamy Coconut & Strawberry Steel Cut Oats
Ingredients
  • 1 cup Quaker Steel Cut Oats
  • 2 -14 oz cans light coconut milk
  • ½ cup water
  • 2 TBS brown sugar
  • 1-½ TBS butter cut into small pieces
  • ½ teaspoon cinnamon
  • ½ teaspoon nutmeg
  • ½ teaspoon vanilla
  • ¼ teaspoon salt
  • 1 cup sliced fresh strawberries
  • 4 TBS low fat sweetened condensed milk
  • ⅓ cup shredded coconut toasted
  • cooking spray
Instructions
  1. 1. Spray inside of 3-½ quart (or larger) slow cooker with cooking spray. Add oats, coconut milk, water, brown sugar, butter, cinnamon, nutmeg, vanilla, and salt to slow cooker. Stir until mixed, cover, and cook on low for 7 hours.
  2. 2. Remove cover, add sliced strawberries and mix using a spatula. Spoon oatmeal into bowls, top with toasted coconut and a tablespoon of sweetened condensed milk. Dig in!
Recipe Notes

To reheat single servings: Put 1-cup cooked oatmeal in microwave proof bowl. Add ⅓ cup milk or water. Microwave on high for 1 minute and stir. Continue cooking for another minute, or until hot.
Recipe can be doubled in 6-quart or larger slow cooker. Increase cooking time 1 hour.
Freezes well.

You can also connect with me here:

Thanks for visiting!

- Allyson

Buffalo Tofu Salad

Published Jan 7, 2015 by Allyson
This post may contain affiliate links. Read my disclosure policy.

Crispy fried tofu doused in creamy ranch and spicy buffalo sauce then served over a delicious salad, makes the best Buffalo Tofu Salad! It's the perfect lunch or dinner!

Crispy fried tofu doused in creamy ranch and spicy buffalo sauce then served over a delicious salad, makes the best Buffalo Tofu Salad! It's the perfect lunch or dinner!

I have such a love affair with buffalo sauce, it’s not even funny. This buffalo tofu salad was a no-brainer because I love buffalo sauce over a crispy crunch! Making crispy tofu is easy as well, so this is the perfect combination! Want more of a sandwich, I also have a recipe for a Buffalo Tofu Wrap!

Crispy fried tofu doused in creamy ranch and spicy buffalo sauce then served over a delicious salad, makes the best Buffalo Tofu Salad! It's the perfect lunch or dinner!

Crispy tofu over a delicious green salad; then adding celery, tomatoes, tortilla chip crumbles, bleu cheese, and creamy ranch is the perfect combination. I could eat this salad every day. Don't say, “Oh, I don’t like tofu,” because you would never even know there is tofu in this salad unless I told you. After frying it and drenching it in homemade buffalo sauce, there is no way you can’t like tofu. No way.

Want a meat-eater version? You can try out this Buffalo Chicken salad or Buffalo Chicken Sandwich!

How to make Buffalo Tofu Salad:

**scroll down for full ingredients list and printable directions**

  • In a heavy bottom stock pot with high sides, heat ½ cup of oil over medium high heat. Taking cubes of tofu, dunk into corn starch, evenly coating, and then drop into oil.
    • This may need to be done in 2 or 3 batches, do not over crowd the tofu.
  • Fry for 2-3 minutes, or until crispy (if your oil doesn't cover the tofu, you will need to flip it to crisp the opposite side). Remove from oil with a slotted spoon and set on paper towels. Continue until all tofu is fried.
  • Place tofu into a small bowl and toss with ⅓ cup of homemade buffalo sauce until evenly coated. Set aside.
  • Using 2 large salad bowls, add lettuce to each bowl. Top with celery, tomatoes, tortilla chips, ¼ cup of bleu cheese crumbles (on each salad). Add ½ of the tofu to each salad. Pour ¼ cup ranch dressing over each salad. Toss to combine.
  • Add more buffalo sauce if you like it spicier!
Crispy fried tofu doused in creamy ranch and spicy buffalo sauce then served over a delicious salad, makes the best Buffalo Tofu Salad! It's the perfect lunch or dinner!

Like Buffalo Sauce as much as I do? Check out these other buffalo recipes!

  • Instant Pot Buffalo Chicken Dip
  • Air Fryer Buffalo Cauliflower Bites (No Oil)
  • Buffalo Chicken Quesadillas (Grilled)
  • Instant Pot Buffalo Chicken Lettuce Wraps
  • Buffalo Chicken Fries
  • Buffalo Chicken Lasagna

Make sure you don’t miss a thing! Follow Domestic Superhero on:

Facebook | Instagram | Pinterest | TikTok | Email

For NEW RECIPES delivered straight to your inbox, signup for our email list! 

Print
Buffalo Tofu Salad
Prep Time
5 mins
Cook Time
10 mins
 

Crispy fried tofu doused in creamy ranch and spicy buffalo sauce then served over a delicious salad, makes the best Buffalo Tofu Salad! It's the perfect lunch or dinner!

Course: Main Course
Cuisine: American
Keyword: buffalo tofu salad
Servings: 2 salads
Ingredients
  • 1 package extra firm tofu drained and cubed
  • ½ cup cornstarch
  • ⅔ cups buffalo sauce divided (see recipe below for homemade sauce)
  • 1 cup vegetable or canola oil
  • 8 cups of chopped romaine
  • 3 celery stalks diced and divided in half
  • 2 plum tomatoes diced and divided in half
  • 2 handfuls white corn tortilla chips crumbled (use your hands!) and divided in half
  • ½ cup ranch dressing
  • ½ cup bleu cheese crumbles
Instructions
  1. In a heavy bottom stock pot with high sides, heat ½ cup of oil over medium high heat. Taking cubes of tofu, dunk into corn starch, evenly coating, and then drop into oil. This may need to be done in 2 or 3 batches, do not over crowd the tofu. Fry for 2-3 minutes, or until crispy (if your oil doesn't cover the tofu, you will need to flip it to crisp the opposite side). Remove from oil with a slotted spoon and set on paper towels. Continue until all tofu is fried.
  2. Place tofu into a small bowl and toss with ⅓ cup of buffalo sauce until evenly coated. Set aside.

  3. Using 2 large salad bowls, add lettuce to each bowl. Top with celery, tomatoes, tortilla chips, ¼ cup of bleu cheese crumbles (on each salad). Add ½ the tofu to each salad. Pour ¼ cup ranch dressing over each salad. Toss to combine.
Recipe Notes

Homemade Buffalo Sauce Recipe.

50+ Healthy Dinner Recipes for the New Year

Published Dec 31, 2014 by Allyson
This post may contain affiliate links. Read my disclosure policy.

50+ Healthy Dinner Recipes for the New Year - this is a great way to start the new year!

It’s New Year’s eve and you know what that means…..time to make all those resolutions for the year to come! I don’t know what the exact statistic is, but something like 75% or more of people make a resolution to be healthier in some aspect. So, what better way to start the year, than with a TON of healthy recipes. Bringing healthy food into the kitchen, and taking unhealthy food out, is a great way to get on track. I have put together a list of over 50 recipes to get you started! Pin this for later and visit these great sources. There are only 50+ recipes here, but if you take some time to browse the various blogs linked here, you will find hundreds more.

Quinoa Fried Rice

Quinoa Fried Rice

Skinny Mushroom Stroganoff (3)  Skinny Vegetable Cajun Pasta (2)

Skinny Mushroom Stroganoff / Skinny Vegetable Cajun Pasta

Prawn-curry-portrait

King Prawn Curry

Sunshine-Citrus-Chicken-Recipe-MyRainbow-shop-cbias-4 Skinny Creamy Cauliflower Soup1

Sunshine Citrus Chicken / Skinny Cauliflower Soup

Skinny Lasagna Soup 1

Skinny Lasagna Soup

DSC_1105  IMG_5054-e1397782331836-682x1024  Quick-Easy-Chicken-Fajitas-3

Kale and Corn Harvest Fried Rice / Light and Easy Fish Tacos / Quick and Easy Chicken Fajitas

Broccoli-Quinoa-Casserole-10

Broccoli Quinoa Casserole

warm-quinoa-salad-healthy-comfort-food-with-corn-and-beans  skinny-fettuccinni-alfredo

Warm Quinoa Salad / Skinny Fettuccine Alfredo

IMG_9467-682x1024

Lamb Tacos with Mango Salsa

weight-watchers-peanut-sesa   Pecan Crusted Halibit 8

Weight Watchers Peanut Sesame Noodles / Pecan Crusted Trout

beef-and-mushrooms-7

Beef and Mushrooms

crab9 Pecan Crusted Chicken- Weight Watchers (8)

Low Carb Crab Cakes with Mustard Sauce / Pecan Crusted Fried Chicken

Honey Sesame Chicken

Crock Pot Honey Sesame Chicken Lettuce Wraps

Cheesy Vegetable Chowder4Roasted Tomato and Red Pepper Soup05

Skinny Cheesy Vegetable Chowder / Roasted Red Pepper Soup with Grilled Cheese Croutons

crock-pot-teriyaki-chicken-6

Crock Pot Teriyaki Chicken

Bruschetta Chicken 1  Slow Cooker Buffalo Chicken Lettuce Wraps 4

Skinny Bruschetta Chicken / Crock Pot Buffalo Chicken Lettuce Wraps

Easy Chicken and Sausage Jambalaya

Easy Chicken and Sausage Jambalaya

asianpork2  Crock Pot Thai Pork (1)

Crock Pot Asian Pork w/Mushrooms / Crock Pot Thai Peanut Pork

Skinny Enchilada Soup 2 

Skinny Tomato Basil Soup  Slow Cooker Chicken Tortilla Soup 1  Slow Cooker Loaded Potato Soup 1 

Skinny Tomato Basil Soup / Slow Cooker Chicken Tortilla Soup / Slow Cooker Loaded Potato Soup

Vegetarian Nacho Soup 1

Vegetarian Nacho Soup

chickpea 8  Whie Bean Provolone Panini  (5)

Chickpea and Brown Rice Burgers / White Bean and Provolone Panini

shakshuka3

Shakshuka

Artichoke and Tomato Frittata5  Mexican Baked Eggs

Artichoke and Tomato Frittata / Mexican Baked Eggs

Black Bean and Sweet Potato Baked Flautas

Black Bean & Sweet Potato Baked Flautas

Skinny Mexican Stuffed Peppers  Taco Bell Mexican Pizzas

Skinny Mexican Stuffed Peppers / ‘Taco Bell’ Mexican Pizzas

Stuffed Shells- Weight Watchers (8)

Weight Watchers Spinach and Mushroom Stuffed Shells

Mexican Quinoa Bowl 1  Quick Veggie & Quinoa Thai Coconut Curry 

Mexican Quinoa Bowl / Quick Veggie Quinoa Coconut Curry

Mushroom and Goat Cheese Flatbread with Balsamic Glaze

Mushroom and Goat Cheese Flat Bread with Balsamic Glaze

Spinach and Feta Quinoa Cakes with Lemon Dill Sauce 2  Winter-Steak-Salad-00757

Spinach and Feta Quinoa Cakes with Lemon Dill Sauce / Winter Steak Salad

Brown-Rice-Salad-3_wm-with-label

Seared Tuna Brown Rice Salad

roasted-veggie-grilled-cheese-watermark-682x1024  Buffalo Tofu Wrap (4) edited

Roasted Veggie and Goat Cheese Grilled Sandwiches / Buffalo Tofu Wraps

chicken enchilada peppers   Baked Tofu

Chicken Enchilada Stuffed Peppers / Easy Baked Tofu

Creole Tofu with Onions and Peppers

Creole Tofu with Onions and Peppers

HAPPY NEW YEAR!

You can also connect with me here:

Thanks for visiting!

- Allyson

Skinny Vegetable Cajun Pasta

Published Dec 29, 2014 by Allyson
This post may contain affiliate links. Read my disclosure policy.

Skinny Vegetable Cajun Pasta

Now that the New Year is approaching us, I know everyone vows to eat healthier. I love eating healthy, but I also love indulging once in a while. It really is about finding balance, and being able to enjoy the things you love, and not feel like you are missing out. That’s why when I altered this recipe from Skinny Taste, I knew it would be great. I love creamy pastas, but let’s face it, pasta is not very healthy…especially when you load it up with creamy cheesy sauce.  Making simple substitutes in this recipe make all the difference, and even though I didn’t, you could also make things healthier by using whole wheat pasta.  I absolutely love this Skinny Vegetable Cajun Pasta, it’s so flavorful and delicious!

Skinny Vegetable Cajun Pasta

You can switch up the veggies in this pasta too, or add chicken or shrimp if you want to add some more protein. I love the peppers, onions, and mushrooms though; it’s a great combination.  Topping the pasta with green onions gives a nice extra crunch, and of course the delicious Cajun seasoning (this stuff is great on everything) spices things up wonderfully.

Skinny Vegetable Cajun Pasta

Print
Skinny Vegetable Cajun Pasta
Ingredients
  • ⅓ cup skim milk
  • 1 TBS flour
  • 3 TBS low fat cream cheese
  • 8 ounces uncooked linguine
  • 2 teaspoon Cajun seasoning
  • 1 teaspoon garlic powder
  • 1 TBS olive oil
  • 1 medium red bell pepper thinly sliced
  • 2 medium yellow bell pepper thinly sliced
  • 8 oz fresh mushrooms sliced
  • 1 red onion sliced
  • 3 cloves garlic minced
  • 3 medium tomatoes diced
  • 1 cup vegetable broth
  • fresh cracked pepper
  • 3 scallions chopped
  • salt to taste
Instructions
  1. 1. In a small blender make a slurry by combining milk, flour and cream cheese. Set aside. Place peppers, onions, and garlic in a medium bowl. Season generously with Cajun seasoning, garlic powder and salt.
  2. 2. Prepare pasta according to package directions.
  3. 3. Heat a large heavy nonstick skillet over medium-high heat; add olive oil to the skillet and reduce to medium; add peppers, onions, and garlic to skillet, sauté 3-4 minutes. Add mushrooms and tomatoes; sprinkle some more Cajun seasoning over top, and sauté 3-4 more minutes or until vegetables are tender. Season with ¼ teaspoon salt, garlic powder and fresh cracked pepper to taste.
  4. 4. Reduce heat to medium-low; add vegetable broth and pour in slurry stirring for 2 minutes. Add linguine and toss well to coat. Top with chopped scallions and serve while hot.
Recipe Notes

Makes about 7 cups.

Want more healthy recipes? Check out over 100 healthy recipes here!

You can also connect with me here:

Thanks for visiting!

- Allyson

19 Handmade Gift Ideas

Published Dec 11, 2014 by Allyson
This post may contain affiliate links. Read my disclosure policy.

19 Handmade Gift Ideas

Handmade gifts during the holidays can really mean a lot to some people. There are simple handmade gifts and more elaborate handmade gifts as well. I put together a list of the simpler ones, because I don’t have much time around the holidays, but I love getting a little crafty and making a homemade gift. From food to art, there is definitely something for everyone! Kids can help with a lot of these gifts too, which is always nice and fun for them!

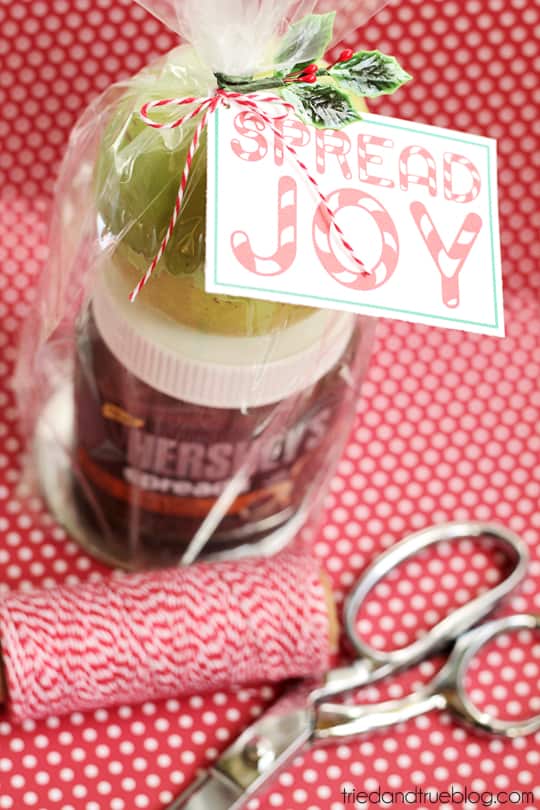
Quck and easy gift that comes together in minutes! #SpreadPossibilities #hersheysheroes

Last Minute Chocolate Dip Gift

freezer paper stenciled onesies

DIY Freezer Paper Stenciled Onesies

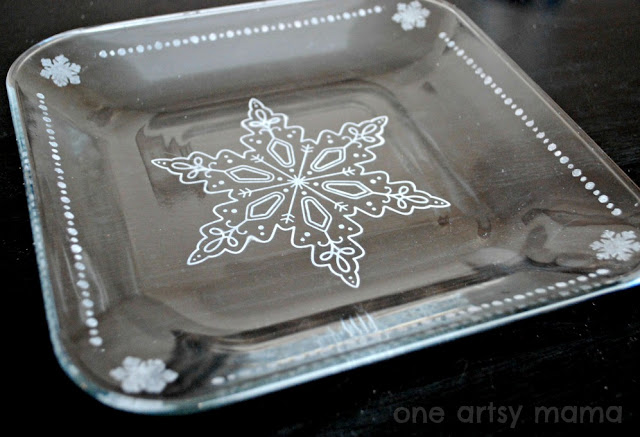
Stenciled Holiday Mug


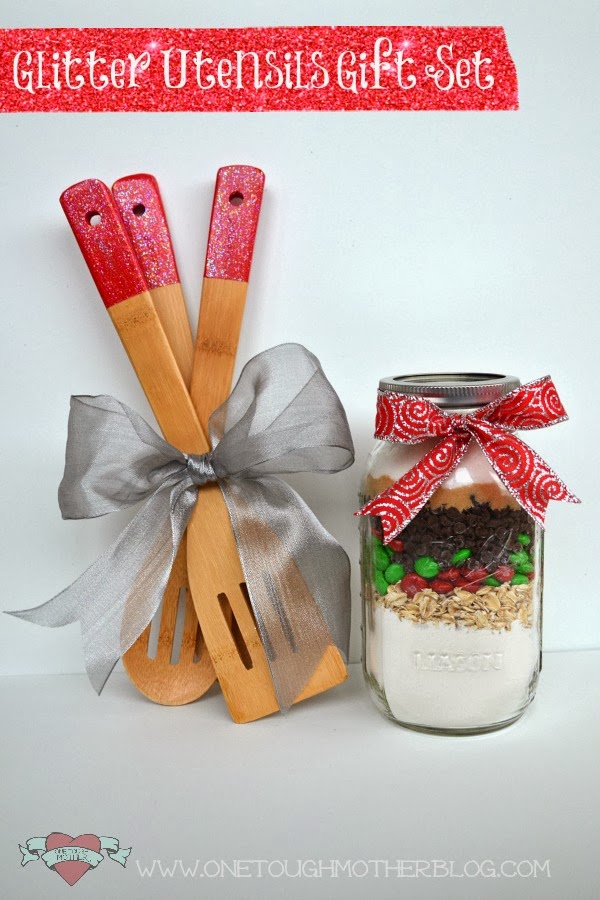
Glitter Utensils Gift Set

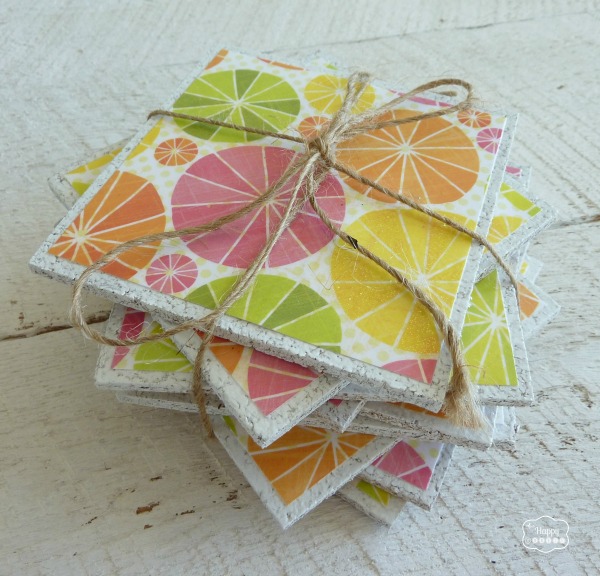
Easy DIY Cork Coasters by The Happy Housie for Domestic Superhero tied

DIY Cork Coasters

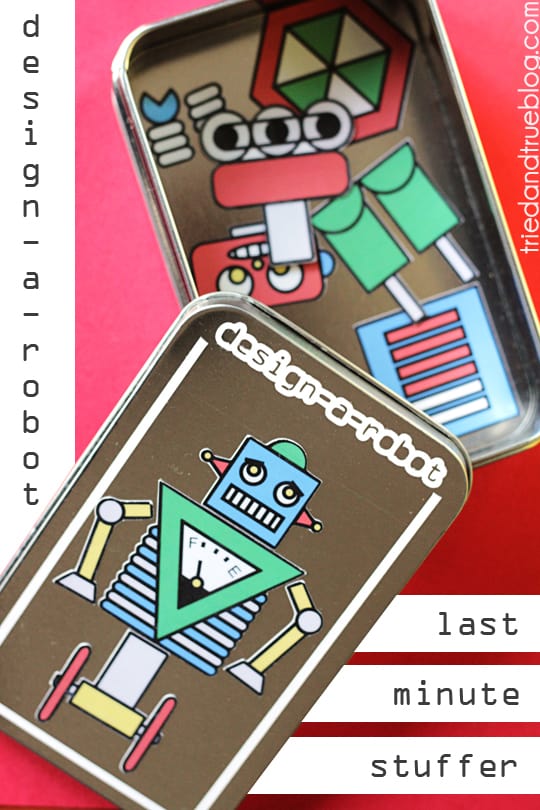
Use your Silhouette to make a last-minute Robot Tin Stocking Stuffer!

Last Minute Design A Robot Stocking Stuffer

Handmade Holiday Tableware

DIY Felt Fall Air Fresheners

DIY Felt Air Fresheners

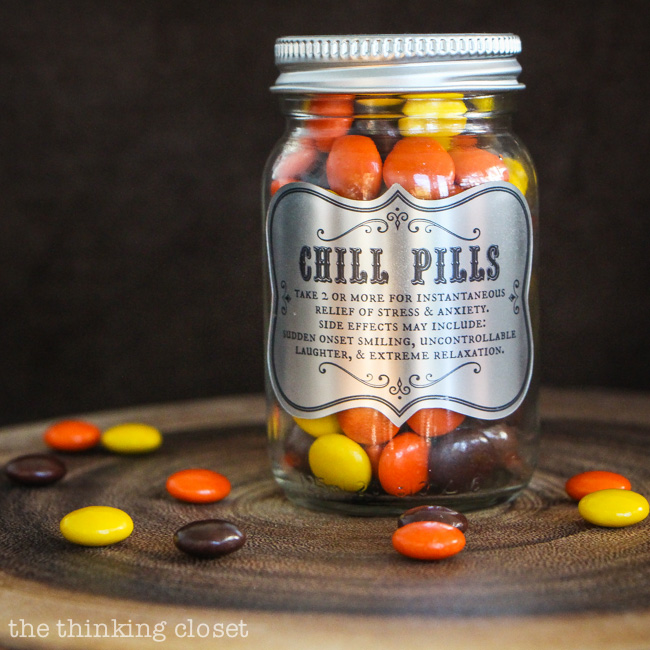
Chill Pills!  A great gag gift idea and all you need is a glass jar, some candies, and the FREE printable labels from this Silhouette tutorial via thinkingcloset.com!

Chill Pills Gag Gift

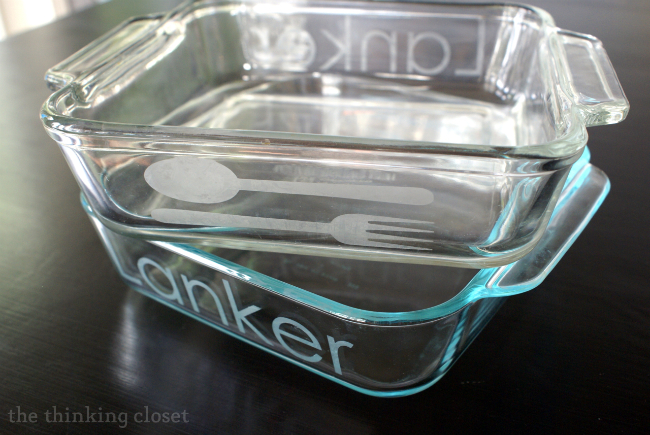
Personalized Etched Casserole Dishes...the full step by step tutorial!  via thinkingcloset.com

Personalized Etched Glass Bakeware

DIY Infinity Scarf | rickabamboo.com | #scarf #DIY

DIY Infinity Scarves

Vintage Bicycle Ad Image Transfer

Vintage Bicycle Transfer Platter

Create these fun DIY Tea Towels with this simple tutorial! via cherishedbliss.com

DIY Tea Towels 

Chalkboard Serving Tray

DIY Chalkboard Serving Tray

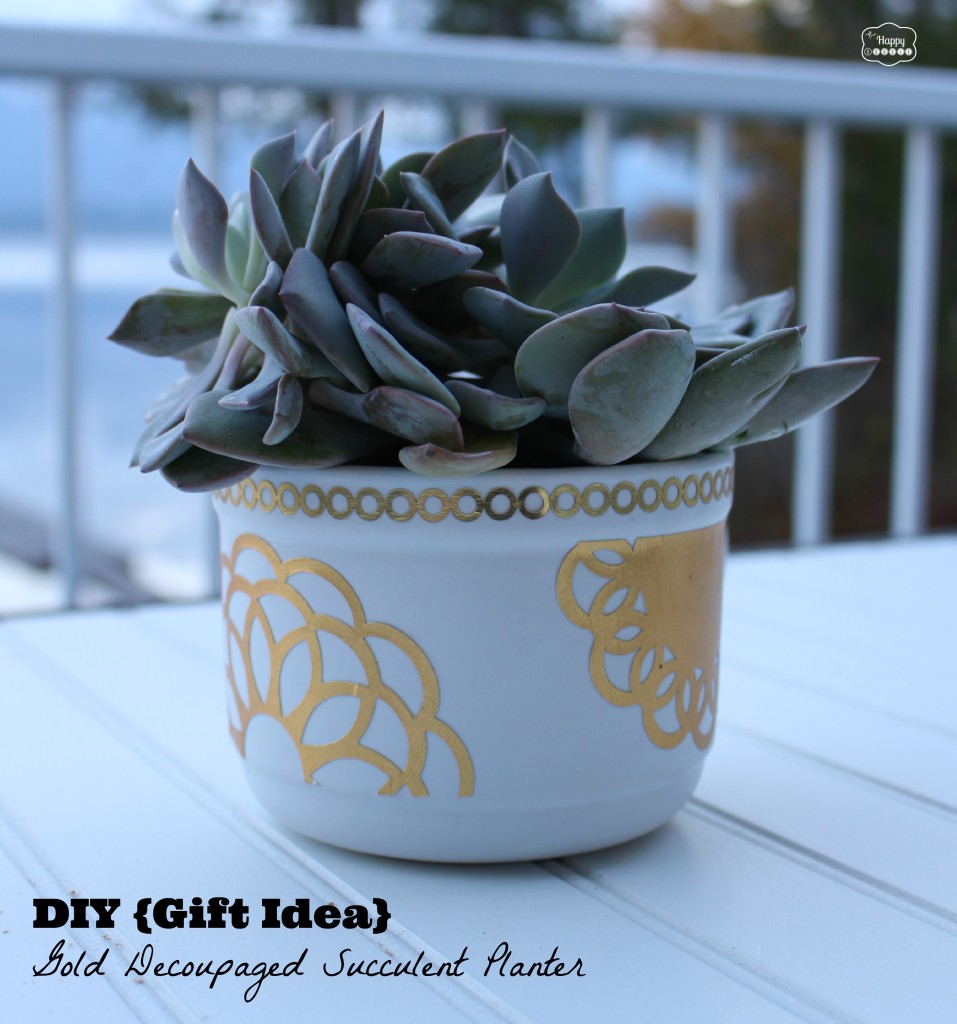
DIY Gift Idea Gold Decoupaged Succulent planter in a Mug at thehappyhousie #MSholiday

Gold Decoupaged Mugs

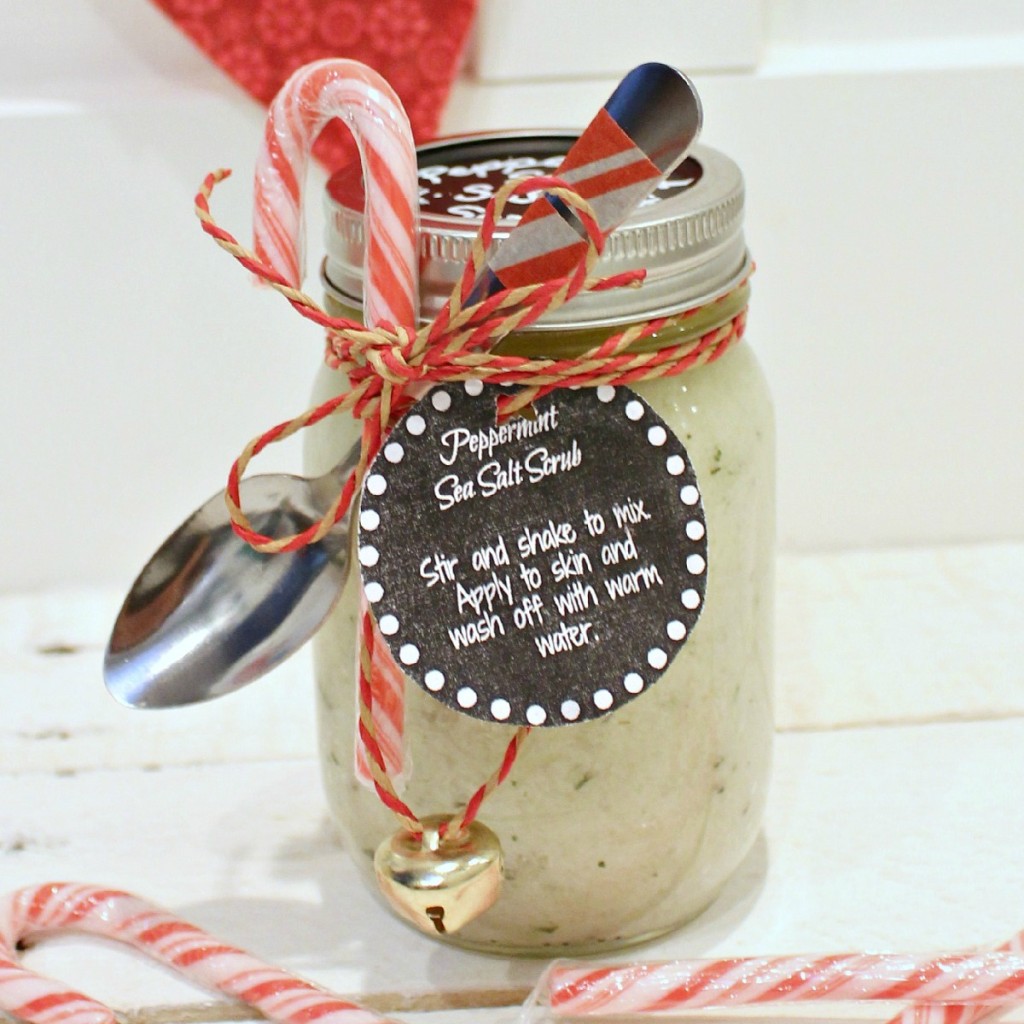
The Happy Housie DIY Peppermint Sea Salt Scrub wrapped with spoon closeup

DIY  Peppermint Sea Salt Scrub

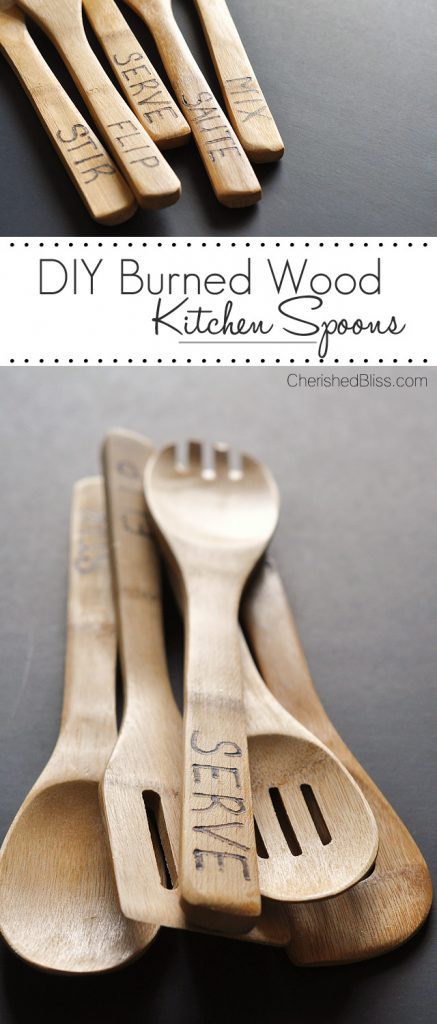
Add a little something extra to your kitchen with these DIY Wood Burned Spoons

DIY Wood Burned Serving Spoons

father's day 3

DIY Easy $10 Photo Block

DIY Monogrammed Canvas

Need some more holiday inspiration?  Check out these great posts from Domestic Superhero! 

Cheap-and-Easy-DIY-Holiday-Gift-Wrapping-with-Kraft-Paper-free-printables-and-bakers-twine.jpg

Cheap and Easy DIY Wrapping Ideas


Easy-Closepin-Holiday-Card-Wreath.jpg

Clothespin Holiday Card Wreath

19-Creative-Gift-Wrap-Ideas.jpg

19 Creative Holiday Gift Wrapping Ideas

snowglobe1.jpg

DIY Snow Globes 

Scrabble-Ornaments-5.jpg

DIY Scrabble Ornaments 

Handprint-Santa-Salt-Dough-Ornaments.jpg

Handprint Santa Salt Dough Ornaments

16-Free-Holiday-Gift-Tag-Printables.jpg

16 Free Printable Holiday Gift Tags

Cranberry-Walnut-Bread-1_thumb.jpg    The-Perfect-Holiday-Appetizer-Cranberry-Baked-Brie-_thumb.jpg

Cranberry Walnut Bread / Cranberry Baked Brie 

You can also connect with me here:

Thanks for visiting!

- Allyson

Holiday Cranberry Cheesecake Bars with Chocolate Drizzle

Published Dec 3, 2014 by Allyson
This post may contain affiliate links. Read my disclosure policy.

Holiday Cranberry Cheesecake Bars with Chocolate Drizzle

Now that we are into December, it’s time to start holiday planning, right?! These Holiday Cranberry Cheesecake Bars with Chocolate Drizzle would have been great around Thanksgiving time, but they are even more festive for Christmas. Cranberries are plentiful around this time, and you can always find them in any grocery store. I like the Ocean Spray cranberries which can usually be found in the produce section in a plastic bag.  This recipe is topped with warm dark chocolate which really adds to the flavor of the cranberry, but you could also make this recipe without the drizzle, or with a cranberry sauce compote or drizzle…they would all be delicious! That’s the thing I really like about this dessert; it’s so versatile!

Holiday Cranberry Cheesecake Bars with Chocolate Drizzle

This recipe is also very easy and fairy quick to make, even though your guests will feel like you spent hours making it! If you prefer more of a pie feel, you could make this in a pie crust as well, more like a regular cheesecake. I usually use one full fat cream cheese and one ⅓ fat (nuefatchel cheese) block to cut a little bit of the calories. You can use whatever you want in terms of fat content, and it will still turn out wonderful!

Holiday Cranberry Cheesecake Bars with Chocolate Drizzle

Print
Holiday Cranberry Cheesecake Bars with Chocolate Drizzle
Ingredients
  • Ingredients
For the crust
  • 5 ounces graham crackers
  • 2 TBS sugar
  • 4 TBS butter melted
For the filling
  • 1 cup fresh cranberries
  • 1 cup granulated sugar divided
  • ⅓ cup orange juice
  • 2 8-ounce packages of low fat cream cheese, softened
  • 1 teaspoon vanilla
  • 2 eggs
  • dash of salt
For topping
  • 4 oz dark chocolate broken into pieces
  • 1 TBS butter
Instructions
For the Crust
  1. 1. Preheat the oven to 350°F. Spray an 8 inch baking dish with nonstick cooking spray. In a food processor, pulse the graham cracker and sugar until mixed and ground. Add the butter and pulse until incorporated. Dump the mixture in the baking dish and press the crumbs into the bottom of the baking dish using the bottom of a glass or something alike. Bake until slightly firm, about 12 minutes. Place on a cooling rack and cool completely.
For the filling
  1. 1. In a small saucepan, combine cranberries, ⅓ cup of the sugar, and juice. Bring to a boil and cook for 6 or so minutes, or until the cranberries pop and the mixture is syrupy. Cool for about 30 minutes and set aside.
  2. 2. Combine the remaining sugar, cream cheese, and vanilla in a large bowl and beat until smooth. Add the eggs, one at a time, and beat until combined. Add a dash of salt and beat until combined.
  3. 3. Pour the cream cheese mixture on top of the cooled crust. Drop dollops of the cranberry mixture into the cream cheese mixture and swirl with a chopstick. They may sink into the cheesecake which is fine.
  4. 4. Bake at 350°F until the cheesecake is set but still slightly jiggly in the center, about 50 minutes.
  5. Remove from oven and cool completely on a wire rack. Cover and chill the cheesecake until firm, at least 4 hours. Cut into small squares.
  6. 5. In a microwave safe bowl, add dark chocolate and butter. Microwave for 30 seconds, mix with spoon, then microwave in 15 second increments, stirring every 15 seconds, until melted. This should not take long.
  7. 6. Using a spoon, drizzle chocolate over the top of the cranberry bars. Serve and enjoy!
Recipe Notes

Bars should be stored in the fridge, up to 1 week.

Like cranberries? Try out these other cranberry recipes from Domestic Superhero

Quick Cranberry Holiday Mocktail Cranberry Ginger Holiday Cocktail

Quick Cranberry Holiday Mocktail / Cranberry Ginger Cocktail

The Perfect Holiday Appetizer - Cranberry Baked Brie  cranberry margs 3

Cranberry Baked Brie / Cranberry Margaritas

Cranberry Walnut Bread 1

Cranberry Walnut Bread with a Crumble Topping

You can also connect with me here:

Thanks for visiting!

- Allyson

Handprint Santa Salt Dough Ornaments

Published Dec 1, 2014 by Allyson
This post may contain affiliate links. Read my disclosure policy.

Handprint Santa Salt Dough Ornaments

Sometimes when you are a blogger, you have all these projects and recipes and things to do, and you do them, but then never get a chance to post them! I have tons of projects and recipes just waiting for a rainy day, because I haven’t had the chance to go through and edit, write a post, and do everything else that goes along with creating a blog post.  I know most people probably think that writing a blog post is pretty easy, however, it’s not! The projects or cooking takes time, staging and taking the photos takes a lot of time, then editing the photos takes time….it all takes a lot of time.  So, understandably things fall by the wayside. Why am I telling you this? Because in case you didn’t notice, these ornaments have the year on them…and it’s not 2014…it’s 2012.  Yes, these are from TWO years ago. How crazy is that?! I have been wanting to post these for TWO years, but haven’t gotten around to it. Geez!  Well, finally the time has come to share this awesome project and recipe with you!

Kids LOVE making things, right? These salt dough ornaments are no exception. I would say that this handprint ornament probably need to be done with a kid 4 or under though, because the bigger the hand, the heavier the ornament, and the last thing you want is your tree branch sagging to the floor, right?

Make your dough: I cup of salt, 2 cups of flour, 1 cup of water. Dump it all in a stand mixer and mix it up with the paddle attachment….or, mix it in a bowl with a wooden spoon by hand, until the dough comes together nice and smooth.  Roll the dough out, about ¼ inch thick.  Then have the kids stick their hands in there good and deep! With a toothpick, poke a couple holes all around the outside of the hand, and trim around the hand with a butter knife  in whatever shape you’d like.  Next, take a straw and poke it through at the bottom of your handprint (by the wrist, don’t make the same mistake as I did, your hand will be hanging upside down so poke it at the wrist, not the fingers…) all the way to the other side and pop that little bit of dough out. This is where you will put the string later on. Lastly, pop these into the oven on a baking sheet lined with parchment paper. Cook for about 3 hours at 250 degrees F.  Remove and let cool.  After they are cooled then you can do a quick spray of clear coat on the top, this way the paint wont chip off and it looks nice and shiny! 

Then you can get your white, red, black, and tan colored craft paints and get to work making your little Santa face! Clearly, I’m no artist and these do not need to be perfect, so let the kids help and have fun!

DSC_8525

I can’t wait to do this project with my little 4 month old this year! His little baby hands are going to be SO cute!!

Like making homemade ornaments? How about checking out these DIY Scrabble Ornaments! So cute and fun!

Scrabble Ornaments (5)

Need some more holiday inspiration?  Check out these great posts from Domestic Superhero! 

Cheap-and-Easy-DIY-Holiday-Gift-Wrapping-with-Kraft-Paper-free-printables-and-bakers-twine.jpg

Cheap and Easy DIY Wrapping Ideas


Easy-Closepin-Holiday-Card-Wreath.jpg

Clothespin Holiday Card Wreath

19-Handmade-Gift-Ideas_thumb.jpg

19 Handmade Gift Ideas for the Holidays 

19-Creative-Gift-Wrap-Ideas.jpg

19 Creative Holiday Gift Wrapping Ideas

snowglobe1.jpg

DIY Snow Globes 

16-Free-Holiday-Gift-Tag-Printables.jpg

16 Free Printable Holiday Gift Tags

Cranberry-Walnut-Bread-1_thumb.jpg    The-Perfect-Holiday-Appetizer-Cranberry-Baked-Brie-_thumb.jpg

Cranberry Walnut Bread / Cranberry Baked Brie 

You can also connect with me here:

Thanks for visiting!

- Allyson

Chocolate Chip Quadruple Nut Crunch Cheesecake

Published Nov 24, 2014 by Allyson
This post may contain affiliate links. Read my disclosure policy.

This shop has been compensated by Collective Bias, Inc. and its advertiser. All opinions are mine alone. #GonutsforNuts #CollectiveBias

Chocolate Chip Quadruple Nut Crunch Cheesecake in a delicious chocolate graham cracker crust and topped with caramel and chocolate drizzle! Wow!

Have y’all heard of the Planters Seasonal Nuts? I am OBSESSED with them. Like, literally obsessed. They have a variety of different combinations, but my absolute favorite is the Winter Spice Blend. There are FOUR different types of nuts and these delicious crunchy sesame sticks, all covered in this sweet by savory spice blend. They are SO good.  I decided to use them to make a delicious cheesecake because nuts + chocolate chips + cheesecake + chocolate + caramel = nothing short of the most amazing cheesecake you’ve ever had. You can pick up these delicious Planter’s Nut Blends at Walmart. There is a huge sled display featuring the nuts, but unfortunately my Walmart didn’t have that out yet! I found them on a couple different end caps though!

peanut collage 

IMG_8864 IMG_8867

They are so yummy.  This cheesecake looks so decadent and difficult to make, but trust me, it’s not. Cheesecake is super easy to throw together, and then adding the toppings is also quick and easy. If you want to impress your friends, make this cheesecake and bring it to whatever holiday/function/event/party/movie night. It’s appropriate anytime, and I swear you will be everyone’s new best friend once you make it.

Chocolate Chip Quadruple Nut Crunch Cheesecake in a delicious chocolate graham cracker crust and topped with caramel and chocolate drizzle! Wow!

Another thing I love about Planter’s Seasonal Nut Blends, is the Blippar app! You can download blippar for free on your apple, android, blackberry or windows device (learn how to download at: https://blippar.com/en/ - download).  After downloading and opening blippar, you can scan (or blip) one of the Planter's seasonal nut items. A mobile site will populate and provide a menu bar with the following choices: Take a Selfie with Mr. Peanut, browse a list of seasonal Planter's items, and browse recipes. I love using this app because it provides tons of recipe inspiration, and I also love the selfie function because who doesn’t love a good selfie?!

Chocolate Chip Quadruple Nut Crunch Cheesecake in a delicious chocolate graham cracker crust and topped with caramel and chocolate drizzle! Wow!

If you need more inspiration for the holiday’s, check out the Cooking Up Good website. They have recipes, sweepstakes, loyalty programs, coupons and more! What's not to love? If you're looking for a new dinner idea or a chance to win some awesome prizes, be sure to check it out!

Chocolate Chip Quadruple Nut Crunch Cheesecake in a delicious chocolate graham cracker crust and topped with caramel and chocolate drizzle! Wow!  Chocolate Chip Quadruple Nut Crunch Cheesecake in a delicious chocolate graham cracker crust and topped with caramel and chocolate drizzle! Wow!


Print
Chocolate Chip Quadruple Nut Crunch Cheesecake
Ingredients
  • 1 chocolate pie crust
  • 2 8- ounce packaged cream cheese I used lower fat cream cheese, softened
  • ½ cup sugar
  • ½ teaspoon vanilla
  • 2 eggs
  • ¾ cup milk chocolate chips
  • 1 cup Planters Winter Spice Seasonal Nuts chopped roughly
  • 6 TBS caramel sauce homemade or store bought
  • ½ cup semi sweet chocolate chips
  • 1 TBS butter
Instructions
  1. 1. Preheat your oven to 325 degrees F. In the bowl of a stand mixer (or glass bowl if using an electric mixer), add cream cheese, sugar, and vanilla and beat with the paddle attachment on medium until smooth. Add eggs, one at a time, beating until mixed but not over-mixed.
  2. 2. Place ½ cup milk chocolate chips in the bottom on the pie crust in an even layer. Fold the remaining ¼ cup milk chocolate chips into the cream cheese mixture. Carefully pour the cream cheese mixture into the pie crust and use a spatula or spoon to smooth the top.
  3. 3. Place in center of oven and bake for 40-45 minutes or until edges are set. Do not over-bake. Remove from oven and let cool completely on a wire rack. Once cooled, place in fridge for at least 3 hours or overnight.
  4. 4. In a microwave safe small glass bowl, place ½ cup semi sweet chocolate chips and butter. Microwave for 30 seconds, remove, mix with spoon, and then microwave in 15 second increments stirring in between until melted. This shouldn't take more than 2 minutes total time. Be careful to stir every 15 seconds or you will burn the chocolate.
  5. 5. Drizzle 2 TBS caramel sauce over the top of the cheesecake (this will help the nuts stick). Sprinkle the nuts over the top in an even layer. Then, drizzle chocolate across the top of the nuts, and then more caramel across the top of the chocolate.
  6. 6. Cut with a sharp knife and serve. Store in fridge up to 1 week.
Recipe Notes

*For a clean cut, wipe the knifes edge off between making cuts so there is no cheesecake on it.


You can also connect with me here:

Thanks for visiting!

- Allyson


Creole Tofu with Peppers and Onions

Published Nov 11, 2014 by Allyson
This post may contain affiliate links. Read my disclosure policy.

Tracking PixelThis is a sponsored post written by me on behalf of Imagine® Organic Culinary Simmer Sauces.

Creole Tofu with Onions and Peppers

When I first was looking through the new Imagine® Organic Culinary Simmer Sauces, I was initially intrigued by the Thai Coconut Curry and the Louisiana Creole sauce. 

Creole Tofu with Onions and Peppers 3  Imagine no watermark (6)

First, I decided to try out the Thai Coconut Curry simmer sauce in a Quick Veggie and Quinoa dish, which turned out excellent. I just love curry and this sauce was no exception.

Quick Veggie & Quinoa Thai Coconut Curry

Next I decided to try out the Louisiana Creole sauce, which reminded me of a delicious jambalaya.  Since I’m a vegetarian, I wanted to make it veggie friendly, and use tofu and veggies for the recipe.  After the tofu and veggies simmered in the Louisiana Creole sauce, the flavor was amazing.  I served it over rice and it was really a delicious, healthy, and filling meal.

Creole Tofu with Onions and Peppers 2

The main things I love about the Imagine® Organic Culinary Simmer Sauces are that they are easy to use, certified organic, they have no preservatives, artificial ingredients, genetically engineered ingredients, and no MSG. I also love how they come in the convenient pouch, and it makes enough to serve my whole family (4-5 people).  Of course, all the sauces are vegetarian and as an added bonus – gluten free. The ease in using them is awesome because all you need is one pan, and that makes clean up a cinch.

Creole Tofu with Onions and Peppers 4

Print
Creole Tofu with Onions and Peppers
Ingredients
  • 1 package Imagine® Organic Culinary Simmer Sauces in Louisiana Creole
  • 1 yellow onion sliced
  • 1 green pepper sliced
  • 1 teaspoon red pepper flakes
  • 1 package extra firm tofu drained and cute into bite size cubes
  • 2 cups cooked rice
  • ½ TBS olive oil
Instructions
  1. 1. In a non stick skillet, add olive oil, onions, and peppers. Saute for 3 minutes over medium/high heat. Add red pepper flakes and tofu. Saute another 2 minutes, stirring frequently. Add Louisiana Creole sauce pouch and stir.
  2. 2. Once the sauce starts simmering, cover and cook for 4-5 minutes, or until tofu is heated through. Remove from heat.
  3. 3. Serve ½ cup of the veggie mixture over ½ cup of rice.
  4. Enjoy!

This is a sponsored post written by me on behalf of Imagine® Organic Culinary Simmer Sauces

Like tofu as much as I do? Check out these other recipes from Domestic Superhero:

Creole Tofu with Onions and Peppers  Firecracker Tofu with Brown Rice  Bang Bang Tofu

Buffalo Tofu Salad  Buffalo Tofu Wrap (4) edited  Baked Tofu Parmesan 1

General Tso's Tofu 1

Baked Tofu

You can also connect with me here:

Thanks for visiting!

- Allyson

Holiday Cranberry Baked Brie

Published Nov 10, 2014 by Allyson
This post may contain affiliate links. Read my disclosure policy.

I am so excited to announce that I am part of the 2014 Holiday Cocktail Party Blog Hop!

2014 Holiday Cocktail Party Blog Hop

There are over 40 bloggers teaming up to bring you delicious appetizers, cocktails, mocktails, desserts, and sweet treats for the holidays! At the bottom of this post you will find links to all the other blogs, so be sure to click through to a couple and check out what they have! In a few weeks I am going to be posting another post, with ALL the recipes from the blog hop – so exciting! You can also search the internet for the recipes using the hastag #2014CocktailPartyHop

The Perfect Holiday Appetizer - Cranberry Baked Brie

For the Holiday blog hop I decided to make an appetizer, and as my readers know, I love me some cheese.  One of my friends was actually telling me a few weeks ago that she tells people that I have an affinity for cheese – like I’m the cheese girl or something. I’m not sure if it’s a good thing to be known for or not, but there is no denying that I love cheese any way you slice it. So for this holiday recipe, I decided to put together some creamy brie cheese, with some delicious sweet tangy homemade cranberry sauce.  Baking the brie for a few minutes, and then adding the hot cranberry sauce to the top is a to die for combination. It is so delicious. This is the perfect appetizer for holiday parties. It cooks up super quickly, and even making a homemade cranberry sauce only takes a few minutes.

The Perfect Holiday Appetizer - Cranberry Baked Brie 2

One tip for this recipe is that I highly recommend making this right before you will be serving it. If you want to prepare ahead of time, make the cranberry sauce and store in the fridge. Then when you are ready to make it, cook the cheese, and then add the cold cranberry sauce, and cook some more together. It cooks really quickly and takes little effort, so you can have it cooking as your guests arrive to your party, then pull it out and pop it onto a tray!

Print
Holiday Cranberry Baked Brie
Ingredients
  • 5 oz whole cranberries
  • ⅓ cup orange or apple juice
  • ¼ cup sugar
  • 1 16 oz round of brie cheese
  • crackers or bread for serving
Instructions
  1. 1. Preheat oven to 350 degrees F.
  2. 2. In a small pot over medium high heat, add the cranberries, juice, and sugar to the pot. Stir to combine. Once it comes to a boil, reduce heat to medium-low and let simmer for 5 minutes, covered. The cranberries should be popping, but you can also use a fork or wooden spoon to mash them. Once it has thickened up, turn off heat and set aside.
  3. 3. While that is cooking, cut the top of the rind of the cheese using a large serrated knife (this will make it super easy). Place the cheese cut side up on an oven safe plate or dish. Cook for 10 minutes and remove from oven.
  4. 4. Top the cheese with cranberry sauce, and place back in the oven for 2-5 minutes. My sauce was extremely hot so I didn't need to bake it much more.
  5. 5. Remove from oven and serve immediately with crackers or slices of baguette bread.
Recipe Notes

If you don't want to make your own cranberry sauce, you can definitely used canned with whole cranberries (not the jelly log of cranberry sauce). I highly recommend making your own because it's so easy and delicious!

Please take a look at the blogs participating in this Holiday Cocktail Party!

Appetizers

Domestic Superhero - Just Us Four - The Blue Eyed Dove - Sweet Pea - Glued To My Crafts - Patricia Eales Nutrition - Lemons and Laughs - Cupcakes&Crowbars - Sowdering About - Vegetarian Gourmet - Yesterday on Tuesday - Mom Home Guide - My Craftily Ever After - The Love Nerds - One Krieger Chick - Kenarry: Ideas for the Home - A Dish of Daily Life

Cocktails & Mocktails

One Artsy Mama - The Blue Eyed Dove - Sparkle - Albion Gould - Southern State of Mind - Eat Drink Eat - A Labour of Life - My Creative Days - Shelstring - I’m Bored Lets Go - Blue Crab Martini

Desserts & Sweet Treats

Major Hoff Takes A Wife - This Is The Life I Have Chosen - Crazy for Crust - Sypsie Designs - DIYfaerie - Little Blog on the Homestead - Living Better Together - Laura's INKlings - Life Made Sweeter - Tried & True – FrugElegance - Play. Party. Pin.

You can also connect with me here:

Thanks for visiting!

- Allyson


One Bite Apple Pie Tarlets

Published Nov 4, 2014 by Allyson
This post may contain affiliate links. Read my disclosure policy.

One Bite Apple Pie Tartlets topped with a delicious cream cheese glaze! Perfect for fall!

Last week I posted about the delicious Apple Pie Cinnamon Rolls I made, and I had some ingredients left over from that recipe that I needed to use up. I hate wasting food, so I knew I could use the left over apples and cream cheese glaze for something tasty.  It just so happened that I had these cute little Phyllo Shells in the freezer and I thought they would be perfect for this!  I was right, and these are super delicious and easy to make.  They would make the perfect fall dessert at a brunch or party.  They would pair great with a seasonal beer or light white wine.  I can’t wait to make them again because they are super cute and delicious!

One Bite Apple Pie Tartlets topped with a delicious cream cheese glaze! Perfect for fall!

The overall time to make these little treats is relatively quick, too, about 25 minutes including prep time!  I have also put these in the fridge, and warmed them up the next day and they taste just as great!

One Bite Apple Pie Tartlets topped with a delicious cream cheese glaze! Perfect for fall!

I would definitely recommend these for a party or get together, just heat them up right before you get there or after the party starts. I love these things and they are so cute and seasonal!

Like Apples? How about trying out these Apple Pie Cinnamon Rolls!

Print
One Bite Apple Pie Tarlets
Ingredients
  • 24 Fillo shells phyllo cups/shells
For Filling
  • 2 granny smith apples peeled and diced
  • ¼ cup brown sugar
  • 1 teaspoon cinnamon
  • 2 TBS butter
For glaze
  • ⅛ cup cream cheese softened
  • 2 tablespoons unsalted butter
  • ¾ cups powdered sugar
  • ¼ teaspoon vanilla extract
  • ⅛ teaspoon salt
  • 2 tbs milk or half and half
Instructions
  1. Directions
For Filling
  1. 1. Heat 2 TBS butter in a skillet and then add brown sugar, mixing to combine. After 30 seconds, add the apples and sauté until apples are slightly caramelized. Sprinkle cinnamon over apples and stir. Remove from heat and set aside.
For glaze
  1. 1. mix cream cheese, butter, powdered sugar, vanilla, milk and salt together with an electric or stand mixer on medium speed and set aside.
To assemble
  1. 1. Preheat oven to 350 degrees. Place shells on a baking sheet lined with parchment. Spoon 1 TBS of filling into the shells (or a little more, just so they are full), and then bake for 5-8 minutes or until the shells are just browned (also check phyllo shell packaging and cook according to that). Remove from oven and let cool for 10 minutes.
  2. 2. Drizzle glaze over the top of the apple pie tartlets and serve warm.
Recipe Notes

*To reheat, just pop back into toaster oven or oven and cook a few minutes until the filling is heated through.

You can also connect with me here:

Thanks for visiting!

- Allyson


30 Recipes for Leftover Halloween Candy

Published Oct 30, 2014 by Allyson
This post may contain affiliate links. Read my disclosure policy.

30 recipes for leftover halloween candy

So now that Halloween is here, I bet you have bags and bags full of candy in your house. If you have kids, this is definitely the case, and if you don’t, well, I bet you can find a bunch of candy on clearance at your local grocery store.  Since you have all this candy that you don’t know what to do with, how about utilizing it in some delicious treats!?!?  I have 30 recipes here that use up that Halloween candy and will taste way better than eating those candy bars straight up.  There are some cute seasonal recipes that would be great for fall parties or Thanksgiving, and then tons of recipes that are good for whenever! Deliver some of these tasty treats to your neighbors and you will be the talk of the town!

TWIX Cheesecake Bars with Chocolate & Caramel Drizzle

Twix Cheesecake Bars with Chocolate and Caramel Drizzle by Domestic Superhero

Reese's Stuffed Peanut Butter Cookies. Soft, chewy, and overloaded with peanut butter! sallysbakingaddiction.com

Reese’s Stuffed Peanut Butter Cookies by Sally’s Baking Addiction

Kit Kat Cookies    Tootsie Roll Acorns -- an easy no-bake recipe with only 4 ingredients. Really cute treats for fall!

Kit Kat Cookies by Life With the Crust Cut Off & Tootsie Roll Acorns by Food for the Soul

Sweet and Salty Marshmallow Popcorn Recipe on twopeasandtheirpod.com

Sweet and Salty Marshmallow Popcorn by Two Peas and Their Pod

Snickers Cheesecake Bars

Snickers Cheesecake Bars by Domestic Superhero

Milky Way Simply Caramel Cheesecake Brownies

Milky Way Caramel Cheesecake Brownies by Domestic Superhero

Reese's Peanut Butter Cup Bars Recipe -- a creamy peanut butter bar with chocolate frosting and peanut butter cup bits!  Come get this amazing recipe today!

Reese’s Peanut Butter Cup Bars by The Country Chic Cottage

No-Bake Hershey's Chocolate Bar Pie

No Bake Hershey Chocolate Bar Pie by The Kitchen is my Playground


Pilgrim Hat Cookies by Organized 31 and Snickers Blondies by Table for Seven

Chocolate Stuffed Peanut Butter Bars Recipe -- a mouthwatering recipe that your family will love!

Chocolate Stuffed Peanut Butter Bars by Country Chic Cottage

Chocolate Tootsie Roll Cookies by Fun with the Fullwoods

Candy Bar Peanut Butter Cookie Cups @amandaformaro Amanda's Cookin'  

Candy Bar Peanut Butter Cookie Cups by Amanda’s Cookin & 100 Grand Cupcakes by the Novice Chef Blog

Almond Joy Brownies from www.insidebrucrewlife.com - coconut, almonds, and brownies together in one amazing brownie for that sweet tooth

Almond Joy Brownies by Inside Bru Crew Life

100grand

100 Grand Rice Krispy Bark by The Domestic Rebel

Chocolate and PB M&M Cheesecake Bars

Chocolate & Peanut Butter M&M Cheesecake Bars by Domestic Superhero 

DSC_0416A

Oh Henry Fudge by The Domestic Rebel

cookie dip Creamy Hersheys Cookie Dip Recipe  

Creamy Hershey’s Cookie Dip by Raining Hot Coupons & Reese’s Cheesecake Brownies by Pip and Ebby

Cookie Dough Brownie Stuffed Truffles by Cookies and Cups

Calling all Reese's lovers!  Look no further for the perfect Thanksgiving treat with these completely adorable Reese's Turkeys! | MomOnTimeout.com

Reese’s Turkeys by Mom on Timeout

Malted Kit Kat Blondies with Malted Chocolate Drizzle

Malted Kit Kat Blondies with Malted Chocolate Drizzle by Baker by Nature

M&M Cheesecake with Chocolate Covered Pretzel Crust by Yammies Noshery

Buried Treasure Brownies by  www.fleecefun.com      SONY DSC

Buried Treasure Brownies by Fleece Fun & Caramel Twix Treats by The Baking Beauty

Caramel Kit Kat Brownies by I Eat Therefore I Cook

Reeses Pieces Chocolate Pretzel Bark

Reese’s Pretzel Bark by Mom Endeavors

Slow Cooker Loaded Potato Soup and a Slow Cooker Giveaway!

Published Oct 29, 2014 by Allyson
This post may contain affiliate links. Read my disclosure policy.

Slow Cooker Loaded Potato Soup 1

During the fall, I definitely love utilizing my slow cooker. It’s so easy to throw the ingredients in there in the morning, and then have dinner ready when I come home from work.  I also LOVE potato soup, and it just feels so comforting and fall-ish to me. It’s especially easy to whip up in the crock pot, and very inexpensive as well.

Slow Cooker Loaded Potato Soup  2

This Loaded Potato Soup also freezes extremely well, so I usually double the recipe and freeze half so we can have that later. It’s so easy!  I made a bunch of this and other soups when I was pregnant, and then froze them so I could have tons of easy meals after the baby came!  If you don’t have a slow cooker, you could make this on the stove top, and it would be just as easy, but I love the set it and forget it mentality behind a slow cooker! Using the Set 'n Forget® 6 Qt. Programmable Slow Cooker With Spoon/Lid is such an easy way to take advantage of this recipe. I love how it’s programmable and I just don’t have to worry about anything.

Slow Cooker Loaded Potato Soup 4

Since we are vegetarians in my house, I left the bacon out of this loaded soup, but you could easily fry some up and add it into the soup. I think it tastes delicious without it, but I know how some people love their bacon!

Recipe adapted from Peas and Crayons (check her out for other GREAT recipes!)

Print
Slow Cooker Loaded Potato Soup
Ingredients
  • 5 medium russet potatoes peeled (optional) and cut into small cubes
  • 4 stalks of celery chopped
  • 1 onion diced
  • 3 cups of vegetable broth
  • 3 cloves of garlic minced
  • ¼ cup butter
  • ½ cup sharp cheddar cheese grated
  • 1 teaspoon salt
  • 1 teaspoon ground black pepper
  • ¼ teaspoon garlic powder
  • ¼ teaspoon red pepper flakes
  • ½ cup milk I used 2% but you could also use cream, half and half, or skim
  • freshly grated cheddar cheese for topping
  • chopped green onion for topping
Instructions
  1. 1. In your slow cooker, add potatoes, celery, onion. Then add the broth, garlic, butter, salt, and pepper.
  2. 2. Set your slow cooker to high and cook for 4 hours, or set it to LOW for 8 hours.
  3. 3. Once done cooking, add milk, and then use a potato masher, fork, or immersion blender to smooth out the soup.
  4. 4. Add cheddar cheese and stir until melted. Add the garlic powder and red pepper flakes and mix.
  5. 5. Serve warm and add your desired toppings.
Recipe Notes

To freeze, add 2 cups of soup to a qt. sized freezer bag, push out air, and then label and freeze. To reheat- defrost overnight in the fridge and then cook in a pot on the stove or in the microwave. I usually add a bit more milk when reheating because it thickens up a lot in the freezer.

Slow Cooker Loaded Potato Soup 5

Okay, now for the fun part! Hamilton Beach is furnishing a Set 'n Forget® 6 Qt. Programmable Slow Cooker With Spoon/Lid for one of my readers! That’s right, you could win your own slow cooker! Now, I know most people have a slow cooker, but who doesn’t need the latest and greatest model, right? Enter below on the rafflecopter and I will be picking a winner next week!

a Rafflecopter giveaway

To participate in any promotion, you must be 18 years or older and reside in the 50 United States or D.C. Hamilton Beach is unable to ship to P.O. Boxes.  Giveaway will run from October 29th at 7am- November 7th at 7am. Winner will be contacted via email and must respond within 48 hours to claim prize. All prizes will be furnished and shipped by Hamilton Beach and Domestic Superhero is not responsible for that.

Disclosure: Hamilton Beach has provided Domestic Superhero with a Slow Cooker to review. I have not been compensated for this post and all opinions are honest and my own. 

You can also connect with me here:

Thanks for visiting!

- Allyson

Quick Veggie & Quinoa Thai Coconut Curry

Published Oct 28, 2014 by Allyson
This post may contain affiliate links. Read my disclosure policy.

This is a sponsored post written by me on behalf of Imagine® Organic Culinary Simmer Sauces.

Quick Veggie & Quinoa Thai Coconut Curry

Being a busy mom and wife, I often look for quick and easy ways to reduce dinner time prep, without sacrificing food quality and taste. By the time I get home from work in the evening, the last thing I want to do is spend an hour cooking dinner.  That’s one reason I love Imagine® Organic Culinary Simmer Sauces. They are super quick and convenient, and their flavors are spot on. They have four different types of sauces - Portobello Red Wine, Latin Veracruz, Thai Coconut Curry, and Louisiana Creole. For this easy recipe I decided to use the Thai Coconut Curry Sauce because we love curry! These sauces are the first simmer sauce in a pouch that is certified organic and it has no genetically engineered ingredients, no preservatives or artificial ingredients, no added MSG, it’s gluten Free, and vegetarian. This is the type of sauce you can actually feel good about eating!

Quick Veggie & Quinoa Thai Coconut Curry 2

This recipe is very versatile because you can use whatever veggies you have on hand, and then all you do is add the sauce! I love baby carrots and broccoli in my curry, so I was sure to pick those up and then I used left over veggies for the rest. It takes 10 minutes to cook this up, and you don’t have to dirty a bunch of dishes either, because everything cooks in one pan.

Quick Veggie & Quinoa Thai Coconut Curry 3

I decided to use quinoa to go along with this curry instead of rice because I had been dying to multicolored quinoa. It actually went really well with the dish and quinoa adds a lot of protein to this meat-free meal.

Quick Veggie & Quinoa Thai Coconut Curry 5 

Print
Quick Veggie & Quinoa Thai Coconut Curry
Ingredients
  • 1 pouch Imagine® Organic Culinary Simmer Sauce in Thai Coconut Curry
  • 2 carrots peeled and sliced
  • 1 red pepper seeded and cut into square bite size pieces
  • 1 cup broccoli florets
  • ½ cup whole baby corn cut in half
  • handful of snow peas
  • ½ yellow onion cut into bite size pieces
  • 2 cups cooked quinoa
Instructions
  1. 1. In a large pan/skillet, spray with nonstick spray, and add carrots, red peppers, and onions. Stir fry for 2-3 minutes over medium/high heat. Add broccoli, baby corn, and snow peas to the pan and stir fry an additional 2 minutes.
  2. 2. Add Imagine® Thai Coconut Curry Simmer Sauce, stir, and then cover pan. Reduce heat to medium and cook for 4-5 minutes or until vegetables are cooked through.
  3. 3. Add ½ cup cooked quinoa to a bowl, then ½ cup veggies and sauce on top. Serve immediately.
Recipe Notes

Feel free to add or remove veggies to suit your tastes! This recipe is very flexible and can be made how you like it!

Interested in trying Imagine® Organic Culinary Simmer Sauces? You are in luck! Right now consumers can enter to win their own “Pan with a Plan” prize pack by entering the sweepstakes on Facebook.  Sweepstakes will take place on the Imagine® Facebook page (Mid-October through November).  Entry rules are detailed online. Forty Eight (48) winners will be selected over the 6-week promotion. Each week, eight (8) winners will be selected to receive a “Pan with a Plan” prize pack (includes a saucepan, four Imagine® Organic Culinary Simmer Sauces, and a $25 grocery Visa gift card).

This is a sponsored post written by me on behalf of Imagine® Organic Culinary Simmer Sauces
Tracking Pixel

You can also connect with me here:

Thanks for visiting!

- Allyson

Cheesy Garlic Pull Apart Bread

Published Oct 27, 2014 by Allyson
This post may contain affiliate links. Read my disclosure policy.

Stuffed Cheesy Garlic Pull Apart Bread is stuffed with 3 cheeses, garlic, butter, and baked to ooey-gooey perfection. This bread is to die for!

Stuffed Cheesy Garlic Pull Apart Bread is stuffed with 3 cheeses, garlic, butter, and baked to ooey-gooey perfection. This bread is to die for!With the holidays rapidly approaching, I am always trying to come up with quick, easy, and delicious recipes that can be served at a party or brought as a dish to pass.  Coming up with these recipes is half of the fun, while sharing them with friends and family is the other half of the fun. I came up with this tasty stuffed cheesy garlic pull apart bread and knew all my friends and family would love it. 

Stuffed Cheesy Garlic Pull Apart Bread is stuffed with 3 cheeses, garlic, butter, and baked to ooey-gooey perfection. This bread is to die for!

First you want to cut the bread up into X shapes, but be careful not to cut all the way through the bread.  Then you want to melt your butter and mix the other ingredients into the same bowl.  After spreading the butter mixture throughout the cracks, you are going to stuff all the cracks with delicious cheese.  You will want to assemble this on top of a huge sheet of aluminum foil (big enough to wrap the bread with), because it’s really hard to move it once it’s stuffed.  After adding all the cheese you wrap it up in the foil, making sure that it’s all sealed up, and pop it in the oven for 15 minutes.  Then you unwrap it and let it cook a few more minutes until all the cheese has turned ooey-gooey and delicious!

Stuffed Cheesy Garlic Pull Apart Bread is stuffed with 3 cheeses, garlic, butter, and baked to ooey-gooey perfection. This bread is to die for!

Yummmmmm

Stuffed Cheesy Garlic Pull Apart Bread is stuffed with 3 cheeses, garlic, butter, and baked to ooey-gooey perfection. This bread is to die for!

So cheesy and delicious!

Stuffed Cheesy Garlic Pull Apart Bread is stuffed with 3 cheeses, garlic, butter, and baked to ooey-gooey perfection. This bread is to die for! 

Print
Stuffed Cheesy Garlic Pull Apart Bread
Ingredients
  • 1 loaf fresh french bread
  • 1 stick of butter melted
  • 2 TBS olive oil
  • 1 TBS poppy seeds
  • 1 TBS dijon mustard I like stone ground
  • 3-4 gloves of garlic minced
  • 1 TBS fresh parsley chopped
  • 1 cup Kraft triple cheddar shredded cheese
Instructions
  1. 1. Preheat oven to 350 degrees F. Cover a large baking sheet with foil (but don't wrap around, you need this loose to wrap around the bread later), and place the loaf of bread in the center. Cut bread diagonally in X shaped (think bite-sexed pieces).
  2. 2. In a bowl, mix butter, olive oil, poppy seeds, mustard, garlic and parsley with a fork.
  3. 3. Using a spoon or brush, pour/brush butter mixture into the cracks of the bread- careful not to miss any! Any remaining butter mixture can be poured over the top of the bread.
  4. 4. Stuff the cheese into the cracks of the bread being careful not to miss any.
  5. 5. Wrap the foil around the bread, sealing it closed. Bake for 15 minutes, then open foil from the top, and bake 3-5 additional minutes or until cheese is all melted.
Recipe Notes

Serve with a side of ranch or your favorite dipping sauce!

Now, onto how I budget for a holiday party. I always calculate the amount I want to budget based on the food, drinks, décor, and invitations.  Then I be sure to shop places I know will have the lowest prices, such as Walmart.  I also always try to come up with a signature cocktail, instead of purchasing several different drinks, because it saves money and time.  There are great cocktail recipes on Pinterest. I wanted to share my budget spreadsheet with y’all, so I am offering it as a FREE printable right now! Just click the link below and print! It will be an 8x10 and you can use it to budget your next holiday party!

Holiday Party Budget Printable FREE!

You can also connect with me here:

Thanks for visiting!

- Allyson

Mushroom & Goat Cheese Flatbread with Balsamic Glaze

Published Oct 20, 2014 by Allyson
This post may contain affiliate links. Read my disclosure policy.

Mushroom and Goat Cheese Flatbread with Balsamic Glaze - Creamy goat cheese paired with delicious sauteed mushrooms and onions, all topped with a sweet balsamic glaze! This is the perfect quick dinner or lunch, and also great for meatless mondays! #vegetarian #dinner Lately I have been cooking up lots of flatbreads. I really like that you can throw anything on top of a Naan bread and call it a day. When you go out to eat, these bad boys are usually on the menu and always super tasty, however, they aren’t so great for your wallet.  When you make them at home, you can save a ton of money, and get just as great flavor (and even eat in your pajamas if you want!).  My go-to place for Naan is Costco. You can get a huge 10 pack for $4, which is the cheapest I have ever seen it.  You can also make it, and it's SUPER simple. Here is the recipe.  You can also pick them up at the grocery store, usually more expensive, but equally delicious. I always find them in the bakery department. Mushroom and Goat Cheese Flatbread with Balsamic Glaze - Creamy goat cheese paired with delicious sauteed mushrooms and onions, all topped with a sweet balsamic glaze! This is the perfect quick dinner or lunch, and also great for meatless mondays! #vegetarian #dinner

For this flatbread, I paired 2 of my favorite foods: goat cheese and mushrooms.  I know some of y’all hate goat cheese (craziness!), so feel free to switch this out for feta or even bleu cheese crumbles. I think any cheese would be delicious though.  The balsamic reduction really brings this together, and the thyme also gives a great flavor punch. I love this combination so much, I made a grilled cheese with most of the same ingredients and it was equally delicious.

Mushroom and Goat Cheese Flatbread with Balsamic Glaze - Creamy goat cheese paired with delicious sauteed mushrooms and onions, all topped with a sweet balsamic glaze! This is the perfect quick dinner or lunch, and also great for meatless mondays! #vegetarian #dinner

5 from 1 vote
Print
Mushroom & Goat Cheese Flatbreads with Balsamic Glaze
Ingredients
  • 2 Naan slices whole
  • 8 oz cremini baby bella mushrooms, sliced thinly
  • ½ yellow onion thinly sliced
  • ½ TBS butter
  • 2 oz goat cheese crumbles
  • ½ cup balsamic vinegar
  • 1 and ½ TBS brown sugar
  • 2 teaspoon dried thyme
  • 1 TBS olive oil
  • salt and pepper
Instructions
For the glaze
  1. 1. Mix balsamic vinegar with brown sugar in a saucepan over medium heat, stirring constantly until sugar has dissolved.
  2. 2. Bring to a boil, reduce heat to low, and simmer until glaze is reduced by half, about 20 minutes. Set aside.
For flatbreads
  1. 1. Preheat oven to 400 degrees F.
  2. 2. In a large skillet, add butter to skillet and melt over medium heat. Then add mushrooms and onions and saute over medium/high heat for 3 minutes, stirring occasionally. Add thyme, salt, and pepper, and saute for a few more minutes or until onions are translucent and mushrooms are cooked and soft. Turn off heat and set aside.
  3. 3. Brush the tops of the Naan with the olive oil so the top is coated. Then add half of the mushrooms/onions to the top of each bread, spreading evenly over the top. Sprinkle 1 oz goat cheese crumbles to each naan.
  4. 4. Place flatbreads on a parchment lined baking sheet, and place in oven for 6-8 minutes, or until cheese is softed. *You do not want to overcook so watch carefully for browning on the bread. Remove from oven.
  5. 5. Drizzle 1 TBS of balsamic glaze over each flatbread. Cut into halves or fourths and serve warm.
Recipe Notes

Makes 2 full flatbreads

You can also connect with me here:

Thanks for visiting!

- Allyson

The 25 BEST Halloween Desserts

Published Oct 13, 2014 by Allyson
This post may contain affiliate links. Read my disclosure policy.

The 25 BEST Halloween Desserts

With Halloween right around the corner, I thought I would put together a list of my favorite 25 Halloween treats! There is such a variety here too, some easy to make, some a little more difficult, but all totally awesome! What are you cooking up this Halloween?

Halloween Sugar Cookie Monsters

Halloween Dessert Recipe

Candy Corn Truffle Bark by The Gunny Sack

Celebrate Halloween with a pudding parfait! Add in brownies, marshmallows, pudding, and your favorite halloween candy.

Boo Pudding Parfaits from The First Year Blog

A classic favorite, Twinkies are given a #Halloween makeover with these Frankenstein Twinkies Pops! A step by step tutorial - http://www.ThisSillyGirlsLife.com


Halloween Trash by Just Us Four / Frankenstein Twinkie Pops by This Silly Girl’s Life

Spooky Pumpkin Cupcakes by Glorious Treats

Halloween Bark filled with Oreos and Candy Corn - YUMMY!

Halloween Bark by Lil Luna

5 Minute candy corn pudding cups, the perfect fall dessert that can be made in less than 5 minutes! #shop #SnackPackMixins

Easy Candy Corn Pudding Cups by Play Party Pin

Spider Krispies by Cookies and Cups

Witch Hat Cookies - These adorable cookies are so simple to make and are perfect for a Halloween party!
White Chocolate Candy Corn Pretzel Fudge { lilluna.com } #fudge


Witch Hat Cookies by Like Mother Like Daughter / White Chocolate Candy Corn Pretzel Fudge by Lil Luna

Simple and Halloween perfect cupcakes!  The kids and adults will love them!

Wicked Witch Cupcakes by Made to Be Momma

Reeses Pieces Monster Cookies

Reese’s Pieces Monster Cookies by The First Year Blog

Spooky Slasher Brownies. A Spooky Halloween treat with no dyes or artificial coloring!  // Happy Food Healthy Life

Spookie Slasher Brownies by Happy Food Healthy life


Skeleton Pretzels by Being Genevieve  / Fancy Shmancy Krispies by Cookies and Cups

Reeses Frankenstein Cupcakes

Reese's Frankenstein Cupcakes by Your Cup of Cake

Butter With a Side of Bread: Caramel Apple Nachos

Caramel Apple Nachos by Butter with a Side of Bread

Delicious Gooey Monster Cookies!! Perfect for Halloween! { lilluna.com }

Gooey Monster Eye Cookies by Lil Luna

Pretzel Candy Spiderwebs ~ a fun and easy Halloween treat | FiveHeartHome.com


Pretzel Candy Spiderwebs by Five Heart Home / Oreo Pumpkin Cheesecakes by Yummy Mummy Kitchen

Candy Corn Krispie Treats by Glorious Treats

Spiderweb Cupcakes | Taste and Tell

Spider Web Cupcakes by Taste and Tell

HAPPY HALLOWEEN! 

You can also connect with me here:

Thanks for visiting!

- Allyson

Guest Post: Easy Sausage Jambalaya

Published Oct 8, 2014 by Allyson
This post may contain affiliate links. Read my disclosure policy.

Today we have a delicious and easy recipe from Britni! I am so excited because I LOVE Cajun food, and this looks awesome! Let's check it out!
 
Hi! I'm Britni from Play. Party. Pin. I am so excited that Allyson has given me the chance to be here while she's getting some great snuggles from that sweet baby of hers. I'm the mom of a 1-year old boy who has the biggest cheeks and best smile ever. I blog about anything party related - party ideas, games/activities/, crafts, and food. And today, I'm sharing one of my family's favorite recipes with you, an easy sausage jambalaya.
 
Easy cajun sausage jambalaya recipe from playpartypin.com

If any of you have had a baby, you'll know that the last thing you want to do immediately after is cook.  This recipe was created the week after I had my little guy last year when nobody wanted to cook. Okay, who am I kidding? I never want to cook unless the recipe calls for at least a cup of sugar. Luckily, one my husband's favorite things to do is cook, and he's one of those people that can look into a fridge and come up with a delicious recipe out of thin air. Like this one.

Easy cajun sausage jambalaya recipe from playpartypin.com

I'll be honest, I've never actually had jambalaya. I've only heard great things about it from my uncle who lived in New Orleans for two years and apparently makes a mean jambalaya. Most of the time it includes onions, which is a no-go for this girl, so I've just stayed away from it altogether. Not anymore. This jambalaya is one of my favorite things that my husband makes, and he makes a lot of great food.

The recipe calls for just carrots and celery, but you can add any veggies that you'd like. My husband eats his with tomatoes and red peppers, two more things I don't really like. What can I say? We're pretty much opposites when it comes to food, but we both love this dish. I hope you enjoy it as much as we do!

Easy cajun sausage jambalaya recipe from playpartypin.com
4 from 1 vote
Print
Easy Sausage Jambalaya
Ingredients
  • 1 tablespoon olive oil
  • 1- 1 lb. package smoke sausage ¼ diced and ¾ sliced into rounds
  • 3 medium carrots peeled and diced
  • 4 celery stalks diced
  • 5 cloves garlic minced
  • 2 large bay leaves
  • 1 teaspoon kosher salt
  • 1 teaspoon oregano
  • ½ teaspoon parsley
  • ½ teaspoon smoked paprika
  • ½ teaspoon chili powder
  • ½ teaspoon kofte mix - we bought ours from Turkey but you can make it at home with this recipe
  • 1 ½ cups white long-grain rice, rinsed and dried
  • 3 cups chicken broth
Instructions
  1. Heat oil in large sauté pan over medium heat.
  2. Add the sausage rounds (keep the diced sausage for later) and cook until browned and carmelized. Remove the sausage with a slotted spoon to leave the drippings behind.
  3. Add the carrots, celery, and diced sausage and cook until slightly browned and softened, about 4 minutes.
  4. Add the garlic, salt, and dried spices to the pan and cook for 1 minute.
  5. Add the rice to the pan and cook for 3 minutes, stirring frequently.
  6. Add the chicken broth and bring to a boil. Once boiling, cover and lower heat and simmer for 10-15 minutes until the rice is done.
  7. Remove the lid and stir in the sausage and serve.
 
Easy cajun sausage jambalaya recipe from playpartypin.com


If you liked this jambalaya recipe, come check out some of my other projects and follow me on Facebook, Twitter, Pinterest, and Instagram! Here are some of my favorite things I've been working on recently.

Splatter Paint Party
Make Your Own Mini Pie Bar Ideas
Spooktacular Halloween Drink Bottles


Apple Pie Cinnamon Rolls

Published Oct 6, 2014 by Allyson
This post may contain affiliate links. Read my disclosure policy.

Ooey gooey apple pie cinnamon rolls! Perfect for fall breakfast or brunch!

Let me start off by saying, I’ve never made cinnamon rolls from scratch, nor have I ever attempted to make them. This was my first attempt.  Being that is was my first attempt, it came out great, but I definitely made A LOT of mistakes along the way.  For the longest time baking any sort of bread really intimidated me, but then I got my stand mixer and I figured I would be wasting it if I didn’t use it to make bread. I started off easy with pizza dough, and worked my way up to other breads (love me some bread bowls!).  I realized that I was being silly and shouldn’t have been so intimidated by making bread.  I mean, the worst the happens is that it doesn’t come out right, and then you are out a few bucks on ingredients…there are worse things in the world, right?  I am telling you all this, because I get so many comments and emails from people telling me that they were too scared to bake bread or attempt anything with yeast until they tried making *insert awesome recipe here*.  They tell me that they wished they would have started sooner.  Well, I wish I would have started attempting cinnamon rolls sooner because while they aren’t difficult, they definitely take some practice!  Lucky for me, I have awesome family and friends who will eat up my ‘practice’ rolls!

Ooey gooey apple pie cinnamon rolls! Perfect for fall breakfast or brunch!

I decided to make these Apple Pie Cinnamon rolls because I felt like they were a perfect reflection of a cool fall morning. It is exactly what I would love to eat on Saturday morning after rolling out of bed, getting cozy under a blanket and pouring a hot cup of coffee (flash forward to 2 kids and this never happens anymore). Attempting to make these was a great idea, however, it wasn’t such a great idea to try them out while my husband was at work and I was in charge of a crazy toddler and psycho baby.  Baking and the 2 crazy kids just do not mix at this point.  The recipe said ‘let the dough rise for 2 hours’….how about 9 hours? Because after I made the dough, the first chance I had to get back to it was NINE HOURS LATER.  ‘While the dough is rising, make the filling’….I started the filling a little while later, and let it simmer for at least an hour (as opposed to the quick sauté the instructions call for) , which resulted in very, very soft apples…but at least they didn’t turn into applesauce (though, I probably could have mashed them easily into sauce).  Then, I am pretty sure I added at least triple the amount of apples to my rolls as I was supposed to, because instead of being neat and pretty with apples peaking out of the inside, the apples were oozing out EVERYWHERE and making a huge mess.  Now, while I had a multitude of ‘issues’, and my rolls don’t look so pretty, they still turned out delicious. I mean, I would have thought they would have been disgusting (which I warned my husband about before he tried one), but they weren't.  What I am trying to say is that even if you think you can’t do it, even if you mess up 100 times along the way, it is still worth a try. I could have easily thrown this all away halfway through, but I am glad I didn’t because they were delicious!

Ooey gooey apple pie cinnamon rolls! Perfect for fall breakfast or brunch!

So even if your Apple Pie Cinnamon Rolls turn out looking like the above picture, it’s okay! This is definitely not a ‘perfect’ food blogger photo, but lets be real, hardly anything turns out like how you see it on Pinterest and on the gorgeous pages of your favorite food blog, right? So make these, and enjoy them!

Ooey gooey apple pie cinnamon rolls! Perfect for fall breakfast or brunch!

Interested in trying these out? You can find the recipe and step by step directions over at The Hopeless Housewife! Hopefully my next attempt will be prettier, but I am not sure they can get much more tasty!

My son was crazy about them too...he tried snatching it off the plate while I was photographing it!

Ooey gooey apple pie cinnamon rolls! Perfect for fall breakfast or brunch!

Do you like apple recipes as much as I do?! Check out these other recipes on Domestic Superhero:

Apple-Fritter-Muffins_thumb.jpg

Caramel-Apple-Dumplings-1.jpg

Apple-Gouda-Grilled-Cheese.jpg

Slow-Cooker-Caramel-Apple-Cider.jpg

You can also connect with me here:

Thanks for visiting!

- Allyson

Firecracker Tofu with Brown Rice

Published Oct 1, 2014 by Allyson
This post may contain affiliate links. Read my disclosure policy.

This is a sponsored post written by me on behalf Success® Rice.

Firecracker Tofu with Brown Rice

Dinner during the week gets so crazy sometimes…with school, work, a baby, and now extra curricular activities for my nearly 4 year old, there isn’t much time left to cook.  Once a week we are left ordering pizza or some various takeout because we simply don’t have the time or energy to make a decent meal.  However, being a vegetarian, take out options are limited. I love Chinese food, but most fast food Chinese places don’t have many veggie options other than noodles or rice; and recently while I was at Panda Express, I saw a new dish called Firecracker Chicken, and I knew I wanted to recreate it with tofu.  That said, the recipe can easily be adjusted to use chicken instead of tofu if that’s what you are into.

Panda Express Copycat Firecracker Tofu with Brown Rice

While this dish comes together in under 30 minutes, which is fast for a weeknight meal, I also didn’t want to get stuck waiting forever on rice to cook. That’s why I picked up some Success® Whole Grain Brown Rice.

Success_14oz_Brn_L_HR-610x923

Success® Rice is the original no measure, no mess boil-in-bag rice that cooks perfectly every time and is ready in just 10 minutes. A true pantry staple, Success® Boil-In-Bag Rice is convenient, and can be made on the stovetop or microwave without sacrificing its great taste or quality. This makes cooking the rice so easy, and I can just let it cook while I get the other food all together and made. You can even let the rice sit in the water after it’s been cooked for up to 30 minutes (with the heat off), to ensure it stays warm!  So convenient.

Panda Express Copycat Firecracker Tofu with Brown Rice

This dish turned out so delicious- with chunks of sweet pineapple covered in a spicy sweet sauce, and crispy tofu…yum. I am definitely adding this to our regular rotation of dinners. It also reheats great and is even good cold (hey, when you have a newborn, sometimes you don’t have time to even microwave!). I love that it’s so easy to recreate take out food, because you actually know what is going into your food and it’s way healthier than the alternative.

Print
Firecracker Tofu with Brown Rice
Ingredients
  • 1 block extra firm tofu must be firm or extra firm, drained and cut into bite sized cubes
  • 2 eggs
  • ¼ cup flour
  • ½ cup cornstarch possibly more
  • ¼ cup vegetable oil or other oil good for frying
  • 1 large red pepper seeded and cut into chunks (bite size)
  • 1 large orange pepper seeded and cut into chunks (bite size)
  • 1 yellow onion cut into chunks (bite size)
  • 3 green onions chopped
  • 2 bags Success® Whole Grain Brown Rice cooked and kept warm
  • 2 8 oz cans of pineapple chunks packed in juice, not syrup, drained and juice set aside
Ingredients for the Sauce
  • 2 cloves garlic minced
  • 2 teaspoon crushed red pepper flakes more or less depending on heat tolerance
  • ⅔ cup sugar I used Stevia
  • 1 and ½ cups water
  • ½ cup reserved pinapple juice
  • 2 TBS sweet red chili sauce find this in the international aisle
  • ½ teaspoon salt
  • 4 TBS cold water
  • 3 TBS corn starch
Instructions
  1. 1. Whisk the eggs in a bowl. Place cornstarch in a separate shallow bowl. Place flour in a separate shallow bowl. Toss 5-6 tofu pieces at a time, in the flour to coat, then into the eggs, then into the cornstarch to coat again. Repeat with all tofu pieces.
  2. 2. Heat vegetable oil in a high sided pan (I like using a pasta pot to prevent grease splatter), and add tofu pieces. You will probably have to do 2-3 batches. Cook 2-3 minutes on first side (or until lightly browned), and then flip over and cook 1-2 minutes on other side. Remove and set on a paper towel lined plate. Continue until all tofu pieces are cooked.
  3. 3. Wipe out the pot you used to cook the tofu, and then over medium heat add peppers, onion and pineapple. Cook over medium heat for a few minutes, or until onions start to soften.
  4. 4. While that is cooking you can make the sauce. In a sauce pot combine garlic, red pepper flakes, sugar, water, sweet chili sauce, pineapple juice and salt. Bring to a boil, whisking constantly. In a small bowl stir together the cold water and corn starch. When sauce comes to a boil, add the corn starch mixture to the sauce. Stir constantly until sauce thickens. Reduce heat to low.
  5. 5. In the pot with the vegetables, add the tofu and the sauce, mixing gently to coat. Serve over Success® Whole Grain Brown Rice and top with green onions.
Recipe Notes

You could also serve this by itself or with noodles. You can also replace the tofu in this recipe with chicken, however adjust cooking times accordingly.

Panda Express Copycat Firecracker Tofu with Brown Rice

This is a sponsored post written by me on behalf Success® Rice.

Like tofu as much as I do? Check out these other recipes from Domestic Superhero:

Creole Tofu with Onions and Peppers  Firecracker Tofu with Brown Rice  Bang Bang Tofu

Buffalo Tofu Salad  Buffalo Tofu Wrap (4) edited  Baked Tofu Parmesan 1

General Tso's Tofu 1

Baked Tofu

You can also connect with me here:

Thanks for visiting!

- Allyson

Fresh Peach Crumble

Published Sep 29, 2014 by Allyson
This post may contain affiliate links. Read my disclosure policy.

Fresh Peach Crumble

Living in Georgia, peaches are everywhere during the summer! I was never a big peach eater until I tried fresh, in season peaches. It is such a huge difference eating a big fresh Georgia peach, than eating a little grocery store peach during the winter.  You need to buy peaches in season, and fresh if possible. I love going to farmers markets in the spring and summer, and in Georgia they are stocked with delicious peaches.  However, if you don’t live in a peach producing state, then head to places like Whole Foods and Trader Joes to get the most fresh produce you find.  Anyway, I had some extra peaches in the fridge and needed to use them up before they went bad, so I decided to make a peach cobbler.  It turned out more like a peach crumble (what is the difference anyway?!), and it was so delicious.  My usually fruit-hating husband even gobbled this down, and my picky eater toddler loved it as well. It was a huge hit and super easy!

Fresh Peach Crumble 3

If you only have a few peaches, or want a smaller portion, the recipe can definitely be sized down. This recipe makes a large serving, and if I were you I would make the whole thing because people are definitely going to want seconds.  Serve this warm with a dollop of vanilla ice cream or whipped cream and get ready to taste heaven!

Fresh Peach Crumble 2

This is a good recipe for kids to help with, too, because it really can’t be messed up and there is a lot of dumping ingredients into the dish!

Print
Fresh Peach Crumble
Ingredients
For the filling
  • 4 large peaches cored, peeled, and sliced thinly
  • 1 teaspoon cinnamon
  • 1 teaspoon lemon juice
  • 3 TBS flour
  • ¼ cup brown sugar
For the topping
  • ¾ cup flour
  • ¾ cup sugar
  • ¾ teaspoon baking powder
  • ¼ teaspoon nutmeg
  • ¼ teaspoon salt
  • 1 medium egg beaten
  • ½ cup butter melted
Instructions
  1. 1. Preheat oven to 375 degrees F. Grease an 11x7 glass baking dish, and then spread the peaches evenly in the dish.
  2. 2. In a small bowl mix 1 teaspoon cinnamon, ¼ cup brown sugar, 3 TBS flour, and 1 teaspoon lemon juice with a fork. Sprinkle mixture evenly over the peaches.
  3. 3. In a medium bowl mix (ingredients from topping list) flour, sugar, baking powder, nutmeg, and salt. Stir in the egg with a fork until it resembles a course crumble.
  4. 4. Sprinkle the crumbles evenly over the peaches and drizzle the melted butter evenly over the top.
  5. 5. Bake for 30-35 minutes or until the topping is browned and the filling is bubbling.
Recipe Notes

Serve with a dollop of ice cream or whipped cream and enjoy!

Fresh Peach Crumble 4

  • « Previous Page
  • 1
  • …
  • 14
  • 15
  • 16
  • 17
  • 18
  • …
  • 20
  • Next Page »

Hi! I’m Allyson

Welcome to Domestic Superhero where you will find lots of recipes & food goodness! Let's connect on social media, and be sure to subscribe to my email so you won’t miss a post!

More About Me →

  • Facebook
  • Instagram
  • Pinterest
  • Twitter
  • TikTok

Footer

↑ back to top

About

  • About Me
  • Contact
  • Disclosure & Privacy Policy
  • Featured On

Social

  • Facebook
  • Instagram
  • Pinterest
  • Twitter
  • TikTok

Recipes

  • Dinner Ideas
  • Desserts
  • Drinks
  • Appetizers

Disclaimer

Domestic Superhero is a participant in the Amazon Services LLC Associates Program, an affiliate advertising program designed to provide a means for sites to earn advertising fees by advertising and linking to amazon.com

Copyright © 2025 Domestic Superhero. Privacy