Domestic Superhero

  • Recipes
  • DIY Projects
  • Travel
  • About Me
menu icon
go to homepage
  • Recipes
  • DIY Projects
  • Travel
  • About Me
search icon
Homepage link
  • Recipes
  • DIY Projects
  • Travel
  • About Me
×
Home » You searched for fall

Search Results for: fall

Spicy Jalapeno Mac & Cheese

Published Feb 15, 2016 by Allyson
This post may contain affiliate links. Read my disclosure policy.

Spicy Jalapeno Mac & Cheese is ultra creamy with a kick of spice. Packed with two cheese and fresh jalapenos, this is the perfect homemade Mac & Cheese!

Spicy Jalapeno Mac & Cheese is ultra creamy with a kick of spice. Packed with two cheese and fresh jalapenos, this is the perfect homemade Mac & Cheese!You guys……I have the most excellent Mac & Cheese recipe for you today; Spicy Jalapeno Mac & Cheese. Now, full disclosure, I started making this recipe 2 years ago, and it took a bit to perfect. Once I did perfect it, I knew I had to share it will y’all…but, then, for whatever reason, it kind of fell by the wayside. Now, since 2016 started, I have been trying to eat really healthy, and I felt like maybe I shouldn’t share this, because it is so NOT healthy…but, you know what? Even when you are being health conscious, you should still treat yourself and indulge once in a while on the things you love most. In this case, delicious Mac & Cheese.

Spicy Jalapeno Mac & Cheese is ultra creamy with a kick of spice. Packed with two cheese and fresh jalapenos, this is the perfect homemade Mac & Cheese!

When you first dip your serving spoon into this golden cheesy top, be prepared to let our a large sigh…you are going to die when you see the creamy cheese nestled around the noodled on the inside.  It is so good. I hate when you make homemade mac & cheese and it’s dry, or there is no cheese sauce left; this is not the case in this Spicy Jalapeno Mac & Cheese. There is plenty of ooey-gooey cheese to keep it saucy. 

When you make this, be prepared for people to ask for the recipe, and for it to be devoured. It’s amazing. I realize that I have used these types of adjectives a lot within this post, but for real, there is no other way to describe it. It’s amazing.

Spicy Jalapeno Mac & Cheese is ultra creamy with a kick of spice. Packed with two cheese and fresh jalapenos, this is the perfect homemade Mac & Cheese!

Look at the cheese!!!!!!

Spicy Jalapeno Mac & Cheese is ultra creamy with a kick of spice; the perfect homemade Mac & Cheese!

I need to make this Spicy Jalapeno Mac & Cheese again STAT. I seriously cannot even take looking at these pictures. I am sitting in the coffee shop, writing this post, and I am literally drooling. Save me!!!!

Like mac and cheese as much as I do?! Try this Bacon Mac & Cheese Gnocchi or Panera Mac and Cheese (copycat recipe)!

Spicy Jalapeno Mac & Cheese is ultra creamy with a kick of spice. Packed with two cheese and fresh jalapenos, this is the perfect homemade Mac & Cheese!

Things you might need for this recipe:

  • Baking dish
  • stock pot
  • colander
  • wooden spoon
  • serving spoon
  • Santoku knife

Make sure you don’t miss a thing! Follow Domestic Superhero on:

Facebook | Instagram | Pinterest | TikTok | Email

For NEW RECIPES delivered straight to your inbox, signup for our email list! 

Print
Spicy Jalapeno Mac & Cheese
Ingredients
  • 1 lb macaroni shells or other pasta like penne farfalle, or rigatoni
  • ½ cup all-purpose flour
  • ⅓ cup butter
  • ½ teaspoon salt
  • 1 TB dijon mustard
  • ¼ teaspoon black pepper
  • 5 cups cups milk whole or 2%
  • 2 cups and ½ cup extra sharp cheddar cheese grated, divided
  • 2 cups and ½ cup fontina cheese grated, divided
  • 4 medium jalapeno peppers include seeds for spicier chili; leave them out for a milder version, stems removed and finely diced
  • 1 teaspoon hot sauce like tapatio, red hot, or tabasco
Instructions
  1. Preheat oven to 375 degrees.
  2. Boil the pasta for about 10 minutes, or until al dente, drain. Return to the pan you boiled it in and set aside.

  3.  While the pasta is boiling, make the sauce: In a medium saucepan over medium heat, melt the butter. Add the flour, salt, and black pepper. Whisk constantly over medium heat for about three minutes. Continue stirring with the whisk and slowly pour in the milk. Over medium high heat, whisk the mixture until it begins bubbling and thickening; continue for about 30 seconds whisking. Add mustard, 2 cups cheddar, 2 cups fontina, jalapenos, and hot sauce, whisking until the cheese has melted and completely combined.

  4. Pour sauce over the pasta and toss gently until coated well.

  5. Lightly grease a large baking dish. Add half the noodles and sprinkle half of the remaining cheeses on top. Add the remaining pastas and sprinkle remaining cheese on top of the pasta.

  6. Bake at 375 degrees for about 25-30 minutes or until bubbly and golden brown.

  7. Serve and enjoy!

Snickers Skillet Brownies

Published Feb 1, 2016 by Allyson
This post may contain affiliate links. Read my disclosure policy.

Snickers Skillet Brownies are ooey-gooey and full of chocolate, peanuts, and caramel. So easy to make and seriously delicious! 

SNICKERS Skillet Brownies are ooey-gooey and full of chocolate, peanuts, and caramel. So easy to make and seriously delicious!

Now that it’s February, it’s almost that time…the time for the BIG game! I have been thinking up fun recipes to make for the occasion, and when I thought up these Snickers Skillet Brownies, I knew I had to share them with y’all! This recipe turned out even better than I thought it would, and I can’t wait to share it with all my friends next weekend!

SNICKERS Skillet Brownies are ooey-gooey and full of chocolate, peanuts, and caramel. So easy to make and seriously delicious!

I started whipping up my Snickers Skillet Brownies.  After chopping up the SNICKERS® Mini’s, I stirred them into the brownie batter. After spreading the batter into the skillet, I added a couple more chopped Mini’s to the top and lightly pressed them down into the batter.

SNICKERS Skillet Brownies are ooey-gooey and full of chocolate, peanuts, and caramel. So easy to make and seriously delicious!

I popped the skillet into the oven for 35 minutes and hallelujah, we had delicious brownies ready to go…well, almost ready…

SNICKERS Skillet Brownies are ooey-gooey and full of chocolate, peanuts, and caramel. So easy to make and seriously delicious!

Don’t forget to add the whipped cream, caramel drizzle, and chopped peanuts!!! They totally complete these decadent Snickers Skillet brownies! Dig in!!

SNICKERS Skillet Brownies are ooey-gooey and full of chocolate, peanuts, and caramel. So easy to make and seriously delicious!

Make sure you don’t miss a thing! Follow Domestic Superhero on:

Facebook | Instagram | Pinterest | TikTok | Email

For NEW RECIPES delivered straight to your inbox, signup for our email list! 

Print
SNICKERS® Skillet Brownies

SNICKERS Skillet Brownies are ooey-gooey and full of chocolate, peanuts, and caramel. So easy to make and seriously delicious! 

Ingredients
  • 1 cup butter melted
  • 2 cups sugar
  • 1 egg
  • 1 teaspoon vanilla
  • ⅔ cup cocoa powder
  • 1 cup flour
  • ½ teaspoon salt
  • ½ teaspoon baking powder
  • 1 cup chopped SNICKERS® about 12 minis
  • 2 TBS caramel sauce
  • 2 TBS chopped peanuts
  • whipped cream for garnish
Instructions
  1. Preheat oven to 350 degrees. Grease a 10 or 12 inch cast iron skillet.

  2. In a large bowl, combine melted butter, sugar, eggs, and vanilla. Mix until just combined. Add cocoa powder, flour, salt, and baking powder to bowl; mix to combine, but don’t over mix. Add almost all the chopped SNICKERS®, leave about 2 TBS out (reserve for topping), to the batter, and fold to combine.

  3. Pour batter into skillet and spread evenly. Sprinkle remaining chopped SNICKERS® on the top of the batter.

  4. Place in oven and bake for 30-35 minutes. Check at 30 minutes with a toothpick and cook additional minutes if needed. Remove from oven.

  5. Top with caramel sauce, chopped peanuts, and whipped cream. Slice and serve.

Sriracha Ranch Dip

Published Jan 25, 2016 by Allyson
This post may contain affiliate links. Read my disclosure policy.

Sriracha Ranch Dip is perfect for game day or anytime really! Cool, creamy, and a little kick - it makes the best dip ever!

Sriracha Ranch Dip is perfect for game day or anytime really! Cool, creamy, and a little kick - it makes the best dip ever!Now that the big game is right around the corner, I have been thinking up some delicious recipes to bring to the party we attend every year. I feel like dips always go a long way, and people love dipping pretty much everything, so I whipped up a delicious Sriracha Ranch Dip! I even made a video to show you exactly how to make it (scroll down to bottom for video)!

Sriracha Ranch Dip is perfect for game day or anytime really! Cool, creamy, and a little kick - it makes the best dip ever!

I wanted to make a dip that would compliment both the tenders and the buffalo wings. Automatically I thought ranch because who doesn’t love buffalo wings dipped in ranch? Next, I wanted to spice it up a bit so I added sriracha to the mix for a little kick. It works well with the chicken tenders giving it a punch of additional flavor, and with the buffalo wings, it enhances the spice, yet gives a cool creamy taste to soothe the heat. Sriracha Ranch Dip will be perfect for game day!

Sriracha Ranch Dip is perfect for game day or anytime really! Cool, creamy, and a little kick - it makes the best dip ever!

Like dips as much as I do? Check out these other awesome Game Day recipes:

  • Caprese Stuffed Pull Apart Bread
  • Air Fryer Frozen Jalapeno Poppers
  • Air Fryer Chicken Wings (super crispy)
  • Million Layer Dip
  • Spinach Artichoke Stuffed Bread

Make sure you don’t miss a thing! Follow Domestic Superhero on:

Facebook | Instagram | Pinterest | TikTok | Email

For NEW RECIPES delivered straight to your inbox, signup for our email list! 

Print
Sriracha Ranch Dip
Ingredients
  • 1 cup buttermilk
  • 1 cup sour cream
  • 3 TBS ranch seasoning
  • 2 TBS Sriracha
Instructions
  1. 1. Add all ingredients to food processor or blender. Blend for 15-20 seconds, scraping down sides if needed and blending a few more seconds. Pour into bowl, and serve.

Recipe Video

Recipe Notes

****This dip is great if you refrigerate it a few hours before serving! It thickens and the flavors meld together.

Chocolate Peanut Butter Oatmeal Smoothie

Published Jan 19, 2016 by Allyson
This post may contain affiliate links. Read my disclosure policy.

Chocolate Peanut Butter Oatmeal Smoothie is a delicious, easy, and majorly nutritious 'treat' that takes only a few minutes to whip up!

Chocolate Peanut Butter Oatmeal Smoothie is a delicious, easy, and majorly nutritious 'treat' that takes only a few minutes to whip up!

Now that we have started another new year, I am excited to get on track and essentially be a ‘new me’! I have been working out nearly every day, and doing my best to come up with new and exciting delicious, yet mindful, recipes.  I have been putting my blender to use, making up all sorts of smoothies. When I heard my friends talking about Jif™ Peanut Powder, I knew it was a great option for me! With 85% less fat than regular peanut butter, this would make a great replacement in my Chocolate Peanut Butter Oatmeal smoothie!

Chocolate Peanut Butter Oatmeal Smoothie is a delicious, easy, and majorly nutritious 'treat' that takes only a few minutes to whip up!

One of the things I really love about this powder, is that it only has ONE ingredient: roasted peanuts! How often does that happen? Usually things like this are packed full of additives and bunches of ingredients that I can’t even read the names of…but not Jif™ Peanut Powder; and I really love knowing exactly what I am putting into my body.

I started out by getting all my ingredients together for my smoothie: oats, Jif™ Peanut Powder, Silk Almond Milk, a frozen banana, and some chocolate syrup for garnish.

Chocolate Peanut Butter Oatmeal Smoothie - a delicious, easy, and majorly nutritious 'treat'!

Next, just toss everything in the blender and BLEND! After blending for 30 seconds, you have a super tasty and balanced smoothie! There are about 13 grams of protein too, which is great for a snack or meal!

Chocolate Peanut Butter Oatmeal Smoothie is a delicious, easy, and majorly nutritious 'treat' that takes only a few minutes to whip up!

Want more detailed instructions? Check out these video I made to show step by step directions on making this delicious Chocolate Peanut Butter Oatmeal Smoothie using Jif™ Peanut Powder!

Print
Chocolate Peanut Butter Oatmeal Smoothie

Chocolate Peanut Butter Oatmeal Smoothie is a delicious, easy, and majorly nutritious 'treat' that takes only a few minutes to whip up!

Ingredients
  • 3 TBS Jif™ Peanut Powder
  • ½ cup Silk Almond Milk - original or vanilla
  • ¼ cup old fashioned oats like oatmeal
  • 1 frozen banana cut into chunks
  • ½ teaspoon chocolate syrup for garnish if desired
Instructions
  1. 1. Place Jif™ Peanut Powder, Silk almond milk, oats, and banana into blender. Blend for 30 seconds, or until smooth. You may need to scrape down the sides and blend a few more seconds.
  2. 2. Swirl chocolate syrup into cup, pour smoothie into cup, serve immediately.

Recipe Video

Recipe Notes

This recipe can be doubled, tripled, quadrupled for as many servings as you'd like. It keeps well in the fridge and can be stored in a sealed container (like a mason jar) for 3 days.

This shop has been compensated by Collective Bias, Inc. and its advertiser. All opinions are mine alone. 

  Like mindful recipes as much as I do? Check out these ones from Domestic Superhero!

You can also connect with me here:

Thanks for visiting!

- Allyson

Southwestern Stuffed Sweet Potatoes

Published Jan 14, 2016 by Allyson
This post may contain affiliate links. Read my disclosure policy.

Southwestern Stuffed sweet potatoes are full of beans, corn, and spices! A dash of lime and cilantro and you have one kicked up healthy meal!

Southwestern Stuffed sweet potatoes are full of beans, corn, and spices! A dash of lime and cilantro and you have one kicked up healthy meal! These bad boys only have 230 calories for a WHOLE (2 halves) potato!!!

Today I have a recipe for you that is not only super tasty, but SUPER healthy! Personally, we have been trying to eat healthier now that it’s a new year, and this is a great recipe to keep you full, but not load a bunch of calories onto your hips. It’s incredibly quick to make, and totally yummy. These Southwestern Stuffed Sweet Potatoes are seriously delicious and the perfect weeknight meal! Want to save time?? You can make sweet potatoes in the AIR FRYER or in the INSTANT POT!
Vegetarian Southwestern Stuffed sweet potatoes are full of beans, corn, and spices! A dash of lime and cilantro and you have one kicked up healthy meal! These bad boys only have 230 calories for a WHOLE (2 halves) potato!!! Total win!
When I make these Southwestern Stuffed Sweet Potatoes, I take the easy way – microwaving the potatoes. It’s quick, it’s easy, and I am done in 10 minutes. High power, 8-10 minutes, and BOOM, done. Make sure you poke holes in the potatoes before you cook them!

However, if you have more time on your hands, or say you spend an hour in the beginning of the week cooking a bunch of potatoes, then by all means use your oven. Bake these bad boys for about 50 minutes, on 350 degrees, and they should be pretty tender.
Vegetarian Southwestern Stuffed sweet potatoes are full of beans, corn, and spices! A dash of lime and cilantro and you have one kicked up healthy meal! These bad boys only have 230 calories for a WHOLE (2 halves) potato!!! Total win!
While the potatoes are cooking, you can whip up your filling – it’s super quick and easy. You only need a handful of ingredients: onions, black beans, corn, tomatoes, cumin, chili powder, lime, and cilantro. Cook everything up in your skillet and BOOM, done. You’re going to scoop out a bit of the potato filling (save that stuff for later, yum!), and then load it up with your southwestern filling! Add a dollop of Greek yogurt (extra protein), a sprinkle of cheese, and garnish with cilantro. Like I said, so easy, so good. 

The best part about these, they only have about 230 calories for the WHOLE (2 halves) potato (interested in all the nutritional info, scroll all the way to the bottom)! I don’t know about you, but I feel like you can’t really beat that! I feel like you can eat this as a side to your main dish, or you can eat it as the main dish; it’s totally versatile!

Like healthy recipes? Checkout these other ideas:

  • Southwestern Flatbreads
  • Southwestern Stuffed Zucchini Boats
  • Air Fryer Chicken Parmesan
  • Air Fryer Hard Boiled Eggs (no boiling)
  • Instant Pot Buffalo Chicken Lettuce Wraps

Make sure you don’t miss a thing! Follow Domestic Superhero on:

Facebook | Instagram | Pinterest | TikTok | Email

For NEW RECIPES delivered straight to your inbox, signup for our email list! 

Print
Southwestern Stuffed Sweet Potatoes

Southwestern Stuffed sweet potatoes are full of beans, corn, and spices! A dash of lime and cilantro and you have one kicked up healthy meal! These bad boys only have 230 calories for a WHOLE (2 halves) potato!!! 

Ingredients
  • 4 sweet potatoes about 5 inches long
  • 1 teaspoon oil
  • ½ cup onion chopped
  • ¾ cups black beans
  • ¾ cups frozen corn
  • 1 cup cherry tomatoes cut in half
  • 1 teaspoon cumin
  • 1 teaspoon chili powder
  • 2 TBS chopped cilantro plus more for garnish
  • 1 lime juiced
  • 4 TBS mexican blend shredded cheese I used 2%
  • 4 TBS Greek yogurt for garnish if desired
Instructions
  1. Clean all potatoes, and poke holes throughout with a fork. Place potatoes in microwave safe dish, and cook on HIGH for 8-10 minutes, or until tender. Remove and set aside.

  2. While the potatoes are cooking, add oil to a skillet, and add onion; saute for 3-4 minutes. Add cumin and chili pepper; stir. Add beans, corn, and tomatoes and saute for 2 minutes. Add lime and cilantro; stir and cook for 1 minutes. Remove from skillet and set aside.

  3. Working one potato at a time, cut potato in half lengthwise, and scoop out a bit of the filling (save to eat later!), making a little opening for the filling. Add about ¼ cup of filling into each potato. Add ½ TBS cheese on top of each, then ½ TBS Greek yogurt, and additional cilantro if desired. Repeat for all potatoes.

Recipe Video

Recipe Notes

Sweet potatoes can also be baked: poke holes and bake at 350 degrees for about 45-55 minutes.

Mint Chocolate Skillet Brownie

Published Jan 6, 2016 by Allyson
This post may contain affiliate links. Read my disclosure policy.

Mint Chocolate Skillet Brownies are minty, gooey, and totally delicious! 

Mint Chocolate Skillet Brownies are minty, gooey, and totally delicious!

I have fallen into a slight obsession with the dessert known as a skillet brownie. Really, these skillet brownies are no different than making brownies in a baking dish…but they feel WAY different. Probably because I feel like I can eat it straight out of the skillet without it being so weird. I’ve been making these in all sorts of varieties lately too…caramel, fudge, cranberry..the sky is the limit! So, when I had some leftover mint chocolates, from making these delicious Mint Chocolate Dipped Pretzels, I knew EXACTLY what I was going to make. Let me introduce you to this marvelous Mint Chocolate Skillet Brownie!

Mint Chocolate Skillet Brownies are minty, gooey, and totally delicious!

This is super simple to throw together, not many ingredients, and the homemade brownie tastes as good as boxed brownies, trust me. If you don’t feel like we are at that level of trust just yet, go ahead and use your favorite boxed brownie, add the mint chocolate, and bake it up in a skillet…it will still be amazing, I know it. Go on with your badself.

Mint Chocolate Skillet Brownies are minty, gooey, and totally delicious!

Luckily for me, my husband doesn’t like mint and chocolate together (hello, crazy), so I thought I had this whole delicious Mint Chocolate Brownie to myself…no such luck. My son spotted this and knew right away he wanted to dive into the deliciousness. I’ll share with him…for now at least.

Mint Chocolate Skillet Brownies are minty, gooey, and totally delicious!

Another reason I like the idea of a skillet brownie, is because if you are going to a party or something, you can just bring this with you, in the skillet, and it looks so good. Totally effortless presentation. Don’t add the ice cream until you get there though…and then you might want to add plastic spoons…don’t want that silver scraping up your skillet!

Print
Mint Chocolate Skillet Brownie

Mint Chocolate Skillet Brownie are minty and delicious fudge brownies!

Course: Dessert
Cuisine: American
Keyword: Mint Chocolate Skillet Brownie
Servings: 8 servings
Ingredients
  • 1 cup butter melted
  • 2 cups sugar
  • 1 egg
  • 1 teaspoon vanilla
  • ⅔ cup cocoa powder
  • 1 cup flour
  • ½ teaspoon salt
  • ½ teaspoon baking powder
  • ½ cup mint chocolate chopped and divided
  • ice cream optional
Instructions
  1. Preheat oven to 350 degrees. Grease a 10 or 12 inch cast iron skillet.

  2. In a large bowl, combine melted butter, sugar, eggs, and vanilla. Mix until just combined. Add cocoa powder, flour, salt, and baking powder to bowl; mix to combine, but don’t over mix. Set 2 TBS of chopped mint chocolate aside, and then add the rest of the mint chocolate to the batter and fold to combine.

  3. Pour batter into skillet and spread evenly. Sprinkle remaining mint chocolate on the top of the batter.

  4. Place in oven and bake for 30-35 minutes. Check at 30 minutes with a toothpick and cook additional minutes if needed. Remove from oven.

  5. Slice and serve topped with ice cream and more mint chocolate if desired.

Recipe Notes

You can eat this straight out of the skillet (best way, in my opinion), or you can cut sliced and serve. I recommend using a plastic knife to cut - you get the smoothest cut and you won’t damage your cast iron skillet. Enjoy!

Things you might need to make this recipe (aff. links)

  • Cast Iron Skillet
    Mint Chocolate
    Mixing bowls
    wooden spoons 

Like dessert as much as I do? Then check out these other dessert recipes from Domestic Superhero:

Slow-Cooker-Chocolate-Lava-Cake.jpg

Chocolate-Tres-Leches-Cake.jpg

Milky-Way-Simply-Caramel-Cheesecake-Brownies-7.jpg

You can also connect with me here:

Thanks for visiting!

- Allyson

Single Serving Spinach & Artichoke Dips

Published Dec 21, 2015 by Allyson
This post may contain affiliate links. Read my disclosure policy.

This is a sponsored conversation written by me on behalf of Tyson Foods. The opinions and text are all mine. #tortillalandholiday #recipe

Single Serving Spinach & Artichoke Dip - the perfect party appetizer!

Can y’all believe it is almost Christmas?! Geez, where did the time go? I have been whipping up all kinds of recipes for this holiday season, and I am really excited to share these Single Serving Spinach & Artichoke Dips in tortilla bowls with you!

Single Serving Spinach & Artichoke Dip - the perfect party appetizer!

I already knew that I wanted to use TortillaLand flour tortillas for this recipe. You can find them at Costco in the refrigerated area (see below), and they are super awesome. They have only 5 ingredients (and you can actually read them all) - wheat flour, water, canola oil, salt, sugar; and you get to cook them up yourself! All you do is heat them on each side in a skillet for a few minutes and they puff up and get those delicious tortilla bubbles right before your eyes! They are super fresh tasting and really delicious.

Single Serving Spinach & Artichoke Dip - the perfect party appetizer!

I picked up a couple other things at Costco (find your local Costco here), too. I don’t know about you, but I can never get out of Costco with just one thing – they have so many things I HAVE to have! Once I got home, I cooked up the tortillas, made the spinach artichoke dip, and started assembling my Single Serving Spinach & Artichoke Dip!

Single Serving Spinach & Artichoke Dip - the perfect party appetizer!

After you get them all setup, it’s really simple – just bake in the oven for about 10 minutes, or until lightly browned and the cheese is melted. Pop them out of the tins and serve them up! You could pre-make these if you want, say, if you are serving them for a party, but I would refrigerate covered, and then bake right before needed. That way the tortillas will stay crispy.

Single Serving Spinach & Artichoke Dip - the perfect party appetizer!

I love these little bowls because once you get to the bottom of the dip, you can tear it up and eat it! So yum! I served these to my guests with carrot sticks, celery sticks, and some chips. They were a huge hit!

Single Serving Spinach & Artichoke Dip - the perfect party appetizer!

Print
Single Serving Spinach & Artichoke Dips

Single Serving Spinach & Artichoke Dips are the perfect party appetizer!

Course: Appetizer
Cuisine: American
Keyword: Single Serving Spinach & Artichoke Dips
Ingredients
  • ½ TBS oil
  • 14 ounces artichoke hearts drained and chopped
  • 10 ounce bag baby spinach leaves
  • 1 8 oz package cream cheese
  • 1½ cups shredded mozzarella cheese
  • ½ cup shredded Parmesan cheese
  • 12 TortillaLand flour tortillas found at Costco
  • carrots and celery for garnish/dipping optional
Instructions
  1. Using a large skillet, cook 12 tortillas as directed on package (just heat on each side for a few minutes).

  2. Preheat oven to 375 degrees.

  3. Using a large muffin tin, place tortillas into the muffin hole area, pressing to fit it in. Repeat for 12 tortillas.

  4. Heat the oil in a large pot over medium-high heat. Add in the artichoke pieces and cook for one minute. Reduce heat to medium, add in the spinach, and cook until wilted, turning often.

  5. Mix in the cream cheese and mozzarella, and let it melt entirely. Season with salt and pepper to taste. Remove from heat.

  6. Add about ¼ cup of dip to fill the holes of the tortillas. Sprinkle each top with a bit of parmesan cheese. Repeat for all.

  7. Loosely cover with foil (you will need a few LARGE pieces), and bake for 10 minutes. Remove foil, and bake for 10-12 additional minutes, watching closely that the tortillas don't burn. Once they are browned and the dip is melted, remove from the oven.

  8. Place individual dips onto bowls and serve with your choice of garnish.

Single Serving Spinach & Artichoke Dip - the perfect party appetizer!

Now for the FUN! I’d like to see what you would do with TortillaLand tortillas. Tell me what you would create using TortillaLand tortillas, or better yet show me! Go grab a bag at your local Costco and send me a photo (DomesticSuperheroAZ@gmail.com) of your creation. I will be GIVING AWAY a $50 Costco Cash Card to the recipe I like best! Don’t have time to actually make the recipe yet? Well, comment and let me know your idea for your chance to win! I will consider all for the Costco Cash Card!

This is a sponsored conversation written by me on behalf of Tyson Foods. The opinions and text are all mine. #tortillalandholiday #recipe


You can also connect with me here:

Thanks for visiting!

- Allyson

Spicy Tomato Grilled Cheese & Easy Tomato Soup

Published Dec 9, 2015 by Allyson
This post may contain affiliate links. Read my disclosure policy.

Spicy Tomato Grilled Cheese and Easy Tomato Soup is the perfect comfort dinner!

A typical weekend at our house always consists of at least one grilled cheese sandwich. I love coming up with different flavor combos, and lately I have been using a lot of spicy tomatoes around the kitchen. I knew throwing them into a grilled cheese would be a total win; then, serving it up with some easy peasy 15 minute homemade tomato soup – dinner victory! These Spicy Tomato Grilled Cheese sandwiches did not disappoint, and they were so tasty dipped into the hearty tomato soup!

Spicy Tomato Grilled Cheese and Easy Tomato Soup is the perfect comfort dinner!

After I picked those up, all I needed was some cream cheese and pepper jack cheese, and I was on my way!  Once I got home, I couldn’t wait to prepare these sandwiches. Now that the weather is getting cooler, I love a hot sandwich and soup – it’s really the perfect lunch or dinner!

Rotel cooking

In a small bowl, I mixed the RO*TEL Chunky Diced Tomatoes & Green Chilies with some softened cream cheese. I was making two sandwiches, so I laid out 4 slices of my fresh bakery bread, added a slice of pepper jack cheese to each slice, and then slathered the RO*TEL cream cheese mixture in the center. I plopped them into my cast iron skillet and let them grill up. Don’t forget the butter on the outside of the bread – this will ensure a nice crispy outside!

Spicy Tomato Grilled Cheese and Easy Tomato Soup is the perfect comfort dinner!

While my sandwiches were grilling up, I made the Tomato Soup, and it really couldn’t be easier. All you need is crushed tomatoes, broth, and some spices. Have all that simmering while you are fixing these sandwiches. Your whole family will thank me later!

Spicy Tomato Grilled Cheese and Easy Tomato Soup is the perfect comfort dinner!

Print
Spicy Tomato Grilled Cheese & Easy Tomato Soup
Prep Time
5 mins
Cook Time
5 mins
Total Time
10 mins
 

Spicy Tomato Grilled Cheese & Easy Tomato Soup is the perfect lunch option!

Course: Main Course
Cuisine: American
Keyword: Spicy Tomato Grilled Cheese & Easy Tomato Soup
Servings: 2 sandwiches
Ingredients
Ingredients for the Sandwich
  • 4 slices of fresh sliced bakery bread or any thick cut bread will be fine
  • 2 ounces cream cheese softened
  • 1 can RO*TEL Chunky diced tomatoes and green chilies strained well
  • 4 slices pepper jack cheese
  • butter for bread
Ingredients for the Soup
  • 28 ounces Hunts crushed tomatoes
  • 1 TBS olive oil
  • 1 onion diced
  • 2 garlic cloves minced
  • 4 cups vegetable or chicken broth
  • 2 teaspoon dried basil
  • ¼ teaspoon salt
  • ¼ teaspoon pepper
Instructions
Directions for soup
  1. In a large pot, add olive oil, onions and garlic and saute for 2 minutes over medium heat. Add crushed tomatoes, broth, basil, salt, and pepper; stir to combine. Bring to a light boil, reduce heat, cover and simmer while you make the sandwiches.

  2. Puree soup using an immersion blender or transfer soup to a blender and puree (this can be skipped if you like chunky soup).

Directions for sandwiches
  1. In a small bowl, combine softened cream cheese and strained RO*TEL; set aside.

  2. Lay out your slices of bread. Place butter on the outside sides of each slice. For the first sandwich, add a slice of pepper jack cheese, then half the tomato mixture - spreading it out evenly, then another slice of cheese. Top the sandwich with a slice of bread, leaving the butter on the outside. Assemble second sandwich in same order.

  3. Heat a skillet or grill pan over medium heat; add sandwiches carefully. Allow to cook for 3-4 minutes over medium heat, until the first side is browning. Flip sandwiches carefully, and allow to cook for 2-3 minutes; this side will cook faster. Remove from pan and set aside.

  4. Allow to cool a few minutes and then slice in half using a sharp bread knife.

  5. Serve sandwiches alongside a cup of soup - enjoy!

Find more easy to make recipes that are perfect during the holidays by visiting this link: Yes You Can Recipes!

Like grilled cheese as much as I do?! Check these recipes out on Domestic Superhero (click on photo for recipe):

Caprese-Panini-31.jpg

Caramelized Onion and Mushroom Havarti Melt

Apple-Gouda-Grilled-Cheese.jpg

You can also connect with me here:

Thanks for visiting!

- Allyson

Chocolate Peppermint Cheesecake with Chocolate Ganache

Published Nov 30, 2015 by Allyson
This post may contain affiliate links. Read my disclosure policy.

Chocolate Peppermint Cheesecake with Chocolate Ganache is the most delicious and decadent holiday cheesecake!

Now that we are past Thanksgiving, I am gearing up for December holidays! It’s such a busy month for us, between my son’s birthday, Christmas parties, taking a vacation, and then of course, Christmas, that I need to get a solid plan on things before it’s the last minute! When I heard M&M's® had a new flavor, M&M's® White Peppermint, I knew it would be perfect for holiday baking. I have been crazy about making cheesecakes lately, so I really wanted to try my hand at a Chocolate Peppermint Cheesecake with Chocolate Ganache, and I am so glad I did, because it came out awesome!

Chocolate Peppermint Cheesecake with Chocolate Ganache is the perfect holiday dessert!

This Chocolate Peppermint Cheesecake with Chocolate Ganache was actually really easy to make. I know what you are thinking, cheesecake is hard to make, but stop- it is totally easy! I love making it because it has really become a no-fail type of recipe for me. You could even make this cheesecake regular, not chocolate, if you wanted, by just leaving out the melted chocolate from the cheesecake mixture.

Either way, once you get those M&M's® White Peppermint candies on the top, you are done and everyone will be impressed with your holiday baking. One tip, make this cheesecake the day before you need it. Keeping it in the fridge to setup overnight is really ideal, and you don’t want to skimp on that.

Chocolate Peppermint Cheesecake with Chocolate Ganache is the perfect holiday dessert!
If you like baking around the holidays, try these other holiday cookies and treats as well:

  • Cranberry Bliss Bars (Starbucks Copycat)
  • Holiday Reindeer Cookies
  • Sugar Cookie Fudge
  • Bear Paw Cookies
  • Christmas Crack - Saltine Cracker Toffee
  • Chocolate Fudge (3 Ingredients)
  • Chocolate Peppermint Cheesecake with Chocolate Ganache
  • Dark Chocolate Peppermint Brownies
  • Cranberry Lemon Loaf

Make sure you don’t miss a thing! Follow Domestic Superhero on:

Facebook | Instagram | Pinterest | TikTok | Email

For NEW RECIPES delivered straight to your inbox, signup for our email list! 

Print
Chocolate Peppermint Cheesecake with Chocolate Ganache
Prep Time
5 mins
Cook Time
1 hr
Total Time
1 hr 5 mins
 

Chocolate Peppermint Cheesecake with Chocolate Ganache is the perfect holiday treat!

Course: Dessert
Cuisine: American
Keyword: Chocolate Peppermint Cheesecake with Chocolate Ganache
Servings: 10 servings
Ingredients
Ingredients for Crust
  • 2 cups crushed chocolate graham crackers
  • ⅓ cup butter
Ingredients for Filling
  • 3 -8 ounce packages cream cheese 24 ounces total, softened
  • ¾ cup granulated sugar
  • 4 large eggs room temperature
  • 1 teaspoon vanilla extract
  • 1 teaspoon peppermint extract
  • 7 ounces condensed milk half a full size can
  • 6 ounces dark chocolate chips melted
  • ⅓ cup M&M's® White Peppermint roughly chopped
Ingredients for Ganache
  • 6 ounces dark chocolate chips
  • 4 TBS heavy whipping cream
  • ½ cup M&M's® White Peppermint chopped
Instructions
  1. Preheat oven to 325 degrees F. Place a baking dish with about an inch of water in the bottom of the oven**
  2. In a medium bowl, combine graham cracker crumbs and butter, mix well to moisten. Press into the bottom of a 10 inch spring form pan.

  3. Using a stand mixer or electric mixer, add cream cheese and sugar to the bowl, mix on a high speed to combine. Add eggs, one at a time until combined. Add vanilla and peppermint extract; mix. Add condensed milk and melted chocolate chips; combine until just mixed. Remove bowl, add ⅓ cup chopped M&M's® White Peppermint; fold to combine. Pour filling on top of graham cracker crust and evenly smooth out the top. Place into oven and cook for 50-60 minutes, or until just set.

  4. Remove from oven and allow to cook on the counter for 1 hour. Place into fridge and leave for at least 6 hours, preferably overnight.

  5. The next day, using a double boiler, add chocolate chips and heavy whipping cream; mix while melting, until melted and combined. Use a spatula to spread ganache over the top and sides of the cake. Sprinkle ½ cup M&M's® White Peppermint over the top.

  6. Slice and serve. Store in refrigerator.

Recipe Notes

**This water dish will help humidify the oven - leave at the bottom while the cheesecake bakes.

Spinach Artichoke Flatbreads

Published Nov 18, 2015 by Allyson
This post may contain affiliate links. Read my disclosure policy.

Spinach Artichoke Flatbreads - Fresh spinach and delicious artichokes with creamy cheeses makes the perfect quick weeknight meal!

I’m not sure who came up with the genius combination of spinach, artichokes, and cheese, but geez were they onto something! This is pretty much the most winning combination EVER. If I could pick 2 veggies to throw together at all times, it would be these two bad boys. One night after work, I was rushing trying to figure out exactly what to make for dinner (I clearly didn’t meal plan that week – doh!), and I had some left over baby spinach and naan breads I had whipped up earlier in the week. A light bulb went off, and luckily, I also had a jar of artichoke hearts in my pantry. Bada bing, bada boom- Spinach Artichoke Flatbreads were born.

Spinach Artichoke Flatbreads - Fresh spinach and delicious artichokes with creamy cheeses makes the perfect quick weeknight meal!

These Spinach Artichoke Flatbreads are super simple to make, and really really delicious. After I was done, I really wished I had made extra to snack on for dessert, but instead, I just made a mental note to make more next time. So good. They key here is using fresh baby spinach; I really can’t stand frozen spinach for whatever reason…it always has a funny taste to me. I think using the fresh spinach keeps it really flavorful and green (literally)! I also always recommend that you use blocks of cheese, and then grate it yourself. The consistency is much better when it melts, but if you don’t have time, or want the convenience of a bag of pre-shredded cheese, go for it. Either way, I think they will turn out delicious!
Spinach Artichoke Flatbreads - Fresh spinach and delicious artichokes with creamy cheeses makes the perfect quick weeknight meal!

Print
Spinach Artichoke Flatbreads

Spinach Artichoke Flatbreads are a delicious quick meal that the whole family will love!

Course: Main Course, Side Dish, Snack
Cuisine: American
Keyword: Spinach Artichoke Flatbreads
Servings: 2 flatbreads
Ingredients
  • 2 naan breads homemade or premade
  • 3 TBS cream cheese
  • 1 garlic clove minced
  • 3 cups baby spinach
  • ½ cup marinated artichoke hearts chopped roughly
  • ¾ cup shredded mozzarella cheese
  • 2 TBS grated Parmesan cheese
  • ¼ teaspoon black pepper
  • ⅛ teaspoon salt
Instructions
  1. Preheat oven to 350 degrees. Place both naan's onto a parchment lined baking sheet.

  2. In a small bowl, combine cream cheese and garlic, mixing until pretty well combined. Divide in halves, and then spread onto the top of each naan. Add 1 ½ cups baby spinach to the top of each flat bread (It will look like a big pile, but will cook down), then top with artichokes (¼ cup on each), then mozzarella cheese (half on each), and then parmesan cheese. Sprinkle pepper and and salt over the top of each flatbread.

  3. Place in center of oven, bake for 10-14 minutes, or until getting a bit browned and cheese is melted.

  4. Serve immediately and enjoy!

Like flatbreads as much as I do? Check out these other recipes on Domestic Superhero (click on photo for recipe):

Mushroom and Goat Cheese Flatbread with Balsamic Glaze

Grilled Veggie French Onion Flatbreads

Southwestern Flatbreads Main

Herbed Asparagus & Goat Cheese Flatbreads

You can also connect with me here:

Thanks for visiting!

- Allyson

Slow Cooker Caramel Macchiato Cheesecake

Published Nov 2, 2015 by Allyson
This post may contain affiliate links. Read my disclosure policy.


Slow Cooker Caramel Macchiato Cheesecake - The creamiest, most delicious cheesecake you will EVER try!

Over the last year or so, I have been totally obsessed with using the slow cooker to make cheesecake! It’s seriously the best ever. It makes the creamiest most delicious cheesecake, and it’s barely any work. Another one of my current obsessions is Iced Coffee. I can’t stop drinking it! I was spending lots and lots of money on the drive-thru, but then I realized you can buy it in the store, and you get so much more for your money! I started drinking International Delight Iced Coffee, and I haven’t turned back! It’s fridge friendly and tastes just like the iced coffee I get at my favorite café. Over the weekend I decided to combine my 2 current obsessions, and I came up with an amazing Slow Cooker Caramel Macchiato Cheesecake.

Slow Cooker Caramel Macchiato Cheesecake - The creamiest, most delicious cheesecake you will EVER try!

I headed to Walmart to pick up my ingredients for the Slow Cooker Caramel Macchiato Cheesecake. I realized that the International Delight Iced Coffee is now in a NEW section in Walmart. You can now find it with all the refrigerated teas, juices, coffees, and close to the milk. My Walmart had a whole row of International Delight Iced Coffee, including all the varieties.

Making the cheesecake is a cinch. You mix all the ingredients in your stand mixer or with your electric mixer, pour the mixture into your spring form pan, and get it cooking in the slow cooker. A couple hours later, your cheesecake is ready to set in the fridge. Then, after a few hours in the fridge, you have the most delicious cheesecake! The biggest tip I have for you about making cheesecake in the slow cooker, is to make sure you DON’T fill your pan too high. The only time I had an issue making cheesecake in the slow cooker, I filled the pan way to high and it overflowed…it was not pretty, and I was not happy about my sloppy cheesecake. I would leave at least an inch of space from the filling to the top of the pan.

I decided on the Caramel Macchiato flavor for my cheesecake, and it really came out perfectly. I love a good Iced Caramel Macchiato and this cheesecake is the perfect balance of coffee, caramel, and cheesecake…yum!

Slow Cooker Caramel Macchiato Cheesecake - The creamiest, most delicious cheesecake you will EVER try!

Print
Slow Cooker Caramel Macchiato Cheesecake
Ingredients
For the crust
  • ¾ cups chocolate graham cracker crumbles
  • 2 TBS butter melted
  • 1 TB sugar
For the filling
  • 12 ounces cream cheese softened (this is 1 and ½ packs)
  • 1 ⁄2 cup sugar
  • 1 TBS flour
  • 1 ⁄4 teaspoon salt
  • 2 eggs
  • ¾ cup International Delight Iced Coffee - Caramel Macchiato Flavor
  • ⅓ cup butter melted
For topping
  • ½ cup caramel sauce
Instructions
  1. 1. For the crust: In a small bowl mix together chocolate graham cracker crumbles, sugar, and melted butter. Press the crumbs into the bottom of a 6 inch spring form pan.
  2. 2. For the filling: In the bowl of a stand mixer (or electric mixer), add cream cheese, sugar, flour and salt. Beat until completely combined with no lumps. Add eggs, one at a time, beating after each one. Add iced coffee and remaining butter, beat until completely combined. Pour mixture into the spring form pan, on top of the chocolate crust. Be sure there is an inch of space between the top of the mixture and the top of the pan.
  3. 3. Using a large slow cooker, add 1 inch of water to the bottom. Place a wire rack, or 3 mason jar ring tops (remove insert) to act as a rack, in the bottom of the slow cooker. Place the spring form pan on top of the rack/rings.
  4. 4. Place 3 layers of paper towels across the top of the slow cooker, pulling tightly so they don't touch the pan, and then place the slow cooker lid on top. This will absorb the moisture to prevent the cake from getting wet while cooking.
  5. 5. Cook on HIGH for 2 hours (do not adjust this setting). Remove top and paper towels, let sit in slow cooker for 1 hour to cool. Remove from slow cooker, place in fridge for at least 4 hours, preferably overnight.
  6. 6. Drizzle top with caramel sauce, slice, and serve. Enjoy!
Recipe Notes

Keep cheesecake in the fridge when not serving.


No Bake Mini Caramel Apple Pie Cheesecakes

Published Oct 20, 2015 by Allyson
This post may contain affiliate links. Read my disclosure policy.

This shop has been compensated by Collective Bias, Inc. and its advertiser. All opinions are mine alone. #EffortlessPies #CollectiveBias

No Bake Mini Caramel Apple Pie Cheesecakes - The perfect fall treat!

I have another awesome fall recipe for you today! I am so excited to share these No Bake Mini Caramel Apple Cheesecakes with y’all! Using only a handful of ingredients, you can make these effortless scrumptious desserts for the whole family! I headed to Walmart to pick up all the ingredients and got cooking!

Mini piesCollage

After I picked up the Keebler® Ready Crust® Mini Graham Cracker Pie Crust, Light & Fit® Greek Apple Pie Yogurt, Reddi-wip®, and a couple of other things, I headed home. My son, Austin, was excited to help me in the kitchen. First, we preheated our oven to 350 degrees, and popped the crusts in to crisp up. It only takes 10 minutes! This step is actually optional, so it’s up to you!  While those were cooking, we combined the yogurt with half a block of cream cheese, and then poured them into the pie crusts. Then, pop them in the fridge for at least an hour to firm up!

No Bake Mini Caramel Apple Cheesecakes 5

Pull those bad boys out of the fridge, then top them with your Reddi-wip®, an apple slice, and some caramel drizzle.

No Bake Mini Caramel Apple Pie Cheesecakes - The perfect fall treat!

Print
No Bake Mini Caramel Apple Cheesecakes
Ingredients
  • 1 package Keebler® Ready Crust® Mini Graham Cracker Pie Crusts 6 crusts
  • 2 containers Light & Fit® Greek Apple Pie Yogurt
  • Reddi-wip®
  • 4 ounces cream cheese softened
  • caramel sauce
  • apple slices
Instructions
  1. 1. In a blender or food processor, add yogurt and cream cheese, process until combine.
  2. 2. Place crusts on a sheet or cutting board, and fill with mixture. Place in fridge for at least 1 hour.
  3. 3. Top with Reddi-wip®, caramel drizzle, and an apple slice.
  4. 4. Serve immediately and enjoy!
Recipe Notes

You can also bake (according to package directions) the crusts to crisp them up before filling. This is totally optional - if you do not bake, they will be more crumbly, which I like.

No Bake Mini Caramel Apple Pie Cheesecakes - The perfect fall treat!

They are SO yummy! We are so busy during the school week, that these snacks are easy, healthy, and everyone loves them! They are also easy to make in a pinch when you have holiday company or family over!

No Bake Mini Caramel Apple Pie Cheesecakes - The perfect fall treat!

Be sure to check out more delicious Effortless Pie Recipes. I'd love to hear about your favorite pie recipe!

You can also connect with me here:

Thanks for visiting!

- Allyson

Spicy Asian Eggplant & Tofu Bowls

Published Oct 12, 2015 by Allyson
This post may contain affiliate links. Read my disclosure policy.

Spicy Asian Eggplant & Tofu Bowls are the perfect healthy dinner! Delicious Japanese Eggplant, Bok Choy, and tofu drenched in a spicy Asian Sauce! Takes less than 30 minutes, too!

Y’all…this is one of the recipes that just comes together. I kind of feel like it could be a ‘clean out your fridge’ recipe, because it’s SO easy, and you can use just about any veggies in here. I had stopped at Super HMart on my way home last week, and of course I scouted out their produce. It is always SO cheap, and they have a HUGE variety…can’t beat that.  So, when I saw they had the Japanese eggplants for .99 a pound and huge bags of baby bok choy for $1, I knew what I was picking up. As I headed towards the back of the produce section, they have a huge assortment of tofu, and it just so happened they had one of my favorite brands on a buy 2 get one free special – SOLD! I had made a delicious Asian inspired sauce before, and I knew it would be perfect for these Spicy Asian Eggplant & Tofu Bowls.

Spicy Asian Eggplant & Tofu Bowls are the perfect healthy dinner! Delicious Japanese Eggplant, Bok Choy, and tofu drenched in a spicy Asian Sauce! Takes less than 30 minutes, too!

Now, I know some of y’all see this food and you’re all like, “where’s the meat?!” Well, I am telling you…YOU DON’T NEED IT! The tofu is so thick and ‘meaty’, it totally makes up for it. Hell, even the eggplant is ‘meaty’. However, if you really really really really can’t eat a meal without some sort of meat, then you could definitely add some to this; Chicken, steak, and shrimp would all be outstanding in here. This recipe is also SO easy to whip up…literally less than 30 minutes and so delicious and healthy. You can add whatever veggies you want, but I enjoyed sticking with the Asian theme. I always order something similar to this when we get Chinese takeout, but I feel so much better eating something homemade, when I know what exactly is in my food.

Spicy Asian Eggplant & Tofu Bowls are the perfect healthy dinner! Delicious Japanese Eggplant, Bok Choy, and tofu drenched in a spicy Asian Sauce! Takes less than 30 minutes, too!

I used a wok to cook up this meal,  but if you don’t have one, a skillet would work just fine. I dry fried the tofu, which is really the easiest way of cooking it (no oil involved!), and then tossed everything together.  My husband and I could not stop eating this, it was amazing. Next time, I am definitely going to double the recipe and make some to last throughout the week for lunch and leftovers…so yum!

Print
Spicy Asian Eggplant & Tofu Bowls
Ingredients
  • 2 Japanese eggplants long skinny purple eggplants
  • 4 baby bok choy
  • 1 package extra firm or firm tofu drained
  • 4 green onions chopped
  • 1 TBS minced garlic
  • 2 TBS vegetable oil
  • 3 TBS soy sauce
  • 3 TBS water
  • 2 ½ TBS oyster sauce
  • 1 teaspoon sriracha
  • ¼ teaspoon red pepper flakes
  • 1 teaspoon sugar
  • 1 teaspoon sesame oil
  • non stick spray
Instructions
  1. 1. Cut your tofu block in half long ways (so you still have 2 rectangles, but then are half as thick. Place the 2 halves on a folded clean kitchen towel, and place another towel on top of the tofu. Place something heavy, like stacked books or a heavy pot on top of the towel. Allow to sit for 15 minutes to 'drain' the tofu.
  2. 2. Cut the tops of the eggplant, then cut in half length wise, and those sections in half again, and again. Then cut them into 2 inch pieces, set aside. Cut the bottoms off the bok choy, and rinse off the remaining stalks to remove any lose dirt.
  3. 3. In a skillet over medium high heat, spray with non stick spray. Cut tofu into bite sized cubes and add to the skillet. Cook for a few minutes on each side until the tofu is browned on the sides (I usually only flip once, every side does not need to be browned.
  4. 4. While the tofu is cooking, heat 2 TBS vegetable oil in another skillet or wok over medium high heat. Once the oil is smoking, add half the chopped green onions and stir quickly. Add the eggplant pieces and stir fry for 6-7 minutes. If things seem to be drying up, add a couple tablespoons of water to the side of the wok and continue to stir fry eggplant.
  5. 5. While eggplant is cooking, mix garlic, soy sauce, water, oyster sauce, sriracha, red pepper flakes, sugar, and sesame oil in a bowl; set aside.
  6. 6. Add bok choy to the wok with the eggplant and stir fry together for 1 minute. Pour sauce mixture into wok and stir to combine. Bring to a simmer, then reduce heat and cook for 2 minutes. Add tofu to wok and stir to coat.
  7. 7. Serve and garnish with green onions.

Like Asian inspired food as much as I do? Check out these other recipes from Domestic Superhero:

Baked Cream Cheese Rangoon Easy Asian Noodles

Baked Cream Cheese Rangoon / Easy Asian Noodles

Garlic Ginger Spinach General Tso's Tofu 1

Garlic Ginger Spinach / General Tso’s Tofu

Copycat PF Chang's Spicy Green Beans

Copycat PF Chang’s Spicy Green Beans

hot and sour soup (2) Spicy Steamed Bok Choy 01

Hot and Sour Soup / Spicy Steamed Bok Choy

You can also connect with me here:

Thanks for visiting!

- Allyson

35+ Amazing Pumpkin Recipes

Published Oct 5, 2015 by Allyson
This post may contain affiliate links. Read my disclosure policy.

35+ Amazing Pumpkin Recipes - everything from ice cream to pasta sauce - yum!

Now that we are officially in fall, you know that that means…Pumpkin EVERYTHING. Well, even if you aren’t a huge fan of pumpkin (like my crazy husband), there is literally something for everyone in this awesome roundup. We have everything from cookies, to ice cream, to pumpkin pasta sauce! The options are endless with pumpkin! Even I’m not a huge ‘pumpkin spice’ fan, but when you incorporate pumpkin into various recipes, it really is super delicious. It also makes baked goods SO super moist, which is way better than a nasty dried out cookie! So take a look and see what delicious fall recipes I’ve found for you, and let me know what you decide to cook! Happy Fall!

Cookies

The perfect soft pumpkin sugar cookies for Fall dessert spiced up with some pumpkin spice and topped off with an irresistible glaze.

Soft Glazed Pumpkin Cookies

These 4 Ingredient Pumpkin Chocolate Chip Cookies are the BEST! You'll love how moist and fluffy they are and so easy to make too! The first batch is ready in just 20 minutes!

4 Ingredient Pumpkin Chocolate Chip Cookies

Gingersnap and Pumpkin Cinnamon Roll Cookies

Gingersnap and Pumpkin Cinnamon Roll Cookies

Pumpkin Chocolate Chip Cookies - These are the perfect soft baked fall cookies full of pumpkiny goodness and stuffed full of chocolate chips.

Pumpkin Chocolate Chip Cookies

Pumpkin Cookies with Caramel Frosting

Pumpkin Cookies with Caramel Frosting

Pumpkin Cinnamon Roll Sugar Cookies

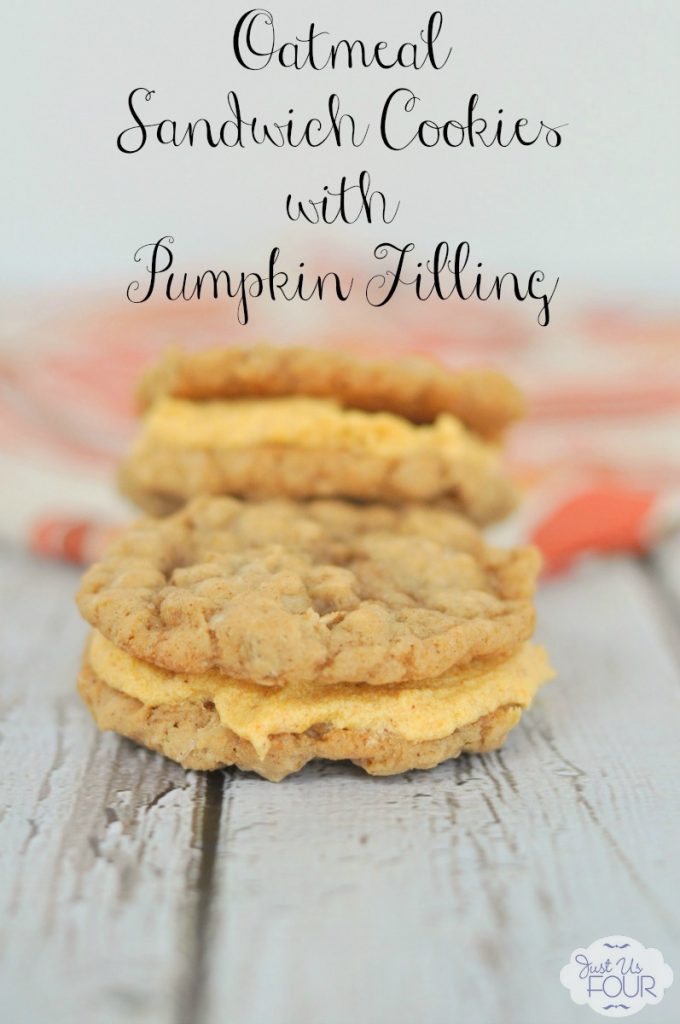
The most amazing oatmeal cookies with pumpkin cream cheese filling.

Oatmeal Sandwich Cookies with Pumpkin Filling

With these Fluffy Pumpkin Snickerdoodles, you will never have left overs! So yummy!! {The Love Nerds}

Fluffy Pumpkin Snickerdoodles

Pumpkin Cannoli Cookie Cups

Pumpkin Cannoli Cookie Cups

Desserts

Triple Chocolate Pumpkin Bundt Cake

Triple Chocolate Pumpkin Bundt Cake

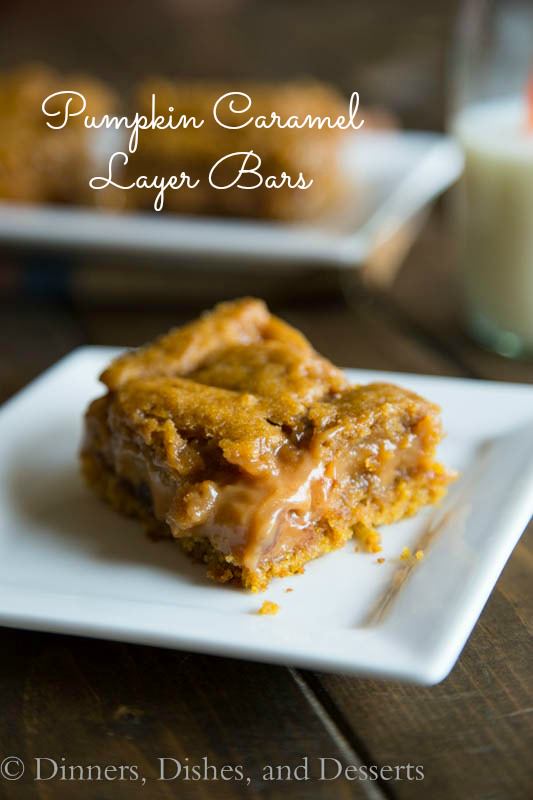
Pumpkin Caramel Layer Bars

Pumpkin Caramel Layer Bars

This Pumpkin Crumble Cake is the perfect alternative to pumpkin pie, this dessert's amazing layers will impress the whole family!

Pumpkin Crumble Cake

Pumpkin Kahlua Cupcakes - Sweet and easy pumpkin cupcakes topped with a whipped Kahlua frosting! | Living Better Together

Pumpkin Kahlua Cupcakes

Yummy Pumpkin PIe Dip

Yummy Pumpkin Pie Dip

Mini Pumpkin Pies

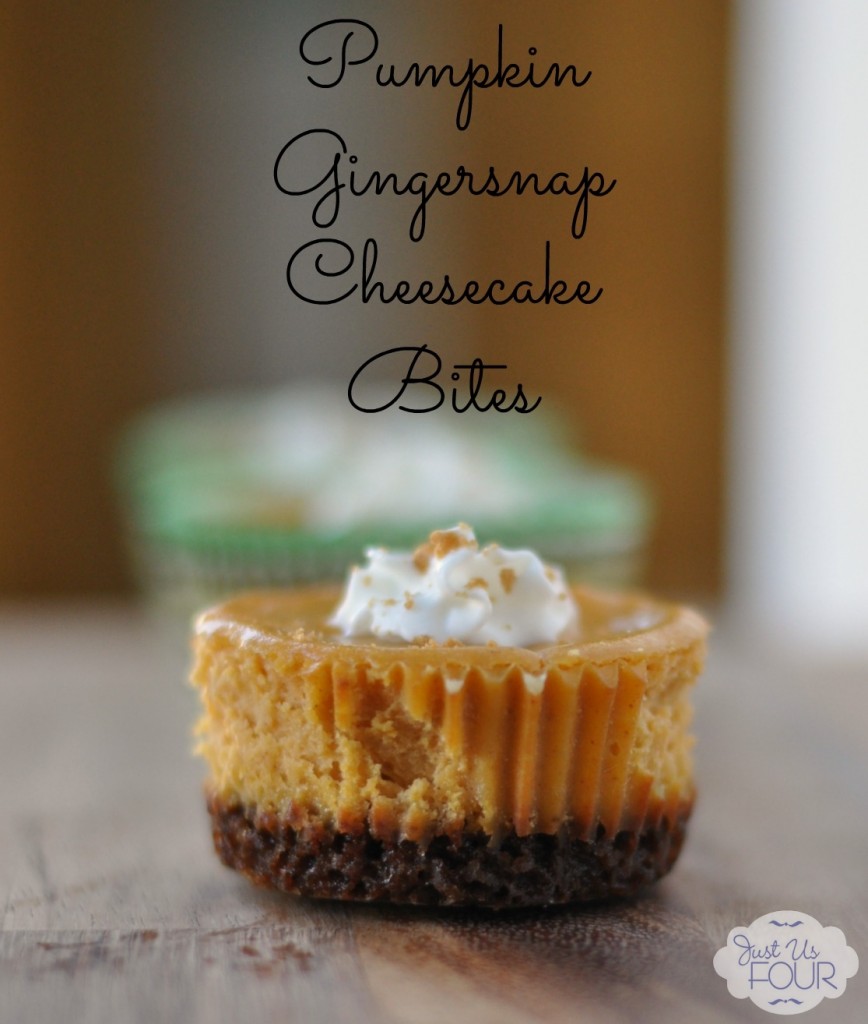
Pumpkin Cheesecake Bite with Label_wm

Pumpkin Gingersnap Cheesecake Bites

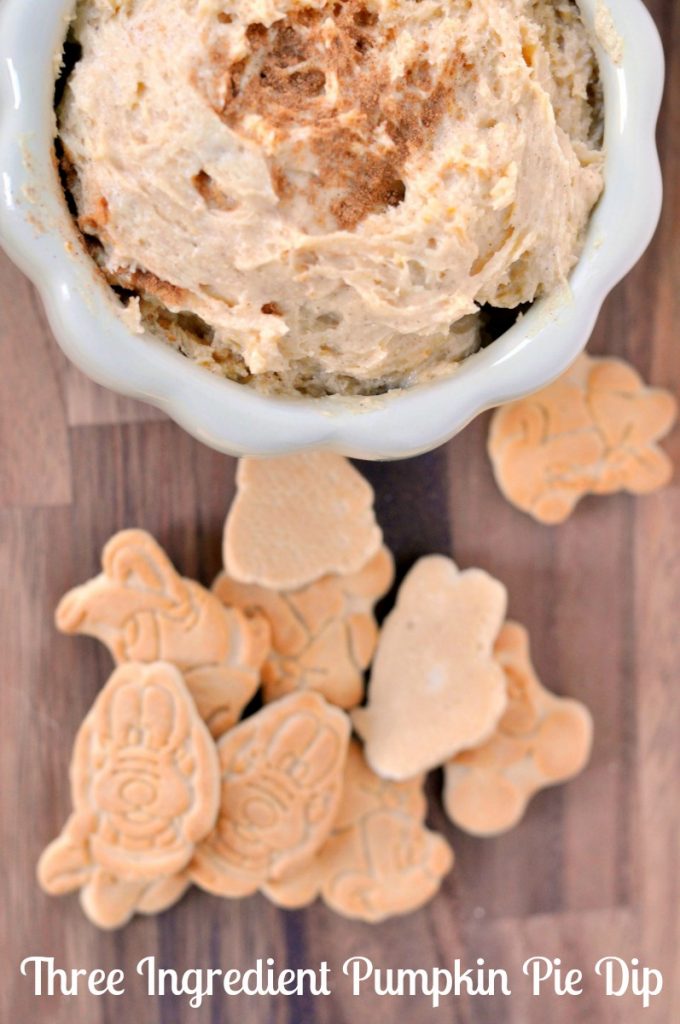
This is THE BEST pumpkin pie dip ever. Oh, and it only takes three ingredients to make.

Four Ingredient Pumpkin Pie Dip

004editedsmall

Pumpkin Muffins with Cinnamon Streusel

Pumpkin Spice Ice Cream (No Churn) 

No Churn Pumpkin Spice Ice Cream 

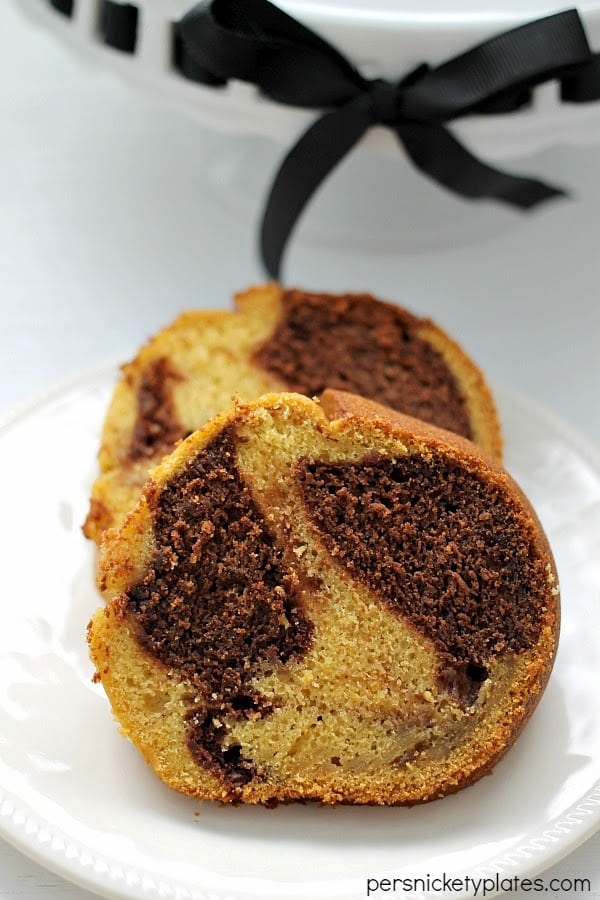
Pumpkin Chocolate Marble Bundt Cake | Persnickety Plates

Pumpkin Chocolate Marble Bundt Cake

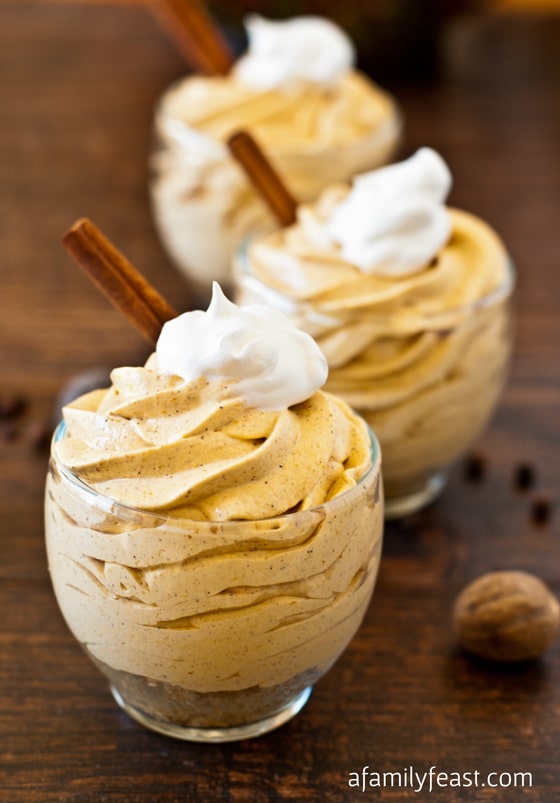
The ORIGINAL recipe...No-Bake Mini Pumpkin Cheesecake - a creamy and delicious cheesecake mousse with pumpkin pie spice flavor!

No Bake Mini Pumpkin Cheesecakes

Creamy Pumpkin Pecan Strudel Cups | Very Culinary

Pumpkin Pecan Strudel Cups

Pumpkin Spice Cream Cheese Icing

Pumpkin Spice Cream Cheese Frosting

Delicious Pumpkin Coffee Cake Recipe via @galmission

Pumpkin Coffee Cake


Pumpkin Pie Spice Blend Recipe 

Homemade Pumpkin Spice 

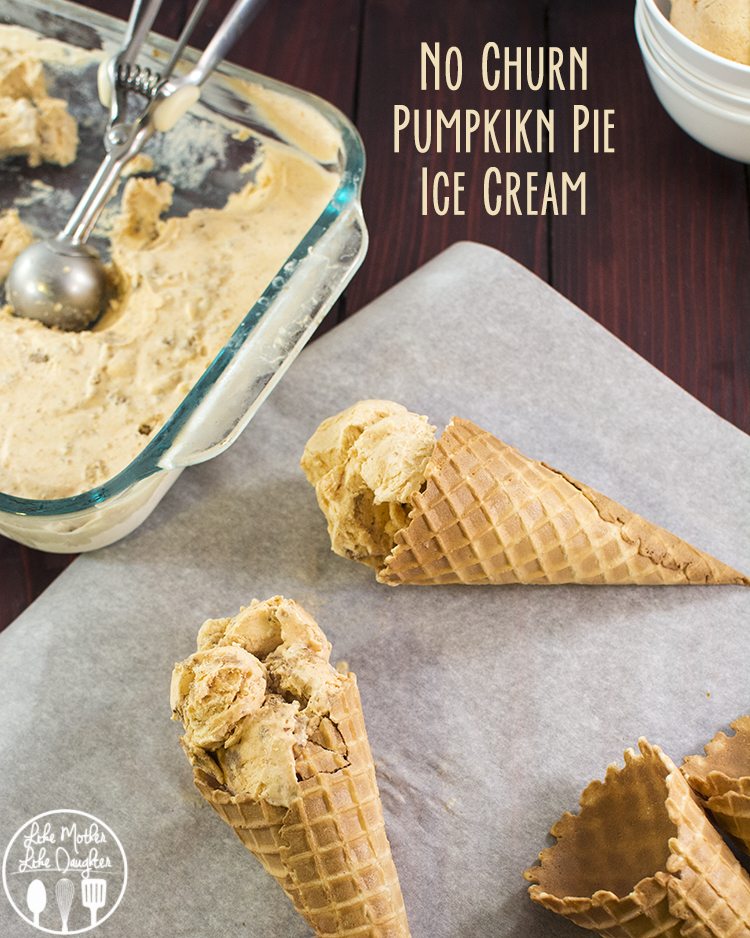
No Churn Pumpkin Pie Ice Cream - This creamy pumpkin pie ice cream is simple, no churn, and only has a few ingredients. It tastes just like a delicious slice of pumpkin pie topped with whipped cream!

No Churn Pumpkin Pie Ice Cream

Breakfast

Pumpkin Cinnamon Rolls - these delicious pumpkin cinnamon rolls are a fun twist on traditional cinnamon rolls and have the perfect fall flavors. All topped with an amazing cream cheese frosting. These are a must make this fall!

Pumpkin Cinnamon Rolls with Cream Cheese Frosting

Delicious Pumpkin Cinnamon Roll Casserole - the perfect fall brunch idea! {The Love Nerds} #recipe #breakfast #cinnamonrollrecipe #pumpkinrecipe

Pumpkin Cinnamon Roll Casserole

Homemade Spiced Glazed Pumpkin Scones - They are moist with the perfect combination of fall spices. | The Love Nerds

Glazed Pumpkin Scones

The Perfect Pumpkin Pecan Pancakes - Delicious all year long with the perfect combination of pumpkin and spices! {The Love Nerds} #brunchrecipe #pancakerecipe #pumpkinrecipe

Perfect Pumpkin Pancakes

Skinny Pumpkin Smoothie

Skinny Pumpkin Pie Smoothie

Appetizers and Main Dishes

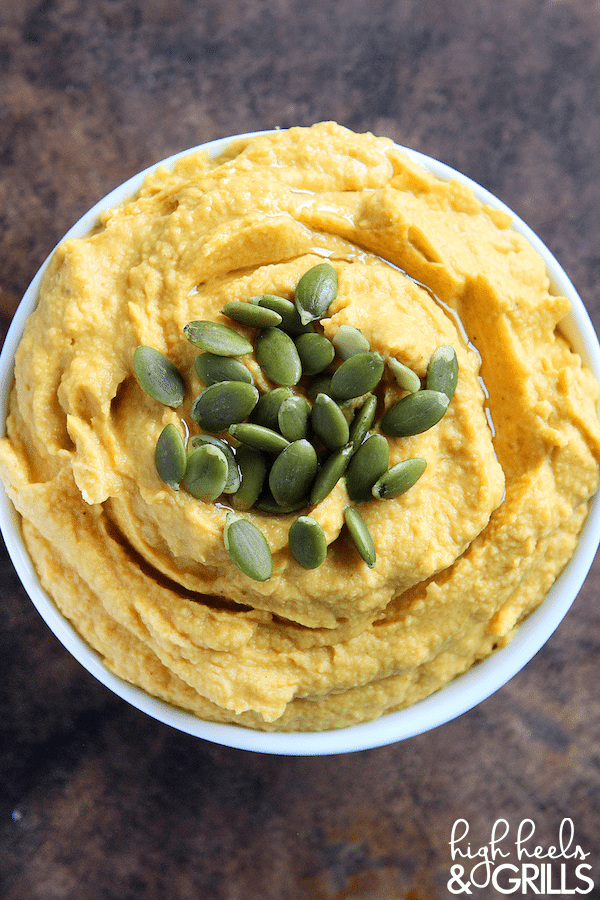
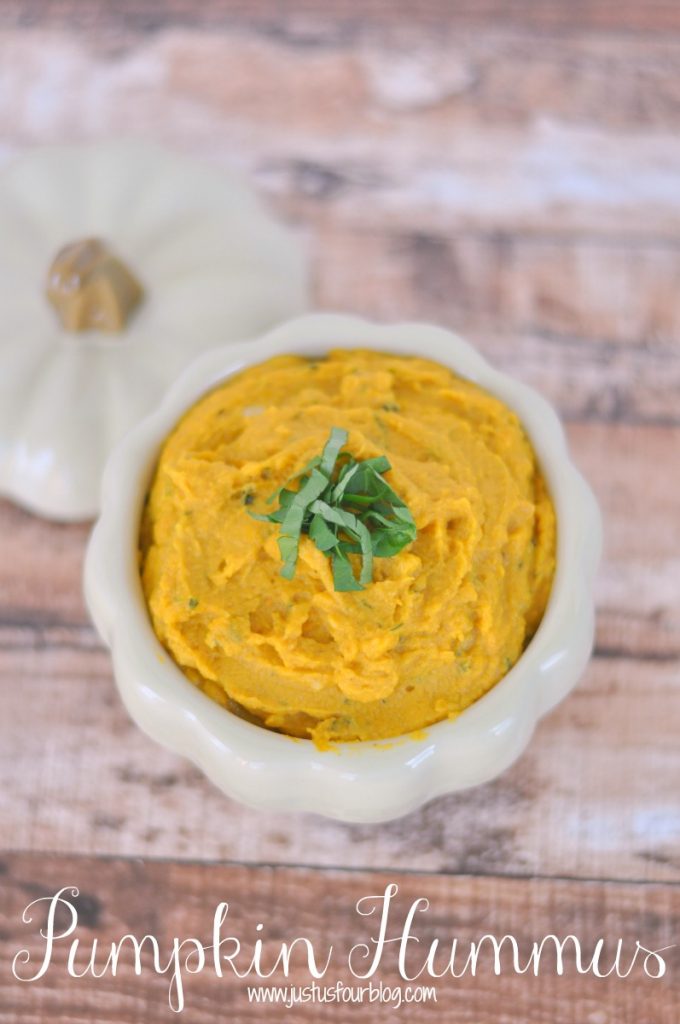
This Pumpkin Hummus is the best hummus I have ever had in my entire life. And that's not even an exaggeration.

Pumpkin Hummus

I love using pumpkin in savory dishes and this green chile pumpkin soup is so delicious. It is the perfect fall soup recipe.

Green Chili Pumpkin Soup

This pumpkin hummus is the best I have ever had. It is so delicious.

Pumpkin Hummus

Delicious Pumpkin Spice Dinner Rolls Recipe via @galmission

Pumpkin Spice Dinner Rolls

An amazing creamy pumpkin alfredo recipe! So easy and ready in 20 minutes! from @galmission

Creamy Pumpkin Alfredo

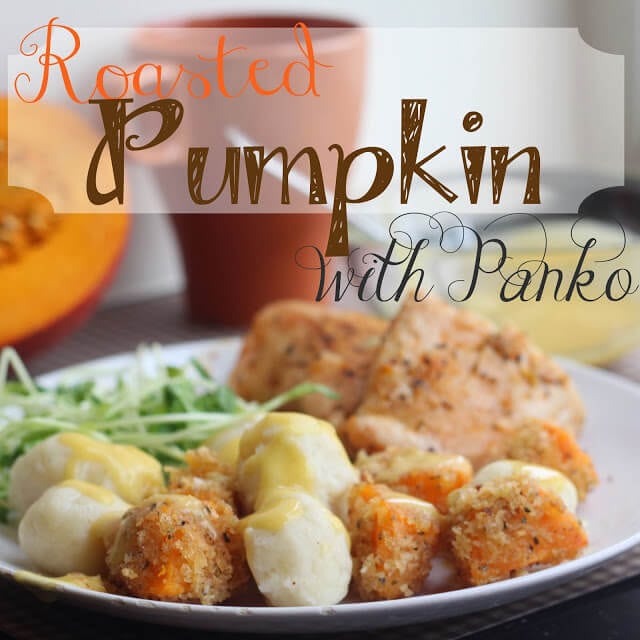
Roasted Pumpkin Recipe

Roasted Pumpkin with Panko

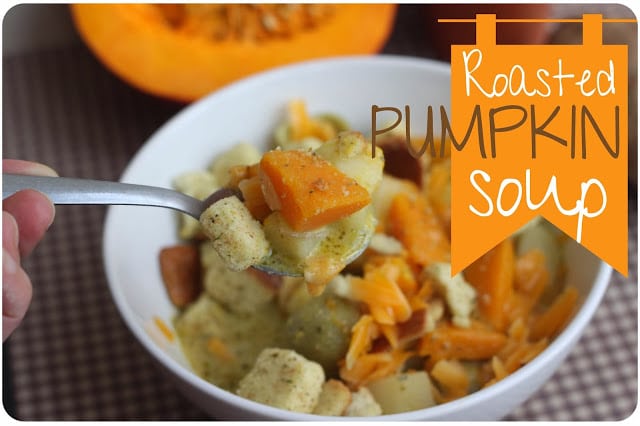
Roasted Pumpkin Soup

Roasted Pumpkin Soup

You can also connect with me here:

Thanks for visiting!

- Allyson

Skinny Pumpkin Pie Smoothie

Published Sep 16, 2015 by Allyson
This post may contain affiliate links. Read my disclosure policy.

Skinny Pumpkin Smoothie
It’s fall, y’all! Well, not technically until next week, but it seems like it, right? Now that the temps are lowering and the trees are starting to change it really is beginning to feel like fall. I love waking up and heading outside in the brisk cool air. I actually dread summer when you wake up in the morning, step outside, and you are already sweating…ugh. But, even in sunny Georgia, we get a pretty legit fall, and it’s glorious! Over the weekend I was making all sorts of yummy fall dishes, and I had some left over pumpkin puree. I decided I wanted to try my hand at making a Skinny Pumpkin Pie Smoothie with my new Blendtec.

Skinny Pumpkin Smoothie 3

Have I mentioned my new Blendtec blender? It’s amazing. It’s awesome and blends anything, literally (click for insane blending videos). I have been using it to make everything; from smoothies to pizza dough, it does it all! I am obsessed with it and can’t wait to see everything it makes. I have pasta and cashew butter on my to-do list!

Skinny Pumpkin Smoothie 2

Anyway, like I said, this recipe is totally delicious! A skinny pumpkin pie smoothie is the perfect compromise for dessert; it feels like you are drinking something decadent, when in reality, it’s actually really good for you. The spices are key here, so don’t forget about those!

Print
Skinny Pumpkin Pie Smoothie
Ingredients
  • ½ cup pumpkin puree not pie filling
  • 1 cup milk non fat for the skinniest version
  • 2 teaspoon splenda
  • 2 teaspoon cinnamon
  • ⅛ teaspoon nutmeg
  • 3 cups ice cubes
Instructions
  1. 1. Add pumpkin, milk, splenda, cinnamon, nutmeg, and cinnamon to the blender. Pulse for a few seconds to combine. Add ice, and blend on smoothie setting until smooth.
  2. 2. Serve right away
Recipe Notes

Makes 2 smoothies. Recipe can be cut in half for 2.
Recipe adapted from http://amyshealthybaking.com/

 
You can also connect with me here:

Thanks for visiting!

- Allyson

Asian Glazed Brussels Sprouts

Published Sep 14, 2015 by Allyson
This post may contain affiliate links. Read my disclosure policy.

Asian Glazed Brussels Sprouts - perfect dinner companion! Roasted with a delicious spicy sweet glaze that everyone will love!

Guys, I have a confession – I LOVE Brussels sprouts. They are tiny little cabbage balls, that when cooked correctly, are amazing. I know, I know, you probably think you hate them, but trust me – they are delicious. These are not the Brussels your mom cooked 20 years ago, these are mouthwatering, spicy sweet balls of goodness.  Serve these Asian glazed Brussels sprouts alongside these Air Fryer Asian Chicken Wings, Air Fryer Salmon Bites, or Air Fryer Sesame Chicken for the perfect meal!

Asian Glazed Brussels Sprouts - perfect dinner companion! Roasted with a delicious spicy sweet glaze that everyone will love!

I think the main issue with people not liking Brussels sprouts, is because they are overcooked. When Brussels are overcooked, they develop a strong flavor.  The odor is associated with an organic compound found in the vegetable, which contains sulfur: hence the strong smell. Of course, most people don’t like things that straight up stink when you hold them up close to your nose, so take note – DO NOT overcook Brussels.

Asian Glazed Brussels Sprouts - perfect dinner companion! Roasted with a delicious spicy sweet glaze that everyone will love!

If you are making a nice salmon filet, or some chicken breast, these Asian Glazed Brussels would be perfect alongside it. You could even use this glaze on those meats, and just cook it altogether – 20 minutes is your key time, which coincidentally is usually the perfect cook time for salmon or chicken. Just double the glaze recipes and toss it on everything – perfection.

Make sure you don’t miss a thing! Follow Domestic Superhero on:

Facebook | Instagram | Pinterest | TikTok | Email

For NEW RECIPES delivered straight to your inbox, signup for our email list! 

4.67 from 3 votes
Print
Asian Glazed Brussels Sprouts
Ingredients
  • 1 pound fresh Brussels sprouts ends trimmed off and cut in half
  • ¼ cup brown sugar
  • 3 TBS low sodium soy sauce
  • 1 TBS hoisin sauce
  • 1 inch fresh ginger peeled and minced
  • ½ teaspoon red pepper flakes
  • ½ teaspoon sriracha or other chili paste
  • 1 garlic clove minced
Instructions
  1. 1. Preheat oven to 350 degrees.
  2. 2. In a medium bowl, add brown sugar, soy sauce, hoisin sauce, ginger, red pepper flakes, sriracha, and garlic; whisk well to combine. Add halved Brussels and toss to combine.
  3. 3. Transfer Brussels with sauce to a shallow baking dish, and place in oven for 20-22 minutes.
  4. 4. Remove and serve. Enjoy!

Blackberry Mojitos

Published Aug 19, 2015 by Allyson
This post may contain affiliate links. Read my disclosure policy.

Blackberry Mojito - super easy and refreshing cocktail!

When it’s summer, I am seriously obsessed with mojitos.  Well, lets be honest here, I am always obsessed with mojitos, but it seems like summer is the perfect time for them. I love using the fresh mint from my garden, as well as fresh berries. They are so simple to whip up, and the options are endless on how to flavor them – berries, herbs, fruits…there’s always something to dress up the original mojito. Today I am sharing a really easy recipe for Blackberry Mojitos, and I know you are going to love it!

Blackberry Mojito - super easy and refreshing cocktail!

If you follow my blog, then you probably already know that I love a good cocktail. Mojitos, Moscow Mules, margaritas…you name it, I’m sure I love it and can tell you exactly how to make it. That’s why I love mixing things up; sure, I love regular plain cocktails, but I love getting some fresh berries, fruit, or even herbs to throw into a drink. My all time favorite drink is a Strawberry Basil Margarita – who would have thought that putting basil into a margarita would be genius? Well, me, of course (ha. ha. ha). Anyway, I really really love blackberries during the summer, and I knew they would be the perfect companion for the traditional mojito. I was right, they were delicious paired with the lime and mint, and of course, they helped color the drink this amazing shade of pink. The longer they sat, the deeper the color became; it was gorgeous, and I love consuming pretty foods and drinks!

Blackberry Mojito - super easy and refreshing cocktail!

So the next time you are having a get together, or when you just want something different, try this delicious Blackberry Mojito – you will thank me later!

Print
Blackberry Mojitos
Ingredients
  • 16 or so blackberries
  • handful of large mint leaves about 20
  • 2 TBS sugar
  • 4 TBS fresh lime juice
  • 1 cup sparkling water/seltzer
  • 4 ounces rum
  • ice
Instructions
  1. 1. Divide blackberries, mint, sugar, and lime juice between 2 glasses. Muddle together well. Add ½ cup seltzer and ¼ cup rum to each glass. Add ice, stir well.
  2. 2. Serve immediately.
Recipe Notes

This recipe makes 2 cocktails but can easily be doubled or tripled for more!
Don't like rum? Try vodka instead!

Like summer cocktails as much as I do? Check out these other drinks from Domestic Superhero:

basil lemonade (12) edited   blueberry basil margaritas 6 (2)   Watermelon Marg 1

IMG_6832   Peach Margarita 3   Strawberry Moscow Mule

Pomegranate Limeade 1    cranberry margs  Strawberry-Basil-Margaritas-3.jpg

Mixed-Berry-Mojitos-1_thumb.jpg  Blackberry-Mojito.jpg

You can also connect with me here:

Thanks for visiting!

- Allyson

Homemade Sweet Chili Sauce

Published Aug 5, 2015 by Allyson
This post may contain affiliate links. Read my disclosure policy.

Homemade Sweet Chili Sauce is perfect on chicken, fish, vegetables or beef! Whip this up in minutes and have your own fresh Sweet Chili Sauce on hand all the time!

I am so excited to share this delicious Homemade Sweet Chili Sauce with y’all!  I have been a huge fan of this sauce, since I started making recipes that call for a sweet chili sauce. I used to just buy it premade in the store, but then one day I was making dinner, and realized I didn’t have any when I needed it!

I looked up the ingredients that typical sweet chili sauce have, and went from there. It’s really quite simple, and you can make a big batch of this, then store it your fridge for when you need it! Serve with the most delicious Air Fryer Crab Rangoon!

Homemade Sweet Chili Sauce is perfect on chicken, fish, vegetables or beef! Whip this up in minutes and have your own fresh Sweet Chili Sauce on hand all the time!

I absolutely love red pepper flakes, and they definitely spice this recipe up! There is a very distinct spicy flavor, and sweet flavor, which balances nicely in Asian and Thai dishes. Heck, I even love dipping raw vegetables into this sauce – makes a great zesty dip! Use it on chicken, fish, or even beef; then stir fry up some vegetables to serve alongside.  Making Homemade Sweet Chili Sauce yourself saves money and you know exactly what you are putting into it!

Use this sweet chili sauce on a variety of recipes such as:

  • Air Fryer Salmon Bites
  • Air Fryer Chicken Wings (super crispy)
  • Asian Salad
  • Air Fryer Sweet Potato Fries (homemade)
  • Air Fryer Crab Rangoon
Homemade Sweet Chili Sauce is perfect on chicken, fish, vegetables or beef! Whip this up in minutes and have your own fresh Sweet Chili Sauce on hand all the time!

Make sure you don’t miss a thing! Follow Domestic Superhero on:

Facebook | Instagram | Pinterest | TikTok | Email

For NEW RECIPES delivered straight to your inbox, signup for our email list! 

Print
Homemade Sweet Chili Sauce
Ingredients
  • 1 cup honey
  • ¼ cup rice vinegar
  • 3 garlic cloves minced
  • 1 TBS red pepper flakes
  • ¾ cup water + 2 TBS
  • 1 TBS cornstarch
Instructions
  1. 1. In a small sauce pot add honey, red pepper flakes, rice vinegar, garlic, and ¾ cup water; whisk well to combine. Heat over medium high, bringing to a quick bowl while whisking. Boil for 1 minute, whisking constantly.
  2. 2. In a small bowl combine cornstarch and 2 TBS water.
  3. 3. Lower heat, pour cornstarch mixture into the pot; whisk to combine. Bring back to a boil, stirring while sauce thickens. Cook about 1 minute, or until thick- it will be quick. Remove from heat and set aside to cool.
  4. 4. Place in an airtight container, such as a small mason jar. Refrigerate and store for up to 2 months.

Mixed Berry Mojitos

Published Aug 3, 2015 by Allyson
This post may contain affiliate links. Read my disclosure policy.

This Mixed Berry Mojito is the definition of summer! Perfectly refreshing and amazingly delicious - your friends will swoon over this cocktail!

Being that it’s the summer, there is nothing like a nice refreshing cocktail while you sit back and relax. I decided to grow a mint plant in my garden this year, in hopes that it would yield lots of mint, therefore allowing me to make lots of mojitos. Mojitos are one of my favorite cocktails, and I love being able to use fresh herbs while making them. I had lots of berries in the fridge over the weekend, so decided to make some easy Mixed Berry Mojitos.

This Mixed Berry Mojito is the definition of summer! Perfectly refreshing and amazingly delicious - your friends will swoon over this cocktail!

I also love making mojitos because they are super easy, and a big crowd pleaser. You can essentially use any fruits you have around, which makes flavoring them fun and creative! I am super excited about my mint plant, because this means I can have fresh mojitos all summer! If you don’t have a mint plant, I highly recommend getting one. They are really easy to maintain and are super black thumb friendly (seriously).  I actually have so much mint, I am not sure what to do with all of it – mojitos for everyone I guess!

This Mixed Berry Mojito is the definition of summer! Perfectly refreshing and amazingly delicious - your friends will swoon over this cocktail!

Print
Mixed Berry Mojito
Ingredients
  • For 2 cocktails
  • 20 mint leaves (more or less is fine)
  • 4 TBS Simple Syrup
  • 4 TBS fresh lime juice
  • ¼ cup blueberries
  • 6 strawberries , diced
  • 6 blackberries , cut in half
  • 1 cup club soda
  • ½ cup rum
  • ice
Instructions
  1. In a large glass or small pitcher add mint leaves, sugar, and lime juice. Muddle together to release the mint flavor. Add berries and lightly muddle (you don't want to completely crush them, just enough to release the flavors). Add club soda and rum, stir to combine.

  2. Fill 2 small/cocktail glasses with ice, pour mojito over the ice in each cup and serve immediately garnished with lime and mint leaves (optional).

Recipe Notes

This recipe can easily be doubled for a small pitcher of mojitos.
Makes 2 servings.

Like summer cocktails as much as I do? Check out these other drinks from Domestic Superhero:

basil lemonade (12) edited   blueberry basil margaritas 6 (2)   Watermelon Marg 1

IMG_6832   Peach Margarita 3   Strawberry Moscow Mule

Pomegranate Limeade 1    cranberry margs  Strawberry-Basil-Margaritas-3.jpg

Mixed-Berry-Mojitos-1_thumb.jpg  Blackberry-Mojito.jpg

You can also connect with me here:

Thanks for visiting!

- Allyson

Double Chocolate Zucchini Bread

Published Jul 29, 2015 by Allyson
This post may contain affiliate links. Read my disclosure policy.

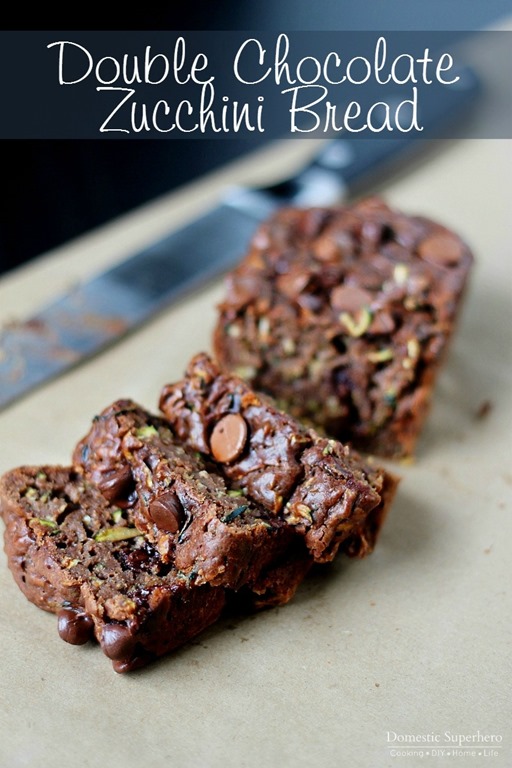
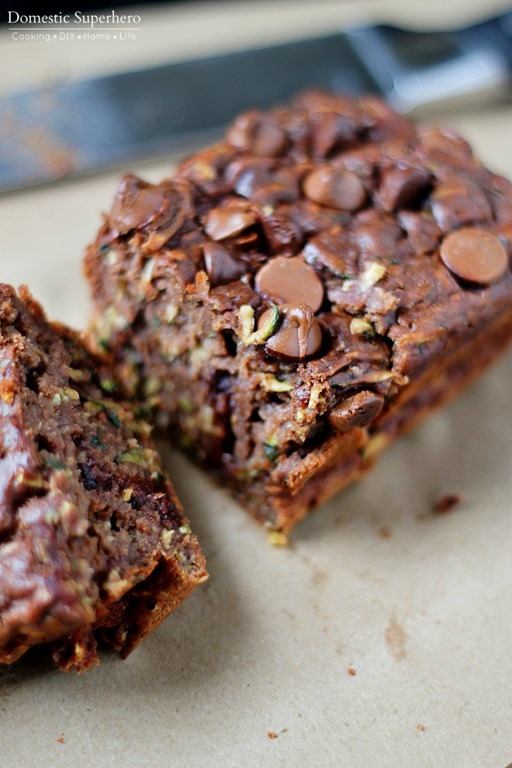
 I love this Double Chocolate Zucchini bread because it could be dessert or breakfast. It is packed with zucchini, but you would never know it while you are eating it. This is perfect for those little picky eaters who refuse to touch anything green

 I love this Double Chocolate Zucchini bread because it could be dessert or breakfast. It is packed with zucchini, but you would never know it while you are eating it. This is perfect for those little picky eaters who refuse to touch anything green! This bread is also pretty healthy because I used olive oil and yogurt instead of some of the more fatty ingredients. This Double Chocolate Zucchini Bread is a total win!

 I love this Double Chocolate Zucchini bread because it could be dessert or breakfast. It is packed with zucchini, but you would never know it while you are eating it. This is perfect for those little picky eaters who refuse to touch anything green

I shared this last month over at Just Us Four, and now I am super psyched to share it with y'all!  Like I said, you can eat this delicious Double Chocolate Zucchini Bread for breakfast or dessert. I am going with dessert mainly, because it’s hard to justify eating so much chocolate for breakfast, but I really think this is one instance where you could, because it really is pretty healthy. Not gonna lie, if my 4 year old asked me for a piece for breakfast, I wouldn’t hesitate…I am just happy is he eats anything to be honest.

 I love this Double Chocolate Zucchini bread because it could be dessert or breakfast. It is packed with zucchini, but you would never know it while you are eating it. This is perfect for those little picky eaters who refuse to touch anything green

I think this recipe is best for spring and summer, because that’s when zucchini is in season and you can either grow it yourself, or you can find really great prices at the grocery store on it.  I used to grow zucchinis when I lived in California, and they would get HUGE, like massive! I am not exaggerating when I say that some were the entire length of my arm. I had more zucchini than I knew what to do with, so I was constantly coming up with new recipes for it, and giving them away, and making more things..it was so. much. zucchini. Anyway, just make this – you will love it!

Print
Double Chocolate Zucchini Bread
Ingredients
  • 2 eggs
  • ¾ cup sugar
  • ⅓ cup olive oil
  • ½ cup vanilla yogurt
  • ¾ cup all purpose white flour
  • ¾ cup whole wheat flour
  • ⅓ cup cocoa powder
  • 1 ½ teaspoon baking powder
  • ¼ teaspoon salt
  • 1 teaspoon vanilla extract
  • 3 cups grated and squeezed/drained zucchini
  • ¾ cup chocolate chips for bread
  • ¼ cup chocolate chips for topping
Instructions
  1. Preheat your oven to 350 degrees F. Grease 2 (8.5x4.5) loaf pans, or 4 mini loaf pans, set aside.
  2. In a large bowl, combine eggs and sugar until completely mixed. Add olive oil, vanilla, and yogurt; mix until completely combined. Add cocoa powder and mix carefully.
  3. In a separate bowl, combine flours, salt, and baking powder. Sift mixture into the wet ingredient mixture; mix until JUST combined - do not overmix.
  4. Add zucchini and mix until just coated with mixture. Sprinkle a little flour over the ¾ cup chocolate chips, then pour into mixture and fold to combine - do not overmix.
  5. Pour batter into pans; top each with the chocolate chips.
  6. Bake for 65 minutes (if using the large loaf pans, 45 minutes for the mini), test with toothpick. When toothpick comes out free of batter (you might see chocolate chips on it though), your bread is done. Allow to cook a few minutes, remove and let cool on a wire rack.

If you like quick breads as much as I do, you should definitely check out this delicious BEST EVER Banana Bread, which is one of my all time most popular recipes!

Best Ever Banana Bread Recipe  

You can also connect with me here:

Thanks for visiting!

- Allyson

Simple Wedge Salad

Published Jul 21, 2015 by Allyson
This post may contain affiliate links. Read my disclosure policy.

With only a few ingredients, this Simple Wedge Salad will be a go-to meal, side dish, or appetizer! Topped with chunky blue cheese dressing, this is the best wedge salad!

Simple Wedge Salad with Homemade Blue Cheese - Super delicious and takes 2 minutes to make!

Whenever we go out for dinner, my husband and I love sharing a wedge salad. They are so simple when you think about it – a chunk of lettuce, blue cheese, tomatoes, and usually bacon. We are vegetarians though, so we always leave off the bacon. The salad is so delicious and crisp, and the blue cheese really takes it to the next level. Most places make their own chunky blue cheese, and then add more blue cheese crumbles to the top, and that is what I prefer – the more cheese, the better.  This Simple Wedge Salad with Homemade Blue Cheese is so easy to make at home, and it’s satisfying and delicious.

Simple Wedge Salad with Homemade Blue Cheese - Super delicious and takes 2 minutes to make!

I recently made my own blue cheese at home, and let me tell you, it is SUCH a difference between store bought. The taste is much better, and it’s incredibly easy to make: Click here for the blue cheese dressing recipe. Serve this alongside a One Skillet Hamburger Casserole, Spinach Quiche with Feta, Chicken Mushroom soup, Air Fryer Brats, or delicious Air Fryer Scallops for a balanced meal!

Simple Wedge Salad with Homemade Blue Cheese - Super delicious and takes 2 minutes to make!

Also, if you aren’t a vegetarian, and you would like bacon on this salad – just fry up some bacon and then crumble it over the top. I think this kind of salad could also be really good with plain shredded chicken.  Anyway, make this for a main dish or appetizer – you can’t go wrong! Don't like blue cheese dressing? Try this Asian Salad Dressing instead!

Simple Wedge Salad with Homemade Blue Cheese - Super delicious and takes 2 minutes to make!

You could also serve a delicious wedge salad with Homemade Poppyseed Dressing if you aren't feeling the blue cheese. It's creamy and majorly delicious!

Wanting some other flavors? Try this delicious traditional 7 layer salad!

Recipes to serve with the wedge salad:

  • Instant Pot Chicken Wings are quick, easy, and super moist and delicious! Done in less than 30 minutes with minimal effort, these wings are the perfect appetizer or meal!
  • These Easy Air Fryer Scallops have a delicious lemon butter flavor! Done in less than 10 minutes, this is a go-to air fryer recipe!
  • Instant Pot Buffalo Chicken Lettuce wraps are the perfect healthy chicken recipe! Make the spicy chicken in just minutes, then load up fresh lettuce wraps with your favorite toppings!
  • Garlic Parmesan Chicken Wings are an easy main dish to serve alongside this delicious salad!
  • Instant Pot Mac and Cheese takes hardly any time to cook, is majorly creamy and delicious, and will become your go-to mac and cheese recipe!
  • Bruschetta chicken pasta is loaded with fresh tomatoes, basil, and juicy chicken. Adding a secret ingredient at the end, takes this dish to the next level!
  • Air Fryer Hot Dogs are perfectly ‘grilled’ in no time and with hardly any effort! 
  • Air Fryer Chicken Wings are the best and crispiest wings ever! Done in less than 20 minutes, you’ll never make wings another way again!
  • Jalapeno Popper Stuffed Burgers are spicy and delicious! Everyone will LOVE these!

Make sure you don’t miss a thing! Follow Domestic Superhero on:

Facebook | Instagram | Pinterest | TikTok | Email

For NEW RECIPES delivered straight to your inbox, signup for our email list! 

Print
Simple Wedge Salad

With only a few ingredients, this Simple Wedge Salad will be a go-to meal, side dish, or appetizer! Topped with chunky blue cheese dressing, this is the best wedge salad!

Course: Appetizer, Salad, Side Dish
Cuisine: American
Keyword: simple wedge salad
Servings: 4 wedges
Ingredients
  • 1 large head of iceburg lettuce , end cut off and cut into fourths
  • ½ cup homemade chunky blue cheese (see recipe link above)
  • ½ cup blue cheese crumbles , dived into fourths
  • 4 roma tomatoes , diced
  • crumbled bacon, optional
Instructions
  1. Arrange lettuce wedge on a plate. Drizzle homemade chunky blue cheese dressing over the top of the wedges, dividing evenly. Add 1 whole diced tomato on top of each wedge, then add blue cheese crumbles, dividing evenly and sprinkling over the top.

  2. Serve with a fork and steak knife. Enjoy!

Recipe Notes

Makes 4 wedges.

Grilled Veggie French Onion Flatbreads

Published Jul 15, 2015 by Allyson
This post may contain affiliate links. Read my disclosure policy.

This shop has been compensated by Collective Bias, Inc. and its advertiser. All opinions are mine alone. #DipYourWay #CollectiveBias

Grilled Veggie French Onion Flatbreads - delicious naan topped with french onion dip and fresh grilled vegetables - perfect summer meal!

There is nothing I love more in the summer, than firing up the grill and cooking a delicious dinner outside. Using fresh delicious ingredients, make it even better! I love this recipe for Grilled Veggie French Onion Flatbreads because it’s a balanced meal that is so quick and easy to whip up. I decided to give my traditional grilled veggie flatbreads a little oomph by adding some creamy and delicious Kraft French Onion Dip. This was a match made in heaven!

Grilled Veggie French Onion Flatbreads - delicious naan topped with french onion dip and fresh grilled vegetables - perfect summer meal!

You can find the Kraft French Onion Dip at Walmart, and they even have new fun redesigned packaging! I love their new look! After picking up the rest of my fresh vegetables, I headed home to throw these together!

First, you have to grill up the veggies! I arrange mine on some grilling trays, and then give them a light spray of olive oil, and shake some salt and pepper over the top.

Grilled Veggie French Onion Flatbreads - delicious naan topped with french onion dip and fresh grilled vegetables - perfect summer meal!

For the flatbreads, I like to use my homemade recipe, but you can also find these in your grocery store. Spread a layer of Kraft French Onion Dip on the bread, then top with your grilled veggies, and then add a couple dollops of dip to the top.

Grilled Veggie French Onion Flatbreads - delicious naan topped with french onion dip and fresh grilled vegetables - perfect summer meal!

After you have them assembled, then toss them on the grill over medium heat, close the top, and cook for 3-5 minutes or until the bottom has slightly crisped. Be careful – using too high of heat or not checking them can lead to burning..no fun for anyone. Then voila! They are done! Cut them in half and serve them up for a delicious summer dinner!

Grilled Veggie French Onion Flatbreads - delicious naan topped with french onion dip and fresh grilled vegetables - perfect summer meal!

I love how the Kraft French Onion Dip warms up and gets melty on the grill – it is the perfect way to take a plain flatbread to the next level!

Grilled Veggie French Onion Flatbreads - delicious naan topped with french onion dip and fresh grilled vegetables - perfect summer meal!

Print
Grilled Veggie French Onion Flatbreads
Ingredients
  • 2 naan flatbreads homemade - see recipe above- or store bought
  • 1 yellow squash cut in half and then into moon slices
  • 1 portobello mushroom cap sliced
  • 8 asparagus spears ends off and sliced into 1 inch pieces
  • 1 red pepper seeded and sliced
  • ⅓ cup Kraft French Onion Dip
  • olive oil
  • salt and pepper
Instructions
  1. 1. Arrange vegetables on a grill tray, lightly spray with olive oil and sprinkle salt and pepper on top. Place on preheated grill over medium heat, cover, and cook for 6-8 minutes or until tender. Remove from grill and set aside.
  2. 2. Taking 2 flatbreads, spread about 1 TBS Kraft French Onion Dip on top of each. Arrange vegetables evenly on top of the dip, then dollop remaining dip on top of vegetables.
  3. 3. Place on the grill, close, and cook for 3-5 minutes, checking to make sure they don't burn. Remove and set aside for 2-5 minutes.
  4. 4. Slice in half and serve immediately.
  5. Enjoy!
Recipe Notes

Makes 4 servings (½ flatbread per serving)

Be sure to check out more delicious recipes at Kraft.com. I'd love to hear your favorite!

You can also connect with me here:

Thanks for visiting!

- Allyson

Apple Fritter Muffins

Published Jun 8, 2015 by Allyson
This post may contain affiliate links. Read my disclosure policy.

Baked Apple Fritter Muffins are filled with delicious tender apples, brown sugar, and topped with a dreamy glaze. Perfect option for baking, not frying!

I am sure I have mentioned it before, but I am a regular contributor over at my friend, Shannah's blog, Just Us Four.  She lets me share a recipe every month with her readers, and it's pretty awesome.  I shared these Apple Fritter Muffins a few months ago, and now I am going to share them with you, too!  I usually share desserts, but I kind of fibbed a bit with this one...I know maybe these aren't technically a dessert…a muffin is for breakfast, right? So you can eat these for breakfast and not feel guilty that you are really eating a cupcake, right? These are filled with delicious apples, brown sugar, and cinnamon…so yum.  I love apple fritters;  I love the crispy crust and the moist apple chunks when you bite inside of them…but, I don’t love that they are fried.  I was excited to make these a tiny bit healthier by baking, not frying, and I didn't lose any of the deliciousness.

Baked Apple Fritter Muffins are filled with delicious tender apples, brown sugar, and topped with a dreamy glaze. Perfect option for baking, not frying!

I know maybe these aren’t the most attractive muffins, but you can’t really expect the sky high muffin top when you have a bunch of apples resting on the filling! But, one good thing about this is that the overage from the filling mix, kind of seeped onto the baking tin, and it crisped up the sides a bit…giving it a little subtle crunch to resemble the fried version even more.

Baked Apple Fritter Muffins are filled with delicious tender apples, brown sugar, and topped with a dreamy glaze. Perfect option for baking, not frying!

After I broke one of these bad boys open, I pretty much couldn’t wait to inhale eat one. It was sweet, yet not overpowering; the apples were tender and delicious, and the ‘cake’ part of the muffin was moist and the perfect companion to the apples. Oh, I almost forgot to mention the GLAZE.  Swirling some creamy icing glaze on top really puts these over the edge. Perfection.

Baked Apple Fritter Muffins are filled with delicious tender apples, brown sugar, and topped with a dreamy glaze. Perfect option for baking, not frying!

I told you I couldn’t wait to eat it. Work hazard. It won’t be long until there are a bunch of other empty wrappers scattered about.

Print
Apple Fritter Muffins
Ingredients
Ingredients for the batter
  • ½ cup butter softened
  • ⅔ cup granulated sugar
  • 2 eggs
  • 1 ½ teaspoon vanilla
  • 1 ½ cups all-purpose flour
  • 1 ¾ teaspoon baking powder
  • ½ cup whole or 2% milk
  • ¼ cup brown sugar
  • ½ teaspoon ground cinnamon
  • Ingredients for the Apples
  • 2 large granny smith apples peeled and chopped
  • 2 TBS granulated sugar
  • 1 teaspoon cinnamon
Ingredients for the Glaze
  • ½ cup of powdered sugar
  • 2 TBS milk
Instructions
  1. Preheat oven to 350 degrees F
  2. In the bowl of a stand mixer (or in a bowl with an electric mixer), combine butter and ⅔ cup sugar' mix until creamy. Add eggs, one at a time, mixing well after each addition. Add vanilla, mix. Removing the bowl from the stand mixer, add the flour and baking powder, and stir by hand with a wooden spoon or spatula until just combined. Add the milk and using a fork, stir until well incorporated and smooth. Set aside.
  3. Place apple pieces into a medium sized bowl and sprinkle 2 TBS sugar and 1 teaspoon cinnamon over the top. Toss well with hands until evenly coated. Set aside.
  4. In a small bowl combine ¼ cup brown sugar and ½ teaspoon cinnamon. Use a fork to get all the chunks out and mix well, set aside.
  5. Spray a 12 muffin tin with nonstick spray and line with cupcake wrappers (optional, but definitely spray regardless). Place a heaping TBS of batter into the bottom of the wrapper, top with a heaping TBS of apples, sprinkle brown sugar/cinnamon over the top of apples (about 1 tsp), then top with another heaping TBS of batter. Finish with a regular TBS of apples over the top of the batter. Repeat for all muffins.
  6. Place in center of preheated oven and bake for 20-25 minutes or until cooked through. Put a toothpick into the middle and it should come out without moist batter on it.
  7. In a small bowl mix powdered sugar and 2 TBS milk. Drizzle over the top of the muffins and serve!
Recipe Notes

You could also make this as a bread, just cook in a loaf pan for 50-60 minutes, testing after 50 minutes with a toothpick.

Like muffins and cake? Check out some of my other recipes:

Lemon Blueberry Breakfast Cake

Cranberry Walnut Bread is delicious and festive for the holidays. This bread is so tasty and wrapped up would make the perfect gift!   Apple Pie Cinnamon Rolls are the perfect fall brunch! Sweet apples with a ooey gooey cream cheese glaze, yum!

The Best EVER Banana Bread Recipe

You can also connect with me here:

- Allyson

Baked Caprese Pasta

Published Jun 3, 2015 by Allyson
This post may contain affiliate links. Read my disclosure policy.

Baked Caprese Pasta is full of fresh basil leaves, tomatoes, fresh mozzarella and more! It's the perfect 20 minute meal!

Baked Caprese Pasta is full of fresh basil leaves, tomatoes, fresh mozzarella and more! It's cheesy deliciousness makes it the perfect 20 minute meal!Y’all, I’d like to say I am a pretty modest person. I mean, I have no problem admitting when I am awesome, but for the most part, I don’t like to go on and on about myself.  This Baked Caprese Pasta recipe, however, I am going to go on and on about.  Do you ever feel like you have totally outdone yourself with something? Well, this is one of those times. This Baked Caprese Pasta is just SO delicious, I really can’t think of many pasta dishes that are as great.  I probably shouldn’t say that, because I have lots of delicious pasta dishes on my blog, BUT this one is seriously delicious.  It uses fresh tomatoes, fresh basil, fresh cheese…I mean, it should really be called healthy (ha!) with all these fresh wholesome ingredients. 

Baked Caprese Pasta is full of fresh basil leaves, tomatoes, fresh mozzarella and more! Perfect 20 minute meal!

Baked Caprese Pasta is made quickly:

One of the things I like best about this baked caprese pasta, aside from it’s amazing taste, is that it comes together so quickly.

  • You basically cook the pasta, then mix everything together, then bake for a few minutes. BAM! Dinner is served! 
  • I didn’t even go all out and make a real pesto. I just tossed the basil in the food processor with some asiago cheese and oil, and let it run for a few seconds. Deeeeeelicious!
  • Toss everything together an bake!

Baked Caprese Pasta is full of fresh basil leaves, tomatoes, fresh mozzarella and more! Perfect 20 minute meal!

I mean, maybe it’s just that I have such an affinity for cheese, but just look at how amazing that cheese looks!! Are you licking your screen yet?! If you need a quick, easy, and delicious weeknight meal, this is a total winner. If you have a super large skillet that you can actually boil pasta in, this could actually be a one pot meal. Mind. Blown.

Baked Caprese Pasta is full of fresh basil leaves, tomatoes, fresh mozzarella and more! Perfect 20 minute meal!
5 from 1 vote
Print
Baked Caprese Pasta
Prep Time
5 mins
Cook Time
20 mins
Total Time
25 mins
 

Baked Caprese Pasta is full of fresh basil leaves, tomatoes, fresh mozzarella and more! It's cheesy deliciousness makes it the perfect 20 minute meal!

Servings: 6 servings
Ingredients
  • 12 ounces linguine or fettuccine
  • 1 cup marinara sauce (your choice)
  • 1 cup packed basil leaves (about 2 handfuls)
  • 2 TBS olive oil
  • ¼ teaspoon salt
  • ⅛ teaspoon black pepper
  • ½ cup freshly grated parmesan or asiago cheese , divided
  • 1 cup cherry or grape tomatoes , halved
  • 4 ounces fresh mozzarella , sliced into ½ inch rounds
Instructions
  1. Cook pasta al dente according to package directions, careful not to over cook. Drain and set aside. Preheat oven to HIGH broil and move rack to center setting.

  2. In a food processor, add basil leaves, salt, pepper, and ¼ cup parmesan or asiago cheese, turn on high to process, drizzle in oil as it processes. Scrape down sides and process again to completely combine.

  3. In the pot you used to boil the pasta, add marinara sauce, basil mixture, and tomatoes; stir to combine. Add pasta back to pot, stir carefully to evenly coat with sauce. Pour pasta into a large baking or casserole dish. Top with mozzarella rounds and remaining parmesan or asiago cheese.

  4. Place in center of oven, broil on high for 5-7 minutes, or until cheese has melted and is browning. Keep a careful eye on it so it doesn't burn.

  5. Carefully remove from oven, garnish with additional basil leaves if desired. Serve immediately and dig in!

Recipe Notes

Want meat in this recipe? Feel free to add chicken or shrimp as a delicious addition.

Like pasta as much as I do? Check out these other delicious pasta recipes on Domestic Superhero:

Spicy-Thai-Noodles_thumb.jpg    Lite-Cajun-Pasta-Vegetarian-Style-7_thumb.jpg One Skillet Spicy Jalapeno Parmesan Pasta finalOne-Pot-Wonder-Tomato-Basil-Pasta-1.jpg  Creamy Pesto Pasta Salad with Artichokes, Tomatoes, and Peas

You can also connect with me here:

Thanks for visiting!

- Allyson


Healthy Green Juice

Published May 18, 2015 by Allyson
This post may contain affiliate links. Read my disclosure policy.

Healthy Green Juice

After hearing about all of the benefits of juicing, we picked up a juicer and were on our way! My husband and I decided to start off by doing a week juice cleanse and it was great. I expected it to be super difficult, hey, I love eating, but I was shocked at how easy it ended up being.  Probably the worst part was preparing all the juices the night before, for the next day – as it was very time consuming, and we just don’t have that much time between when my kids go to bed and we go to bed. Even with the time commitment, I felt like it was worth it. Anyway, a lot of the juice recipes I found were just meh, but then I altered the one I liked the best, and made it spectacular. I could seriously drink this Healthy Green Juice all day – it’s delicious.

Healthy Green Juice 2

I also didn’t realize just how much produce we would have to buy to do a week long cleanse..let me tell you, it’s a lot! Here are a couple snap shots from my phone/Instagram while we were doing it. Keep in mind, the photos below were the amount of produce we needed for 2 people, for 3 days (we would shop every 3 days to make sure everything was fresh!).

10408120_10152630838656272_4922696237741434967_n.jpg

10959458_630535723746240_930018003803787280_n.jpg

Fruit and veggies were literally the only things in my fridge, with the exception of some other food for my son. It was crazy.  We shopped at places where it would be cost effective – Aldi, H Mart, and Kroger. It ended up seeming like it cost a lot, but it really didn’t. We calculated it was about $4 per juice, which really isn’t much, and probably less you would pay at the store. On top of that, the juices were 20 ounces, so we were getting a lot of bang for our buck.

Healthy Green Juice 3

If you have the urge to do a juice cleanse, I highly recommend it. I slept better, felt better, and it helped me get rid of my nasty caffeine addiction. Feel free to send me a message and I can send you lots of tips! If you are considering buying a juicer, I highly recommend this Hamilton Beach Juice Extractor. I love it because you don’t have to pre-chop and it makes juicing really easy!

Print
Healthy Green Juice
Ingredients
  • 2 Granny Smith Apples
  • 1 Cucumber
  • 1 Orange peeled
  • ¼ Lemon peeled
  • 1 overflowing cup of spinach
  • **ingredients for 20 ounces of juice will depend on how large your produce is
Instructions
  1. 1. Turn on your juicer, juice ingredients one by one. Drink immediately and enjoy!
Recipe Notes

Recipe can easily be doubled to serve 2.

You can also connect with me here:

Thanks for visiting!

- Allyson

One Skillet Spicy Pasta (Jalapeno Parmesan)

Published May 11, 2015 by Allyson
This post may contain affiliate links. Read my disclosure policy.

One Skillet Spicy Pasta (Jalapeno Parmesan) is the perfect one skillet dinner; no mess, super delicious, and easy to make! 

One Skillet Spicy Pasta (Jalapeno Parmesan) is the perfect one skillet dinner; no mess, super delicious, and easy to make! 

Over the last few years, I have become OBSESSED with one pot/skillet meals. I haven’t posted that many, but I seriously love them. One of my all time most popular recipes, One Pot Wonder Tomato Basil Pasta, is a one pot recipe and one of the most delicious recipes EVER – try it if you haven’t already! However, once I tried the One Skillet Parmesan Pasta from Yellow Bliss Road, I had a new favorite. I mean, it’s cheesy, easy, and super super delicious. I was hooked, making it ALL the time.  Then, I thought to myself that it would be really really awesome spiced up – we love spicy food at my house. I decided to add some jalapenos, red pepper flakes, and spicy cheese and called it a day. This One Skillet Spicy Pasta (Jalapeno Parmesan) is seriously my best pasta dish to date.

One Skillet Spicy Pasta (Jalapeno Parmesan) is the perfect one skillet dinner; no mess, super delicious, and easy to make! 

For thisOne Skillet Spicy Pasta (Jalapeno Parmesan) recipe, you need a BIG skillet. You really can’t go wrong with whatever BIG pot you use, but things can go very wrong if your skillet is too small. I really highly recommend the one I purchased recently (obsessed!)!  The last thing you need is to see all this delicious sauce bubbling over onto your stove top – no bueno.

One Skillet Spicy Pasta (Jalapeno Parmesan) is the perfect one skillet dinner; no mess, super delicious, and easy to make! 

Ahhh, One Skillet Spicy Pasta (Jalapeno Parmesan) is seriously so delicious. Just make it tonight, please! You will love it! If you don’t like a lot of spice, just reduce the red pepper flakes and jalapenos. I wouldn’t even say this was super spicy though, you could even add more to spice things up to your liking!

One Skillet Spicy Pasta (Jalapeno Parmesan) is the perfect one skillet dinner; no mess, super delicious, and easy to make! 

I also recommend using a thicker noodle for this dish – stick to linguine or fettuccine. They absorb the water perfectly and cook up to al dente without getting mushy. I recently found Pastificio Di Martino Fresine Pasta at Kroger, and OMG it is SO good. It was on sale for $1, so I figured I would try it out and I’m glad I did. Keep an eye out for it - so delicious.

4.25 from 4 votes
Print
One Skillet Spicy Pasta (Jalapeno Parmesan)
Prep Time
5 mins
Cook Time
15 mins
Total Time
20 mins
 

One Skillet Spicy Pasta (Jalapeno Parmesan) is the perfect one skillet dinner; no mess, super delicious, and easy to make! 

Servings: 6 servings
Ingredients
  • 1 TBS olive oil
  • 3 jalapenos , cut in half, seeded, minced
  • 4 TBS minced garlic
  • 2 cups nonfat milk (or whatever milk or cream you have on hand)
  • 4 TBS butter
  • 4 cups vegetable or chicken broth
  • 1 teaspoon salt
  • ½ teaspoon black pepper
  • ¼ teaspoon red pepper flakes
  • 16 oz . dry fettuccine/linguine noodles
  • ¾ cup Parmesan cheese
  • ¼ cup pepper jack cheese , grated
Instructions
  1. In a large skillet (at least 12 inches), or stock pot, add olive oil and heat over medium heat. Add jalapenos and saute for 2 minutes, stirring frequently. Add garlic and saute for 30 seconds.

  2. Add milk, butter, broth, salt, pepper, red pepper flakes, and pasta. Increase heat to medium high, and bring to a boil. Use a wooden spoon to stir noodles as they soften. After you bring to a boil, reduce heat to low. Cover and simmer for 20-22 minutes, stirring occasionally.

  3. When the sauce has thickened** and the noodles are al dente, remove from heat. Add cheeses and stir to melt/coat.

  4. Serve in bowls and sprinkle with additional cheese, salt and pepper if desired.

Recipe Notes

**It might seem like you have too much liquid when the time is up - once you add cheese the liquid will decrease and turn into a delicious creamy sauce.

 Like one pot meals? Check out these from Domestic Superhero

One Pot Wonder Tomato Basil Pasta 6
One Pot Wonder Tomato Basil Pasta
Mexican Baked Eggs
One Skillet Mexican Baked Eggs

One-Pot-Cajun-Pasta-4.jpgOne Pot Cheesy Cajun Pasta

One-Pot-Spaghetti-with-Meat-Sauce-5.jpg
One Pot Spaghetti with Meat Sauce
Spicy-Thai-Noodles.jpg
 One Pot Spicy Thai Noodles
You can also connect with me here:

Thanks for visiting!

- Allyson

The BEST EVER Vegetable Lasagna

Published May 6, 2015 by Allyson
This post may contain affiliate links. Read my disclosure policy.

The BEST EVER Vegetable Lasagna is the perfect go-to dish for any occasion! So easy, takes barely any time, and everyone will LOVE it!

Several recipes claim to be the BEST EVER, and then you make them and are sadly disappointed when you discover that they really aren’t the best ever. This recipe however, is really, the BEST EVER Vegetable Lasagna recipe. I know what you might be thinking, that you need meat in your lasagna; that’s just not true. Filling your lasagna with delicious fresh veggies, cheese, and more cheese, really makes it more than wonderful, and you will NEVER even miss the meat – trust me.

The BEST EVER Vegetable Lasagna is the perfect go-to dish for any occasion! So easy, takes barely any time, and everyone will LOVE it!2

I’ve been making this recipe for the longest time, and constantly emailing the recipe out to people. People always ask for the recipe after I share the delicious lasagna with them. It is my go-to recipe for funerals, new babies, new neighbors, potlucks..you name it, this is the perfect thing to bring.  It freezes amazingly well, so someone can freeze it and then pop it out the day they want to eat it, and cook according to directions. It’s so delicious, and so easy.

The BEST EVER Vegetable Lasagna is the perfect go-to dish for any occasion! So easy, takes barely any time, and everyone will LOVE it!

People always complain that lasagna is too hard to make…it takes too much time. You’re wrong. They have this thing called ‘no boil’ noodles, and these are my go to. All you have to do is cover them with sauce while baking, and you don’t have to boil them at all. They actually make assembling the lasagna a lot easier, in my opinion, too.  Plus, it cuts out all the time you would normally waste boiling, draining, cooling etc etc. Get the no boil noodles folks.  One time when I was making this after my Grandmother’s funeral, my cousin came up to me laughing, telling me, “you know, you have to boil those noodles before you use them? *hahhahahahahaha*”, ummm, no – jokes on you cuz, because these are NO boil noodles…get with the times!

The BEST EVER Vegetable Lasagna is the perfect go-to dish for any occasion! So easy, takes barely any time, and everyone will LOVE it!

The key to making this lasagna extra delicious, is using red pepper flakes. You don’t want to make it crazy spicy, but you do want to add a little kick – again, trust me, it’s amazing.  Now, as if I haven’t told you 100 times how amazing this recipe is already, I will tell you that I have had several of my friends feed this to their ‘picky eating’ children, and the kids LOVE it. I was shocked, they were shocked, but, it just goes to show…BEST EVER vegetable lasagna.

**** I used a small loaf pan for the photos for this, because I made a few individual servings (feel free), HOWEVER, the instructions listed are for a 9x13 baking dish, which I usually use for this recipe****

Print
The BEST EVER Vegetable Lasagna
Ingredients
  • 1 box barilla no boil lasagna noodles
  • large zucchini or 2 small, diced
  • 8 oz mushrooms diced
  • large onion diced
  • 2 cloves garlic minced
  • 2 jars pasta sauce/marinara 24 ounce each, whatever kind you like - I like four cheese or fire roasted!
  • 15 ounces ricotta cheese
  • 1 egg
  • 2-3 cups shredded mozzarella cheese
  • ½ cup fresh grated parmesan cheese
  • ¼ teaspoon dried oregano
  • ¼ teaspoon basil leaves
  • ¼ teaspoon thyme
  • ½ teaspoon red pepper flakes
  • ⅛ teaspoon salt
  • ⅛ teaspoon fresh cracked black pepper
Instructions
  1. Preheat oven to 350
  2. 1. In a large skillet, spray with non stick spray, add garlic and onion and saute for 1 minute over medium high heat. Add zucchini and mushrooms and saute. Add dried oregano, basil leaves, thyme, red pepper flakes, salt and pepper. Cook about 5 minutes, mixing occasionally until tender. When done cooking, strain out water from skillet. Set veggies aside.
  3. 2. In a medium bowl add ricotta, a handful of mozzarella, egg, more dried spices (just a couple shakes), and mix everything together with a fork.
  4. 3. In a 9x13 baking dish, coat the bottom with non stick spray, and add some sauce to cover the bottom (not too much).
  5. --Add a layer of noodles (I use 3 across and they are just barely not touching because they expand when cooked), then add ½ the ricotta mixture and spread with a spatula. Add ½ veggies on top of the ricotta (just sprinkle across), then sprinkle a handful of mozzarella on top of that, then add about 1 cup of sauce on top of that cheese, spread with spatula.
  6. --Add layer of noodles and repeat with next layer.
  7. --Add 3rd layer of noodles and then top those noodles with sauce (make sure you spread the sauce so it covers all noodles or they will get hard). Cover the top with lots of mozzarella and parmesan cheeses.
  8. 4. Cover/tent with foil (Not tight or it will stick to the cheese when you take it off), and cook for 55 minutes. Take foil off and cook for about 10 more minutes, uncovered.
Recipe Notes

To freeze: Follow above directions. Allow lasagna to cool at least 2 hours. Cover tightly with foil/wrap, place in freezer. Store for up to 3 months. To reheat: Remove from freezer and allow to defrost during the day (at least 4 hours). Place into preheated oven and bake for 55 minutes. To cook from frozen - place in oven and cook for 95 minutes, remove cover and cook 20 more minutes.
Mushrooms can be substituted - I LOVE making this with diced asparagus in addition to the other veggies, but if you don't like mushrooms you can leave them out and add asparagus - it's a great substitute.
**** I used a small loaf pan for the photos for this, because I made a few individual servings (feel free), HOWEVER, the instructions listed are for a 9x13 baking dish, which I usually use for this recipe****

You can also connect with me here:

Thanks for visiting!

- Allyson

Jalapeno Popper Dip

Published Apr 27, 2015 by Allyson
This post may contain affiliate links. Read my disclosure policy.

Jalapeno Popper Dip - The perfect party, potluck, and anytime dip!

A couple weeks ago I went on a dip making rampage, and Jalapeno Popper Dip was on my list. It had actually been on my ‘to make’ list for a long time, but I didn’t get around to making it until recently. I was lucky enough to score a HUGE bag of fresh jalapenos at the grocery store for only $1 (soon to be ‘bad’), and I knew right away some of the things I could make with them.

Jalapeno Popper Dip - The perfect party, potluck, and anytime dip!

I decided to make this dip in little ramekins instead of a big dish, but either way would work. I liked the idea of being able to set these around the dining and living room areas so that guests could have access wherever they were hanging out. Making it in a big dish would be great for taking to a potluck or BBQ.

Jalapeno Popper Dip - The perfect party, potluck, and anytime dip!

Roasting the jalapenos really helped develop the flavor for this dip and I highly recommend it. You could get by without roasting first, but I think it’s definitely best with the roasted jalapenos.

Jalapeno Popper Dip - The perfect party, potluck, and anytime dip!

If you like cheesy, gooey, spicy and delicious dips, then this one if definitely for you. If you are growing jalapenos in your garden this year, this would be a great recipe to utilize them!

Print
Jalapeno Popper Dip
Ingredients
  • 6 jalapenos sliced in half, deseeded and roasted
  • 8 ounce package cream cheese I used ⅓ less fat, room temperature
  • 1 cup low fat sour cream
  • 2 cups shredded medium cheddar
  • 1 cup shredded parmesan divided
  • ¼ teaspoon dried basil leaves
  • ⅛ teaspoon salt
  • ⅛ teaspoon black pepper
  • ¾ cup panko breadcrumbs
  • olive oil spray
Instructions
  1. 1. Preheat oven to 350 degrees F. Chop your roasted jalapenos; set aside. In a medium bowl, combine cream cheese and sour cream, until there are no clumps. Add jalapenos, medium cheddar, ¾ cup parmesan cheese, basil, salt, and pepper; mix well.
  2. 2. In a baking dish or individual ramekins, pour cream cheese mixture evenly into dish/es. Sprinkle left over parmesan cheese over the top. Then sprinkle panko over the parmesan cheese evenly; lightly spray the top with olive oil spray.
  3. 3. Bake for 15-20 minutes or until panko has browned and dip is bubbling on the sides.
  4. 4. Serve with crackers, chips, bread, or veggie sticks
Recipe Notes

Dip can be reheated for 30 seconds in the microwave if needed.
Also great cold!

Jalapeno Popper Dip - The perfect party, potluck, and anytime dip!

Like jalapenos as much as me? Check out these other spicy recipes!

Jalapeno Cheddar Cream Cheese   Creamy Jalapeno Ranch 1

You can also connect with me here:

Thanks for visiting!

- Allyson

Blueberry Mojito

Published Apr 20, 2015 by Allyson
This post may contain affiliate links. Read my disclosure policy.

Blueberry Mojito - the easiest and most delicious spring and summer cocktail!

Once the warm weather rolls around, I really want to start entertaining outside, and whipping up some delicious cocktails for my friends! Last summer was especially awesome; having lots of friends nearby with similarly aged kids, and being able to play, hang out, grill out, and drink up! Fun times for all! One cocktail I was obsessed with, and know I will still be drinking this summer, is the Blueberry Mojito.

Blueberry Mojito - the easiest and most delicious spring and summer cocktail!

I love Blueberry Mojitos because they are super easy to mix up, and I’m able to use fresh mint from my garden. If you don’t have a garden, I urge you to make a little window sill herb garden. It’s easy, you don’t have to do much to keep them living (just a little sun and water), and then you always have fresh herbs at your fingertips! Not only is this great for cooking, but it’s also awesome for cocktails. A mojito traditionally uses mint and rum, but you can always mix it up by using some basil or thyme, such delicious spins on a classic taste.

Blueberry Mojito - the easiest and most delicious spring and summer cocktail!

This recipe comes together in minutes, and only has a handful of ingredients. If you don’t like blueberries, I urge you to try this anyway, but if you really don’t like them, you could use other berries, or just make it plain. I am a HUGE fan of strawberry mojitos as well.  The recipe I am supplying today is only for 2 mojitos, but you could easily triple it for a pitcher of mojitos – let the good times roll!

Blueberry Mojito - the easiest and most delicious spring and summer cocktail!

One thing you do need for this recipe is mint simple syrup, which is super easy to make. See the directions below, but DO NOT feel intimidated, it’s easy- trust me!

Print
Blueberry Mojitos
Prep Time
5 mins
 

Blueberry Mojitos are the perfect warm weather cocktail! The blend of rum, blueberries, and mint is perfect!

Course: Drinks
Cuisine: American, cuban
Keyword: Blueberry Mojitos
Servings: 2 cocktails
Ingredients
  • ½ cup blueberries (fresh or frozen and thawed), plus more for garnish
  • 2 TBS freshly squeezed lime juice
  • 4 ounces white rum
  • 2 cups ice
  • 2 ounces club soda
  • lime slices for garnish
  • ½ cup mint leaves , rinsed + a few extra for muddling
For the Simple Syrup:
  • 1 cup water
  • 1 cup granulated sugar
Instructions
For the Simple Syrup:
  1. In a small sauce pan whisk together water and sugar; add mint leaves. Over medium heat, bring it up to a simmer while you stir it to dissolve the sugar, then lower the heat and simmer for at least 15 minutes on low low heat. ***Trust me, you do not want this stuff boiling or simmering too high. I made that mistake with a batch and it hardened as it cooled. Basically it turned into basil sugar candy. Learn from my mistakes…*

For the cocktails:
  1. Taking 2 glasses, add 1 cup of ice to each glass. Add 2 ounces of rum to each glass, then 2 ounces club soda to each glass.

  2. In a small bowl or mug, muddle the blueberries with extra mint leaves and lime juice. Add 4 TBS of the simple syrup and muddle until well combined. Divide blueberry mixture between 2 glasses.

  3. Stir each drink very well; garnish with additional blueberries and lime wedges

Recipe Notes

Makes 2 cocktails.
Homemade simple syrup will yield about 1 cup of syrup - store in an airtight container in the fridge and continue using for up to 3 months.
For a pitcher of cocktails - triple the recipe.

Blueberry Mojito - the perfect and easiest spring and summer cocktail!

Like summer cocktails as much as I do? Check out these other drinks from Domestic Superhero:

basil lemonade (12) edited   blueberry basil margaritas 6 (2)   Watermelon Marg 1

IMG_6832   Peach Margarita 3   Strawberry Moscow Mule

Pomegranate Limeade 1    cranberry margs   Strawberry Basil Margaritas (1)

You can also connect with me here:

Thanks for visiting!

- Allyson

Strawberry Moscow Mules

Published Apr 8, 2015 by Allyson
This post may contain affiliate links. Read my disclosure policy.

Strawberry Moscow Mules- a spin on traditional Moscow Mules: Ginger Beer, Lime, Vodka, & Strawberries make the perfect combination for this warm weather drink!
Last month I had a big girl’s weekend with 10 of my good friends. It was so much fun, lots of good company, good food, and good drinks.  My friend, Stacey, had been raving for months about this ‘Moscow Mule’ cocktail that she was obsessed with. So, naturally, when we went out she ordered it. I was intrigued to try it, because she said it was ginger based, and I love ginger anything. I was shocked when I tried it, because for one, it didn’t even taste alcoholic, and two, it was DELICIOUS.  I found myself ordering Moscow Mules all weekend, probably way too many in fact, but I knew when our weekend was over, I wanted to go home and put my own spin on the classic Moscow Mule. After I did, I came up with this delicious Strawberry Moscow Mule which is perfect for drinking anytime, but especially summer!
Strawberry Moscow Mules- a spin on traditional Moscow Mules: Ginger Beer, Lime, Vodka, & Strawberries make the perfect combination for this warm weather drink!
The key to making a great Moscow Mule, is making sure you have REAL Ginger Beer- not ginger ale which a lot of DIY at home recipes call for. There is a difference, Ginger beer is brewed and fermented while ginger ale is essentially a carbonated beverage made from water and ginger. Ginger beer often has much more of a "gingery" flavor and because it's fermented, is less carbonated.  Ginger beer is great because it actually doesn’t have any alcohol (you have to add that to get the Moscow mule), and it has WAY less sugar than Ginger Ale. My favorite brand of Ginger Beer is Gosling’s, and I usually pick it up at my local package store (liquor/beer store for those who don’t reside in the south). In a pinch you could use Ginger Ale, but I highly recommend you get the real Ginger Beer for your make at home Strawberry Moscow Mules.
Strawberry Moscow Mules- a spin on traditional Moscow Mules: Ginger Beer, Lime, Vodka, & Strawberries make the perfect combination for this warm weather drink!
Anyway, making your own Moscow Mules is super easy- only 3 ingredients, and then any additional fruit or add on’s if you want to make it a special Mule. These drinks are seriously so refreshing and tasty! You have to be extra careful though, since they don’t have an overwhelming alcohol flavor, you can easily find yourself drinking one too many! Most places serve the Moscow Mule in a fancy Moscow Mule Copper Mug, but if you don't have them at home, that's okay!
Strawberry Moscow Mules- a spin on traditional Moscow Mules: Ginger Beer, Lime, Vodka, & Strawberries make the perfect combination for this warm weather drink!
Print
Strawberry Moscow Mules
Prep Time
3 mins
 

Strawberry Moscow Mules are the perfect cocktail!

Course: Drinks
Cuisine: American
Keyword: Strawberry Moscow Mules
Servings: 2 cocktails
Ingredients
  • 1 can ginger beer
  • 1 lime , cut in half
  • 4 ounces vodka
  • 5 strawberries , muddled well
  • lots of ice cubes
Instructions
  1. In a glass with ice, combine 2 ounces vodka, juice of half a lime, half of the muddled strawberries, and half can ginger beer. Repeat for 2nd cocktail.

  2. Garnish with a lime slice and strawberry.

  3. Enjoy!
Recipe Notes

The above recipe is for 2 drinks.
This recipe can easily be doubled (for 4 drinks) and if you would like to make a pitcher (60 ounces), just multiple everything by 4 (serves 8 Moscow mules), add to pitcher, and top fill with ice until full.

Like summer cocktails as much as I do? Check out these other drinks from Domestic Superhero:

basil lemonade (12) edited   blueberry basil margaritas 6 (2)   Watermelon Marg 1

IMG_6832   Peach Margarita 3   Strawberry Moscow Mule

Pomegranate Limeade 1    cranberry margs  Strawberry-Basil-Margaritas-3.jpg

Mixed-Berry-Mojitos-1_thumb.jpg  Blackberry-Mojito.jpg

You can also connect with me here:

Thanks for visiting!

- Allyson

Herbed Asparagus & Goat Cheese Flatbreads

Published Mar 18, 2015 by Allyson
This post may contain affiliate links. Read my disclosure policy.

Herbed Asparagus & Goat Cheese Flatbreads

Naan bread is such an easy tool for throwing together an awesomely quick and delicious dinner! I usually keep a package of naan in the freezer or I whip up a fresh batch (recipe here), that way I can just take them out whenever the mood strikes, or when we don’t have much time to throw together dinner. For this flatbread, I paired asparagus, delicious herbs, and creamy goat cheese.  These Herbed Asparagus & Goat Cheese flatbreads turned out amazing.

Herbed Asparagus & Goat Cheese Flatbreads 2

It took less than 20 minutes to whip these up, and way less time to eat them! I love using asparagus now that it’s coming back into season, and for this recipe a little goes a long way. I use a vegetable peeler to peel thin slices of asparagus, but you could also just finely slice them with a knife. I usually leave the spears whole, because if you slice those, they kind of crumble apart. After rubbing a little olive oil on the top of the naan, I sprinkled it with various herbs – thyme, basil, parsley, and oregano, and then rubbed them around with my fingers.  After that all you do is top with a pile of asparagus slices (use a lot, it cooks down), dot goat cheese around, and then top off with a few cracks of pepper and salt.

Herbed Asparagus & Goat Cheese Flatbreads 3

Pop it in the oven for 10 minutes, and then remove and eat it up immediately. The recipe I am sharing is for 2 breads, but you could easily double it for 4 breads.

Herbed Asparagus & Goat Cheese Flatbreads 5

Don’t like goat cheese? Use feta or brie instead – yum!

Print
Herbed Asparagus & Goat Cheese Flatbreads
Ingredients
  • 2 pieces of Naan
  • ½ pound asparagus spears thinly sliced
  • 1 teaspoon dried basil leaves
  • 1 teaspoon dried oregano
  • 1 teaspoon dried thyme
  • ⅛ teaspoon salt
  • ⅛ teaspoon pepper
  • 1 TBS extra virgin olive oil
  • 4 ounces goat cheese crumbles
Instructions
  1. 1. Preheat oven to 350 degrees F.
  2. 2. Place both naan onto a lined baking sheet. Drizzle ½ TBS olive oil onto each naan and spread around. Sprinkle the basil, oregano, and thyme over the oil and lightly rub it around with your hands or the back of a spoon. Divide the asparagus spices in half, then put half on each bread. Top with 2 ounces goat cheese on each bread, then a few cracks of pepper and salt.
  3. 3. Place into oven and bake for 10 minutes. Remove from oven and serve immediately.
Recipe Notes

These could easily be cut into small pieces and work well as a party appetizer!

Like making easy flatbreads as much as I do? Check out these other recipes on Domestic Superhero:

Mushroom and Goat Cheese Flatbread with Balsamic Glaze  Southwestern Flatbreads Main
Homemade-Naan.jpg
You can also connect with me here:

Thanks for visiting!

- Allyson

Crunchy Baked Zesty Cheddar Ranch Chicken Tenders

Published Mar 16, 2015 by Allyson
This post may contain affiliate links. Read my disclosure policy.

This shop has been compensated by Collective Bias, Inc. and its advertiser. All opinions are mine alone. #MVCheezIt #CollectiveBias

Crunchy Baked Zesty Cheddar Ranch Chicken Tenders are a delicious party snack and game day favorite!

This month we are gearing up for some really exciting basketball! My husband and I always make brackets and follow along with the games. Most of the time I just do it because it’s a fun way to be a little competitive…and most of the time I win, and who doesn’t love to win (don’t let my 4 year old read that last sentence!)?! Of course while we are watching all the games, we have to cook up some yummy snacks. We had some friends coming over recently, and I wanted to make them something delicious using some new Cheez-It Grooves in the Zesty Cheddar Ranch Flavor, so I ended up throwing together these simple Crunchy Baked Zesty Cheddar Ranch Chicken Tenders.

Crunchy Baked Zesty Cheddar Ranch Chicken Tenders are a delicious party snack and game day favorite!

I headed to Target to pick up the Cheez-It Grooves, they are currently having a sale so they are 3 for $8, and then if you use cartwheel (love that app!), you get an additional 35% off the 3 boxes, so only $5.20 for 3 boxes, or it breaks down to $1.73 per box – this is a fantastic deal! You can find the Cheez-It Grooves in the cracker aisle, and I also found some brand new Cheez-It Crunch'd which are Cheez-It's first-ever crunchy puff made with 100% real cheese.

Crunchy Baked Zesty Cheddar Ranch Chicken Tenders are a delicious party snack and game day favorite!

Crunchy Baked Zesty Cheddar Ranch Chicken Tenders are a delicious party snack and game day favorite!

The Crunchy Baked Zesty Cheddar Ranch Chicken Tenders took less than 30 minutes to prepare and cook from start to finish. I decided to also whip up a healthy Chipotle Greek Yogurt dipping sauce to accompany the tenders as well.  They really turned out fabulous, and next time I will be doubling the recipe in hopes that they won’t be consumed so quickly!

Crunchy Baked Zesty Cheddar Ranch Chicken Tenders are a delicious party snack and game day favorite!

I also love just putting these snacks out to eat while we are watching all the games. They get gobbled up and everyone always raves about the Zesty Cheddar Ranch Grooves. My husband was a HUGE fan of the Cheez-It Crunch'd as well, so we will definitely be stocking up with Target’s current promo!

Crunchy Baked Zesty Cheddar Ranch Chicken Tenders

Print
Crunchy Baked Zesty Cheddar Ranch Chicken Tenders
Ingredients
  • 1 pound package of boneless skinless chicken tender strips or 1 pound chicken breasts, slices into tender sizes
  • 2 egg whites beaten
  • 2 cups Zesty Cheddar Ranch Cheez-It Grooves
  • 2 TBS grated Parmesan cheese
Instructions
  1. 1. Preheat oven to 350 degrees F. In the bowl of a food processor, add Cheez-It Grooves and Parmesan cheese. Process for 15-30 seconds, or until they are a breadcrumb-like consistency.
  2. 2. Place beaten egg whites into a shallow bowl. Place Cheez-It crumbs into another shallow bowl.
  3. 3. Place a wire cooling rack on top of a large baking sheet. Spray well with non-stick spray; set aside.
  4. 4. Taking one tender, dip into the eggs, then press into the crumbs, turning to coat well. Set tender onto cooling rack (on top of baking sheet), and repeat steps for all tenders.
  5. 5. Spray a light spray of oil spray on top of the tenders, then place into preheated oven. Bake for 16-20 minutes, or until cooked through (time will depend on size of tenders, but start checking at 16 minutes). Remove from oven and serve right away with your choice of condiments.
Recipe Notes

I made a Chipotle Greek Yogurt dip for these tenders which was a great flavor pairing. To make the dip at home, blend 1 cup non fat greek yogurt, 2 TBS milk, and 3 chipotle chilis in adobo sauce together in a food processor or blender. Serve alongside chicken.

And more exciting news – There is a Most Valuable Cheese Contest going on from now through April 2015. Users can vote on their favorite flavors/varieties from six popular Cheez-It flavors and play games for a chance to win $10,000!!!  What would you do with $10,000?!?!

Want more Cheez-It inspiration? Check out a bunch of delicious recipes here!

You can also connect with me here:

Thanks for visiting!

- Allyson

  • « Previous Page
  • 1
  • …
  • 13
  • 14
  • 15
  • 16
  • 17
  • …
  • 20
  • Next Page »

Hi! I’m Allyson

Welcome to Domestic Superhero where you will find lots of recipes & food goodness! Let's connect on social media, and be sure to subscribe to my email so you won’t miss a post!

More About Me →

  • Facebook
  • Instagram
  • Pinterest
  • Twitter
  • TikTok

Footer

↑ back to top

About

  • About Me
  • Contact
  • Disclosure & Privacy Policy
  • Featured On

Social

  • Facebook
  • Instagram
  • Pinterest
  • Twitter
  • TikTok

Recipes

  • Dinner Ideas
  • Desserts
  • Drinks
  • Appetizers

Disclaimer

Domestic Superhero is a participant in the Amazon Services LLC Associates Program, an affiliate advertising program designed to provide a means for sites to earn advertising fees by advertising and linking to amazon.com

Copyright © 2025 Domestic Superhero. Privacy