Domestic Superhero

  • Recipes
  • DIY Projects
  • Travel
  • About Me
menu icon
go to homepage
  • Recipes
  • DIY Projects
  • Travel
  • About Me
search icon
Homepage link
  • Recipes
  • DIY Projects
  • Travel
  • About Me
×
Home

Holiday Shopping List: 50+ Gift Ideas for Infants through 8th Graders (part 1)

Published Oct 16, 2013 by Allyson
This post may contain affiliate links. Read my disclosure policy.

Holiday Shopping List 50+ Gift Ideas for Infants through 8th Graders (part 1)

With the holidays right around the corner, I am trying to get a jump on all the holiday shopping.  Luckily, I have Amazon Prime which allows me free shipping (on mostly anything), and other awesome perks as well such as free streaming of movies/tv shows (much like Netflix, but it’s included in the Prime membership)!  Don’t worry if you don’t have Amazon Prime, I have a special offer for you! You can click here to sign up, and you will receive a 1 month membership for FREE (it must be the first time you have had a membership)!  That means you can order all your holiday goodies, and if you decide you don’t like it for some reason, you aren’t obligated to continue with your membership!  Don’t walk, run.  

Okay, back to holiday shopping!  I’m going to do a 4 part series on what to buy for the people in your life.  I’ll focus on the following categories: Babies & Kids, High school and College Students, Significant Others, and Parents & Grandparents.   Amazon definitely has something for everyone. I will link the products to amazon where you can check their ratings, prices, and specifications.

Birth- 1 year

Fisher-Price Rock n' Play Sleeper is the perfect gift for a baby or a mom that is expecting.  This is seriously the most amazing baby item, and yes, you need it. I know over 300 moms who rave about this thing on a regular basis, and it was the ONLY thing my colicky/fussy/never sleeping son would actually sleep in!

Have you heard of Sophie?!  Well, if not, then you are missing out on the world’s best teething toy!This is not a normal giraffe, this is Sophie the Giraffe!!  

One of my friend's has a 3 month old right now, and she swears the Fisher-Price Discover 'n Grow Kick and Play Piano Gym is the best baby toy ever! She says she gets at least 30 minutes of playtime from it! It looks like everyone on Amazon loves it as well!

The Green Toys Shape Sorter Baby Toy is an awesome learning toy for little ones (about 6+ months).  My son learned all this shaped and colors from a shape sorter, so they are definitely fun learning tools!

The Fisher-Price Laugh and Learn Crawl Around Car is fun for kids 6+ months.  It also included a shape sorter and lots of big bright buttons for added fun and stimulation! 

81n05pEdfaL._SL1500_

The Baby Einstein Rhythm of The Reef Activity Saucer is really great for kids who can support some of their weight, and want to play! They can jump around and play with all the hanging toys as well. 

The VTech Sit-to-Stand Learning Walker is great for those babies who are pushing up and trying to walk. They will be cruising around in no time with this littler toy helper!

Toddlers (1 year-3 years)

The Little Tikes Cozy Coupe! This is a total classic and is perfect for kids 1 year-3 years (there is an attachable floor board for those smaller kids who can’t touch the ground yet!)

The LEGO Duplo Building Set is perfect for any toddler who is interested in building. They are great beginner building blocks, and will have along life with a growing child.

A VTech Go! Go! Smart Wheels - Train Station Playset is a really fun gift for kids over 1. As they grow this toy grows with them since they can change the track around into different configurations.

Like most Toddlers, my son loves music. He especially likes all the Children's Favorites . We bought this CD long ago and it's almost totally worn out from so much repeated play. Any toddler would love this fun CD!

A Melissa & Doug Deluxe Standing Easel is a really functional toy. Toddlers can learn motor skills and get a sense for art at the same time. Many studies show that children who do art activities from a young age have an easier time with learning other things.  Exposure to art is very important!

My son is 2.5 and he has been absolutely obsessed with this Fisher-Price Little People Lil' Movers School Bus. Not only does he love the bus, but he loves the little people it comes with too.

All kids I know this age are obsessed with trains!  This KidKraft Ride Around Train Set and Table(with over 100 pieces!)  would be the perfect big gift from Santa or Mom and Dad!

While most girls I know love buses as well, who doesn’t love a little princess action? This Fisher-Price Little People Disney Princess Songs Palace is totally adorable and the little people work with other Little People toys as well!  So cute!

This Radio Flyer Grow 'N Go Flyer tricycle is really great for kids about 2+.  It actually expands so as your child grows, they won’t grow out of the trike!

Preschool (3-4)

Kids around 3 years old really start loving to dress up and play pretend games.  This Learning Resources Pretend & Play Doctor Set is a great way to expand their imaginations.

dr

This Dr. Suit would be perfect to go along with the Dr. Kit above!  They have it in blue and pink!


These Melissa & Doug Jumbo Coloring Pad are seriously so awesome! They have huge pictures, and kids can learn to color in the lines without a bunch of frustration!  Pair this with a pack of Crayola 64 Ct Crayons and this is a perfect gift set!

Have you seen these Crayola Color Wonder Markers? They are awesome because they only work on the special paper they are intended for.  Pair with a special Crayola Color Wonder Disney Preschool Coloring Pad and you are good to go!

 book     

By this point your little one is probably anxious to start learning to write! Dry erase books like this Handwriting Book are really helpful in learning to write letters.  Grab some Fine Line Dry Erase Markers .


Preschool Zoo Bingo and Dr. Seuss Cat in the Hat Card Game are 2 great games for preschoolers!


The Melissa & Doug Giant Fire Truck Floor Puzzle and Melissa & Doug Farm Friends 32 pc Floor Puzzle are tons of fun!


Around this age kid’s start wanting to have more independence and learn how to ride a ‘real bike’!  The Spiderman 12-Inch Kid's Bicycle and the Schwinn Girls' Petunia 12-inch Steerable Bike are great to learn with! Once they get the hang of it, the training wheels come off!

Kindergarten- 3rd grade


Nurf guns such as the Strongarm Blaster and Nerf Rebelle Sweet Revenge Dart Kit , are really popular with the boys this age. It’s great to take them outside and have them run around chasing each other!

Legos are great for all aged 4+. There are small parts so you don’t want to risk younger children playing with the smaller legos, but this LEGO Bricks & More Deluxe Brick Box (704 pieces) will last you forever!

The Littlest Pet Shop has been popular with girls for years, and this Littlest Pet Shop Walking Pets Themed Pack is no exception!


LaLaLoopsy Dolls are also super popular and have a long shelf life (girls 4-13 really love them!).  The Charlotte Charades Doll and the Mango Tiki Wiki Doll are both super cute!

The Fisher-Price Imaginext Eagle Talon Castle is a super fun interactive castle for boys aged 3-8.


Have a little rebel on your hands?  Kid’s these days are obsessed with funky hairstyles and expressing themselves.  These Raskullz Hawk Helmets are so fun and wild, even the most reluctant helmet wearer will be wanting to try it out!

4th grade-8th grade

book1    books2    books3

Remember The Baby-Sitters Club?! They still haven’t dwindled in popularity and they are readily available on amazon either in paperback or Kindle.  These three books The Baby-Sitters Club #1: Kristy's Great Idea, Claudia and the Phantom Phone Calls, and The Truth About Stacey are all classic titles (reading level grade 3-7)


How about the newest book from Diary of a Wimpy Kid; Diary of a Wimpy Kid: Hard Luck? This book comes out in early November, but preorder now! Or, is your child down with the spooky Goosebumps series?  This Goosebumps Most Wanted #4: Frankenstein's Dog looks sure to spook!


Monster High Dolls are also super popular right now! The 13 Wishes Gigi Grant Doll and the Travel Scaris Skelita Calaveras Doll would be great additions to any collection!


Star Wars Legos, what a genius idea! Check out the LEGO Star Wars X-Wing Starfighter and the LEGO Star Wars Droid Escape for 2 perfect gifts.

Around this time girl’s catch the American Girl bug! Here are 4 Film Favorites: American Girl that the girls will go crazy over!

We love going outside on nice days, so maybe your child would like to take up a new hobby? Skate boarding can be really fun and definitely teaches a lot of coordination. This checkered Skateboard is gender neutral.


We are living in a time when technology is king and kid’s love having a hand in that.  Expand their artist talents with a Canon PowerShot Digital Camera! This camera has all the bells and whistles (including HD video recording), and doesn’t break the bank at $89.  It also comes in 4 different colors (red, black, silver, and blue).

Everyone loves Despicable Me!  Pre-order Despicable Me 2 now, and it will be delivered to your door on December 10th, just in time to wrap for Christmas!

That’s it for today!  Stay tuned for the next posts in this Holiday Shopping Guide Series (Teenagers, College Students & 20-something's, Significant Others, and Parents & Grandparents)!

9-27_holiday-toy-list_300x250_v3._V355090958_

Check out Amazon's Holiday Toy List for more inspiration as well!

And if for some reason you STILL haven’t signed up for a free trial of Amazon Prime (hello free shipping!), click here and do it now!


Super Easy and Cheap Fall Mantle

Published Oct 14, 2013 by Allyson
This post may contain affiliate links. Read my disclosure policy.

Super Easy and Cheap Fall Mantle

I know we are well into fall now, and I probably should have posted this last month, but I just got around to taking pictures and thought it would still be nice to share! Fall isn't over yet, so I think it's still applicable!  When I was throwing my fall mantle together, I really didn’t want to spend a lot, and wanted to make use of things that I already had as well. 

Every year I make a Fall Bucket List, and I thought it would be cool to display it this year.  I shared my Fall Bucket List (and a free printable) a few weeks ago on the blog, and I decided to make an easy burlap ‘frame’ to go behind the bucket list.  I already had the burlap so that was no expense, and I paid around $2.50 for the print from Costco.  Then I made a quick garland/banner with some left over burlap ribbon and twine (all already had on hand).

Super Easy and Cheap Fall Mantle

Next, I lined up some pine cones on the front of the mantle. I had these from Christmas last year, so again, no expense. Don't have pine cones on hand? Go to a local park and collect a basket of them! Just make sure you clean them first, or you will end up with bugs all over your house!

Super Easy and Cheap Fall Mantle

I used the same glass containers from my previous mantle to hold some festive branches. I didn't have the branches though, so I picked those up from Hobby Lobby. They were $4, but I had a 40% off coupon (you can always use the coupon on their website when you are in the store, just pull it up on your phone!) so those were only $2.40! Total score! I also used a little owl I had to brighten things up and break up all the brown on the mantle. I had this little guy from last year (and scored him on clearance at Kohls for only $2!).

Super Easy and Cheap Fall Mantle

On the right side of the mantle I used the same glass jar, again, and just put some other floral/branches into it.  I don’t even know where these came from and have had them holed up in a closet for at least 2 years.  At least I’m finally using them!  Then I stacked 2 little candles on the pillar (I am still not sure about this, but it works for now), which I had purchased at the end of the season last year, for $.50 each.  Also, the 2 pillars I had from last year as well, also purchased on clearance at some point from Kohls. 

Super Easy and Cheap Fall Mantle

Cost Breakdown

Bucket List/Burlap Frame: $2.50 (print only)

Fall Garland: $0 (had already)

Glass Jars: $0 (had already)

Owl: $0 (had already)

Fall braches/floral: $2.40

Pine cones: free!

Pillars: $0 (had already)

Candles: $1 for both

Total:  $5.90

Have you put together your fall mantle? Will you use stuff around the house as well, or do you usually purchase new things every year?

You can also connect with me here:
Thanks for visiting!
-Allyson

Guest Post: Punk Princess - Fast & Cheap Franken-Shirt Tutorial (no sew!)

Published Oct 7, 2013 by Allyson
This post may contain affiliate links. Read my disclosure policy.

Today we have an awesome Guest Post from Homegrown & Healthy! I am excited to share her awesome tutorial with you, so lets check it out!

____________________________________________________________

I hate to be the bearer of bad news, but did you know that Halloween is soon? Like, really really soon? Are you ready for it? In my family we are all about Halloween. It's not just a day to be celebrated once a year, but an event that begins with the first signs of fall and continues on every single weekend in October. And at Homegrown & Healthy we are all about being frugal and crafty, so I'm completely fine with the uber-Halloween celebration. Here's a little something to help you get in the spirit as well: frankenshirt

This Franken-shirt is a crowd pleasure because it combines my favorite traits: it takes only a little bit of time, costs just a little bit of money, and the only skills required are that you know how to sew and to *iron. (*And really, it's only about 20 seconds of ironing, so don't worry if you're lacking in that department) IMG_4961

What you'll need:

  • a tshirt that you'd like to Halloweenify.
  • cotton fabric.
  • a pattern. (I did a google search for "Frankenstein Silhouette")
  • scissors.
  • iron on transfer paper (I used "Thermoweb Heat'n Bond Ultra Hold Iron-On Adhesive", and please, if you use a different kind then make sure to read the instructions to make sure that the system is similar).
  • an iron.

IMG_4962

IMG_4963

First things first: Print your pattern and trace it onto the transfer paper, making sure that the shiny side is facing down. The transfer paper lines will be your guide, but they will not show on your finished t-shirt, so don't worry if you make a little mistake. IMG_4967

Do NOT cut your transfer paper yet! Iron the transfer paper, in its entirety, onto the fabric where your silhouette will be. IMG_4969

It takes about 15 seconds. Easy peasy.

IMG_4970

Now you will have your pattern put directly onto your fabric. It'll be so much easier to cut it out now!

IMG_4971

Start hacking away. You know those little details that are kind of a pain to cut? Those little details are what will make this look extra cool, so don't skimp. All done cutting? Now flip it over.

IMG_4975 

  Pretty cool, huh? Not flip it back over.

IMG_4978

You'll be able to remove the white backing from the transfer paper, and all that will remain will be a translucent coating. Remove the white paper and put your fabric down on the shirt, making sure that the coating is facing the shirt. Line everything up to where you want it.

IMG_4979

Iron it again, making sure to get all the little spots down. It only takes a few seconds to melt the coating, but you want to ensure that all those details are locked into place.

IMG_4981

Ta-da! Nice and smooth. Now get your model.

frankenshirt2

Look how sweet she is! When it gets dirty-- and you know it will, especially if you have a little cutie like this wearing it --turn it inside out and just wash and dry like you do your regular clothes. frankenshirt3

And that's it! It probably takes just as long to make this shirt as it does to actually read through the tutorial, so go knock out a few while you still have time. When you're done with that come visit me at Homegrown & Healthy where we share recipes, DIYs, gardening advice, and all other aspects of natural living. We even have a whole section on crafts!

53 Quick and Easy Crock Pot Recipes

Published Oct 5, 2013 by Allyson
This post may contain affiliate links. Read my disclosure policy.

53 Quick and Easy Crock Pot Recipes with 5 Ingredients or Less - Breakfast, Dinner, Desserts, dips, bread...everything you can imagine!
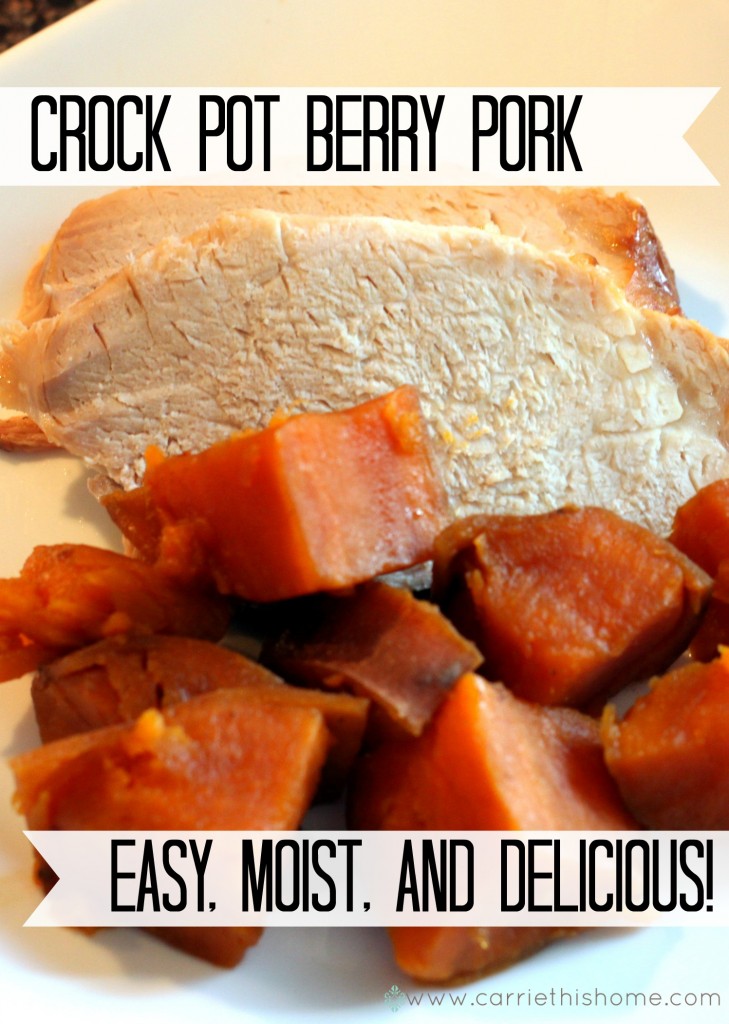
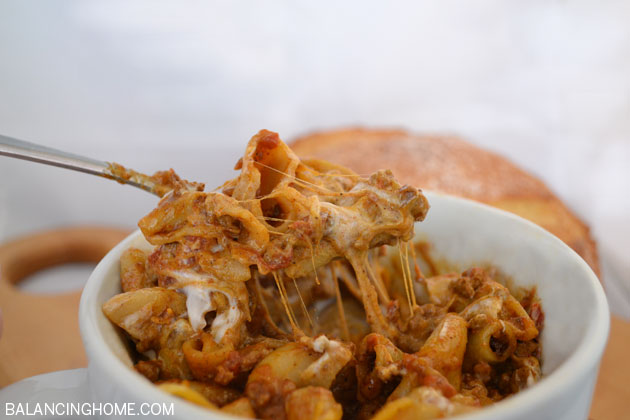
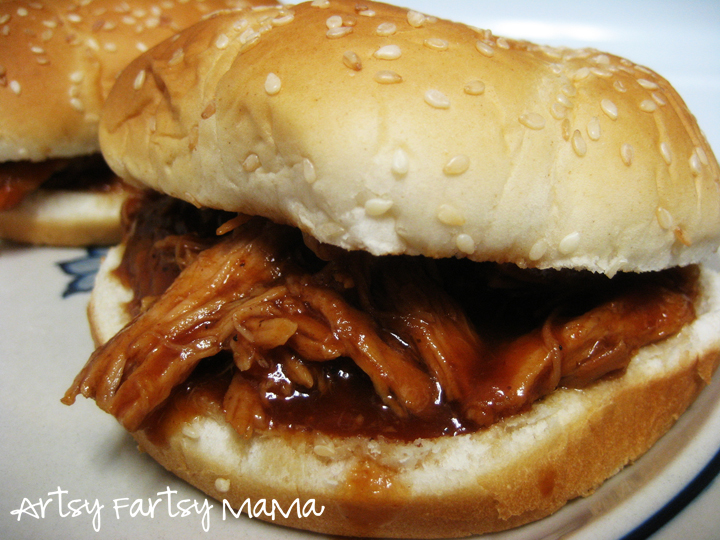
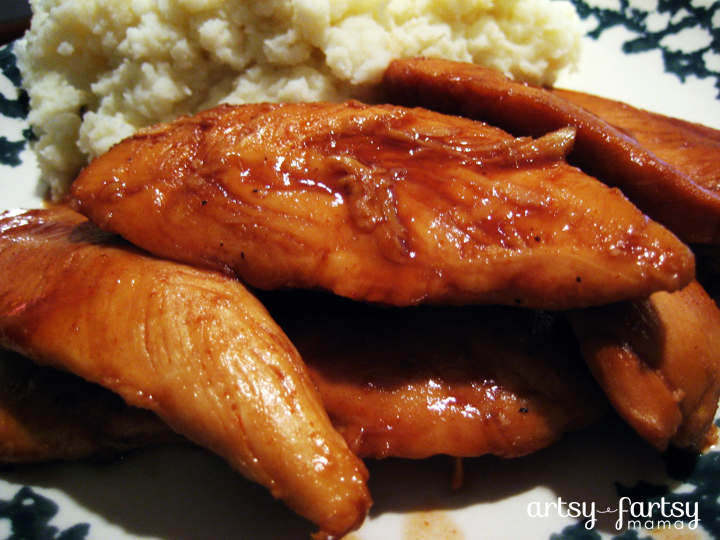
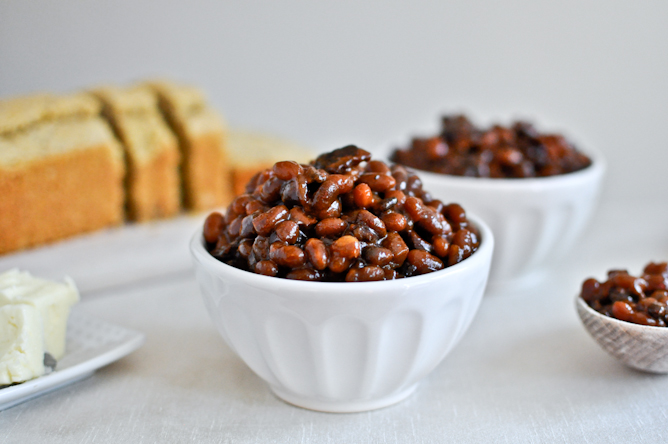
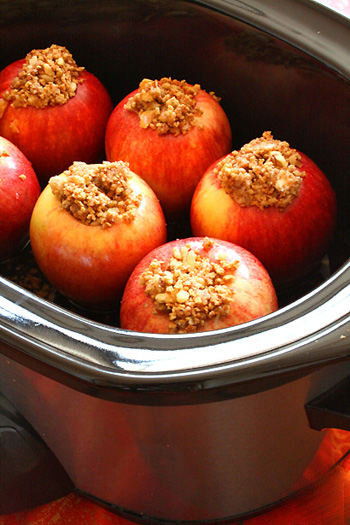
A few weeks ago one of my friends was asking me if I knew of any easy crock pot meals…easy as in, you probably have most of the ingredients on hand, and there aren’t a million things involved.  I have a few that I love on my blog, so I sent her those, but then I had some major inspiration to put together a huge list of super easy crock pot meals.  Don't have a crock pot? Don't worry! They are pretty affordable and definitely pay off with the time you save, and the convenience.  I love this Programmable Cook and Carry 6qt. Slow Cooker. It can hold a ton of food, and it is super easy to travel with and clean (the stoneware comes out, and is dishwasher safe!).

There are so many recipes floating around on the internet for various crock pot meals, but sometimes when you actually check one out that looks good, you see there are 30 ingredients involved, and who has time for that when you are trying to save time and be efficient in the first place by using the crock pot and cooking ahead? 

That’s where this list comes in! I have put together a list of 53 super easy crock pot recipes and most have less than 5 ingredients (I am not counting spices and basic ingredients that most people have in their pantry…like flour and salt).  There are several main dishes, sides, breakfast, and dessert recipes….something for everyone!

Main Dishes

African Pulled Beef Sandwiches in the Slow Cooker with Yogurt-Mint Sauce

African Pulled Beef Sandwiches with Mint Sauce

Super Easy and DELICIOUS Crock Pot Chicken Cacciatore Recipe #shop #kraftrecipemakers and #cbias

Chicken Cacciatore

    Italian Chicken by www.whatscookingwithruthie.com

The Fastest and Yummiest Chicken Parmesan    &   Italian Chicken

Cheesy BBQ Chicken Sandwiches

This is a simple set it and forget it crockpot Buffalo Chicken Recipe. If you have a slow cooker and love buffalo chicken, this recipe is for you.

Buffalo Chicken

Slow-Cooker Beef Pot Roast

Beef Pot Roast

Easy Crock Pot Berry Pork

Crock Pot Berry Pork

In-Your-Sleep Chili        In-a-Hurry Chicken Curry

In Your Sleep Chili & In a Hurry Chicken Curry


Crock Pot Teriyaki Chicken &  Easy Slow Cooker French Dip

Slow Cookers Fiesta Chicken

Slow Cooker Fiesta Chicken

     Kung Pao Sauce

Mexican Corn and Bean Soup  &   Kung Pao Chicken

Pumpkin and Black Bean Chili


Vegan Quinoa & Sweet Potato Chili

Easy Crockpot Ham      Crock Pot Thai Peanut Pork

Easy Crockpot Ham  &  Thai Peanut Pork

If you are looking for a Crockpot Chicken Teriyaki recipe, look no further. This delicious recipe is sure to be a hit! Slow cooking is the way to go!

Chicken Teriyaki

Chili Mac

5 Ingredient Chili Mac

Sweet Pulled Pork

Sweet Pulled Pork

Easiest Pulled Pork Ever   

Easiest Pulled Pork Ever & Chicken Italiano

01_slow-cooker-chicken-salsa-rice-easy-crockpot-meals 

Chicken and Salsa

Boneless Slow Cooker Beef Ribs Recipe via cherishedbliss.com

Boneless Beef Ribs

      3 Ingredient Slow Cooker BBQ Chicken at artsyfartsymama.com

Hawaiian Haystacks  &  BBQ Chicken

Skinny Cheesy Vegetable Chowder

Skinny Cheesy Vegetable Chowder

Side Dishes

crock-pot hot onion dip   

Hot Onion Dip

   Crock-Pot Beer Dip

Slow Cooker Mashed Potatoes  &   Beer Dip 

Slow-Cooker-Queso-Recipes

Easy Crockpot Queso

Crockpot-Baked-Potatoes-from-TheFrugalGirls.com_

Baked Potatoes


 Crock Pot Chicken Stock

   This is a delicious and easy easy crockpot cornbread recipe. It is simple to make and you can absolutely bake it in your slow cooker! Gotta try this one!

Garlic Butter Corn on the Cob  &  Easy Corn Bread

Bacon Bourbon Baked Beans

Breakfast

Apple Cinnamon Oatmeal, in the crock pot!

Apple Cinnamon Oatmeal

Throw in the ingredients before bed and wake up to a house smelling like pumpkin!!  Delicious and hot right before work, you've GOT to try this crockpot pumpkin oatmeal recipe!!!!!!

Pumpkin Oatmeal

#backtoschoolweek #coffeecake #slowcooker #crockpot #breakfast

Slow Cooker Apple Coffee Cake

Dessert

Crockpot Chocolate Cake, it's the moistest cake I've ever had and perfect for company! #slowcooker #crockpot #crockpotchocolatecake #cake

Chocolate Cake

Have you ever baked in your crockpot? You must try this amazing, simple & moist Crockpot Pumpkin Bread! It's so easy and has over 300,000 pins on Pinterest

Pumpkin Bread

Gingerbread Pudding Cake     Triple-Berry Cobbler

Gingerbread Pudding Cake & Triple Berry Cobbler

Slow-Cooker Triple Chocolate Brownies

Triple Chocolate Brownies

Baked Apples   Slow-Cooker Pear and Apple Butter

Baked Apples  &  Apple and Pear Butter

    Apple Crisp

Hot Cocoa Cake  &  Apple Crisp

This is the best cheesecake we have ever made. Best Cheesecake EVER. This is an amazing crock pot cheesecake recipe all done in a slow cooker! Check it out!

Crockpot Cheesecake

S    

S’mores Fondue &  Peanut Butter Cup Cake

You can also connect with me here:
Thanks for visiting!
-Allyson

Guest Post: Basil Walnut Pesto Recipe

Published Sep 30, 2013 by Allyson
This post may contain affiliate links. Read my disclosure policy.

I am so excited to have Shannah from Just Us Four guest posting for Domestic Superhero today!! I have followed Shannah’s blog since I started blogging a year and a half ago, so I it’s really cool that she is now writing this post for me!  She came up with a delicious recipe (like always), so lets check it out below!

_____________________________________________________________

Hi everyone! I am Shannah from Just Us Four. I am thrilled to be here posting at Domestic Superhero...thanks so much to Allyson for having me 🙂 Today, I am going to share with you one of my absolute favorite recipes that is so easy but so versatile.

Basil Walnut Pesto

Towards the end of summer/beginning of fall, I start to have small bit of panic about what to do with all the basil from my basil plant before it stops producing for the winter. It is a pretty small plant but produces A LOT of basil. Basil Walnut PestoSo, each fall, I like to make a few batches of pesto to store for the winter so we can skip buying the store bought stuff. I love pesto because you can use it on so many things beyond the standard pasta. One of my favorites is pesto meatball subs. YUMMY.

What You'll Need

3 packed cups of basil leaves

½ cup of walnut pieces

2 garlic cloves

1 teaspoon lemon juice

⅓ cup olive oil

½ cup grated parmesan cheese

Let's Make It: 1) In a skillet, toast the walnuts and unpeeled garlic cloves for a few minutes until fragrant. Peel the garlic. Basil Walnut Pesto

2) In food processor, pulse the walnuts and garlic until finely chopped. Add the basil leaves and lemon juice and turn on the processor. With the process running, pour in the olive oil and run for about 30 seconds to a minute until it is well mixed/combined. Scrape down the sides of the bowl and pulse a few more times to ensure everything is chopped and combined.

3) Pour into bowl and stir in grated parmesan cheese. Basil Walnut Pesto

Basil Walnut PestoOnce your pesto is made, you can use it immediately, store it in the fridge for 3-5 days or freeze it. I typically reserve some for a dish I am going to make that week and then spoon the rest into ice cube trays and freeze. Once they are frozen, I pop out the cubes and store in a plastic freezer bag. Each cube equals about 1 tablespoon of pesto.

I hope you've enjoyed the recipe for Basil Walnut Pesto I shared with you today. If you'd like to see more recipes or crafts I have to share, please stop by my blog, Just Us Four, and say "hi". You can also connect me with on Twitter, Facebook, Pinterest and Instagram.

Thanks again to Allyson for having me here! I appreciate her letting me come by and highjack her blog for the day 😉

The Perfect Hostess Gift with FolkArt Multisurface Paint & Handmade Charlotte

Published Sep 24, 2013 by Allyson
This post may contain affiliate links. Read my disclosure policy.

I am so excited to be joining forces with Plaid, and sharing their new FolkArt Multi Surface Paint and brand new line of stencils by Handmade Charlotte!  Both will be available for purchase in Michael’s stores soon!  Make sure you read all the way through this post as you will have a chance to win a $100 gift card to Michaels and a gift pack of this amazing FolkArt Multi Surface Paint!!!

I was thrilled to hear about this new Multi Surface Paint by FolkArt.  I love their regular paints, and now this new product is even more versatile.  It can be used on pretty much any surface (glass, fabric, wood, metal, etc), and it is dishwasher and washing machine safe! Doesn’t get much better than that!  Then when I saw the new stencil designs by Handmade Charlotte, I was seriously swooning.

The Perfect Hostess Gift: Custom Designed Kitchen Towel and Custom Spatulas! So cute!

When I received my box of goodies from Plaid, I was shocked to see my favorite combination….grey, yellow, and chevron!!?!?!?  If you know me (or know my blog), you know I just love these 3 things…especially together!  All I needed to pick up for this project were some white dishtowels and a set of wooden spatulas/spoons.The Perfect Hostess Gift: Custom Designed Kitchen Towel and Custom Spatulas! So cute!

I decided to make 2 sets, and try out one of the other stencils as well.  I loved the little triangle pattern so I gave that one a try too!

Layout your spoons, and then tape off where you want the paint to stop. This will give you a crisp clean line.  Use paint and cover the end of the spoons with desired color (yellow and grey!).  I did 3 coats, because I wanted the coverage to be heavy.

The Perfect Hostess Gift: Custom Designed Kitchen Towel and Custom Spatulas! So cute!

After the paint on the handles was dry, I taped the stencil over the handle, and then painted with the opposite color.  One key thing I learned while stenciling my dining room, is that you have to dab off a lot of the paint before you put it on the stencil.  This helps with getting crisp clean lines, and avoids the paint from running under the stencil etc. Dip the brush lightly in the paint, dab off paint, and then dab onto stencil. Repeat until you have desired coverage.  Also, these little foam round brushes are a MUST for stenciling.

The Perfect Hostess Gift: Custom Designed Kitchen Towel and Custom Spatulas! So cute!

Next it was time for the towels!  I figured out where I wanted the design, and then I folded the towel and placed a piece of cardboard under it so the paint didn’t bleed through the top fabric layer to the rest of the fabric. Then I taped the stencil in position over the towel, and began painting.  These were totally simple and I did about 3 coats on these as well, because I wanted the paint to be pretty bold.

The Perfect Hostess Gift: Custom Designed Kitchen Towel and Custom Spatulas! So cute!

Tie them together with some cute string, twine, or ribbon and you are good to go!

The Perfect Hostess Gift: Custom Designed Kitchen Towel and Custom Spatulas! So cute!      The Perfect Hostess Gift: Custom Designed Kitchen Towel and Custom Spatulas! So cute!

Plaid on Facebook - - - Plaid on Twitter - - - Plaid on Pinterest - - - Plaid’s Blog

Ready for the big $100 and FolkArt  giveaway?!?!

a Rafflecopter giveaway

Like stenciling? Handmade Charlotte is having a big challenge right now, and the grand prize is amazing!! Check it out here!

Disclosure: this is a sponsored post by Blue Print Social and Plaid.   I was compensated for my time in creating a craft, writing, photo styling & editing. All opinions shared are mine. 

And, for some more Plaid inspiration you can check some other ways bloggers have used these products!

Guest Post: DIY Trendy Hair Accessories

Published Sep 23, 2013 by Allyson
This post may contain affiliate links. Read my disclosure policy.

Today we have a guest post from Ursula over at Kraft and Mint! Let's have a look and see what she put together for us! 

__________________________________________________________________

{ DIY Trendy Hair Accessories} 

Hello friends at Domestic Superhero!

I am so excited to be a guest here and collaborate with Allyson. Thank you Allyson for hosting me!

Today I get to share with you a craft I just finished this week. But first, I'd like to briefly introduce myself and share a little bit about me 🙂

Hi there! I'm Ursula Rosien, I'm a wife, mom to 3 great kiddos and recent blogger at kraft&mint blog, a journal of modern crafts. I've always wanted to start a blog about crafting, a little bit about birthday parties and anything else creative that my crazy brain concocts.

My family

This picture best describes my fam! A husband with great sense of humor and 3 super active kiddos. (The third kid is right behind my husband. You can only see his hair sticking up! 😉

And now let's get down to FUN business!

DIY Trendy Hair Accessories

DIY Trendy Hair Accessories!

I love visiting small boutiques in my neighborhood and support the community where I live. There is a cute little boutique next to my local Starbucks that I love to visit. My routine goes something like this: I grab a soy caramel macchiato, venture to "Carousel" shop and browse around for decor, items on sale and such. About a few weeks ago, I noticed the cutest and very simple hair ties sitting in a pretty bowl. And when I say simple, I mean rea-lly simple! These cute little accessories consisted of an elastic stretchy band with a knot tied at the end. That's it! The inner crafter inside me said, "Hey! I can do this myself and have many colors for a fraction of the retail price. So during my next trip to Ben Franklin Crafts store, I asked the sale lady if they carried an elastic stretchy band to make hair ties. She knew exactly what I was talking about and pointed me to a slew of elastic thread supplies. I bought two colors: grey and mint and walked out of the craft store super excited to start my craft. Once I was at home, I looked around my own supplies and found few beads made of wood that inspired me to create my final hair ties craft. Please take a look below to see how I made them.

Tutorial

DIY Trendy Hair Accessories!

First, you will need 1) A few wood beads with big holes. 2) A glittery marker. 3) Two yards of elastic bands. You can find all of these at Ben Franklins.


DIY Trendy Hair Accessories!

Begin with your glittery marker and start drawing on your beads. I picked a big bead to work with first and get used to drawing on a round surface. I doodled a few designs on a piece of paper and then I drew a polka dots theme, a color block style and other styles you can view below.

DIY Trendy Hair Accessories!

DIY Trendy Hair Accessories!

Once you have your beads designed, you will grab the elastic band and cut 12 inches. Then you will put it through the bead carefully not to "scratch" the elastic band.

DIY Trendy Hair Accessories!

Once you have your your band through the bead, place the bead in the middle and tie a knot. Please see the picture below.

DIY Trendy Hair Accessories!

DIY Trendy Hair Accessories!

DIY Trendy Hair Accessories!

DIY Trendy Hair Accessories!

I also made a hair tie for my daughter. This time I used the mint green version of the elastic band and hand stamped my bead with mint ink. I really liked how it turned out!

DIY Trendy Hair Accessories!

My daughter wanted to try her new hair tie right away and even let me take a picture of it...(She is not too keen on being photographed 😉

DIY Trendy Hair Accessories!

Here is a photo of what it looks on me. I've been wearing my new hair ties ever since!

DIY Trendy Hair Accessories!

I hope you enjoyed reading this! As always, I enjoy hearing from you and your comments are such an encouragement!

DIY Trendy Hair Accessories!

Thank you Allyson for letting me share this craft with your readers!

And thank YOU for reading my post and getting to know a little bit about me. You can follow my blog kraft&mint, follow my boards on Pinterest, follow my Instagram or Facebook , Bloglovin or all 🙂

All the best, Ursula!

Dining Room Makeover

Published Sep 19, 2013 by Allyson
This post may contain affiliate links. Read my disclosure policy.

Here is a step by step tutorial on how to use a wall stencil! This Dining Room Makeover is to die for!

Dining Room Makeover with Grand Damask Stencil

Since we moved into our house last April (2012), I have had so many ideas on what to do with each room.  First I tackled our living room, because I figured it would be the most frequented area of the house.  While it’s still not done, I am happy about the projects I’ve done, and the progress we have made on it.  Next, I did some work on the kitchen, and finally it was time to tackle the dining room. Here it is when we moved in (back left)…..

Dining Room Makeover with Grand Damask Stencil

We found the perfect table, and up next was decorating.  I had a couple different ideas about hanging things, making shelves, or doing a gallery wall, but all of those ideas were put out of my mind when I started seeing wall stencils popping up everywhere.

Pre-anything….and yes I know this picture is incredibly crooked. Oops…

Dining Room Makeover with Grand Damask Stencil

I started talking with Royal Design Studio, and they were kind enough to send me a stencil of my choice along with some of their awesome crème paint, and a stencil brush. 

Now, the hardest part was picking a stencil.  They have so many different designs that it made it nearly impossible to select the perfect one.  Originally I wanted a Moroccan Trellis, but then I thought maybe going bolder would be better?!  I am too indecisive when it comes to things like this. 

So, I enlisted the opinions of my 250 closest friends, and went from there.  It definitely wasn’t unanimous, as there are so many awesome patterns, but I felt really good about the Grand Damask pattern I chose.

stencil

Now, I had to decide on the colors for the dining room.  I absolutely love super dark paint in dining rooms, but I was worried maybe my smallish dining room couldn’t pull it off. 

So I debated doing just an accent wall with dark paint, and keeping the other walls light…but then I thought that might look weird….so then I thought maybe leave all the walls light and just do the stencil, but that didn’t seem to have a big enough impact in my mind…..so then I thought maybe paint a darker color, but not too dark…maybe light grey? 

Are you following this? This is seriously the way I try to decide on these types of things….too indecisive.  Well, I narrowed it down and decided to go with some shade of grey.  But how to find the perfect grey?  Through multiple searches I found this great site that had The Best Shades of Grey listed!  Total. Score.  If you want to paint something grey, this is your go-to list.  I ordered 2 samples from Benjamin Moore: Kendall Charcoal and Chelsea Grey.Dining Room Makeover with Grand Damask Stencil

So yeah, I know it’s kind of hard to see them accurately, and I am apologizing in advance because in all my ‘before’ pictures I used my phone camera because I was in such a rush to just do it.  Sorry, but hopefully you will get the idea (who cares about the before pictures anyway!?).

I still wasn’t sure which color; I liked them both in theory.  So, I took out the silver crème paint that Royal Design Studios sent me, and I decided to try it on top of each color and see how I liked it.  I used the little sample stencil they sent with the order, and it gave me a good idea what it would look like.

Dining Room Makeover with Grand Damask Stencil
1235884_10151607774396272_524375337_n

I know, it’s still hard to tell from these pictures, but I was totally set on the darker color once I did this.  So I took out my handy HomeRight EZ Twist Paint Stick and got to work. 

Before I go on, have you heard of this EZ Twist Paint Stick?  I hadn’t either until I heard all these DIY bloggers raving about it.  I had to have it!  Let me tell you, it’s amazing!  You don’t need any trays or anything really.  The paint gets sucked up into a tube that is attached to the roller, and you just push the paint out as needed. 

It also is super easy to load up…no pouring or spilling, it has an easy attachment that attaches to the paint can lid and then to the EZ Stick, and it pulls the paint in it with NO mess.  Like I said, it’s amazing.  I highly recommend getting one if you are going to be painting a large area.  It saves sooo much time, and you don’t waste any paint.  I used just the paint sample and had nearly one big wall covered.

Dining Room Makeover with Grand Damask Stencil

(again terrible picture, and no, I do not buy Pop-Tarts in bulk, this was a box from Costco!)  Can you believe that wall coverage is JUST from the paint sample?  Crazy!

Anyway, I finished painting the next day because I had to go out and buy the actual gallon of paint.  The color I selected was my Benjamin Moore- Kendall Charcoal- 166. I finished painting it the following evening, and then let it dry overnight. 

Dining Room Makeover with Grand Damask Stencil

Someone wanted to test out the ladder….

You can kind of see the paint color better here in natural light (Excuse the mess and the weird panoramic iPhone shot):

Dining Room Makeover with Grand Damask Stencil

I was anxious to start the stencil and I began first thing the next morning….I was a little confused where to start, but from everything I researched, starting in the middle at the top was the best idea for this pattern.  So I put all fear aside, and just went for it!

Dining Room Makeover with Grand Damask Stencil

I think I was literally holding my breath throughout the entire first stencil. I breathed a huge sigh of relief when I took it off and saw the result!

Dining Room Makeover with Grand Damask Stencil

So I kept stenciling…

Dining Room Makeover with Grand Damask Stencil

Now, for some reason I felt all this anxiety about doing the actual stencil. I thought for sure I would mess it up, or it would come out terrible, or something alike.  I wish I hadn’t felt this way because it really came out great, and was super simple.  It was time consuming, but even still I did the entire wall in about 4 hours, with a couple breaks.

Dining Room Makeover with Grand Damask Stencil

The main tip to remember while stenciling is to brush off almost all of the paint on your brush before putting it to the wall.  Really, you want barely any paint.  I dipped my brush just a little into the paint, and then wiped it off on a paper towel. 

Then, I used the brush and made a circular motion while painting onto the stencil. By following those simple directions I was able to get super crisp lines, and I was actually shocked at how clean the lines were.

Dining Room Makeover with Grand Damask Stencil

I also love the look of this Silver Stencil Crème.  The color doesn’t come out even, which I love, and it really picks up the light. I love it.

Definitely the trickiest part of stenciling was painting where it didn’t line up exactly: the ceiling line, the molding line, and then also where the wall stopped on the right and left sides (see picture below for example).  However, it wasn’t hard…just a bit tricky.  You really can’t tape it down, you just have to press the stencil into the corners where you want it.  Dining Room Makeover with Grand Damask Stencil

I pressed and kept my fingers crossed. It wasn’t bad, and it came out pretty good.  Be sure to tape off your edges! I like Frog Tape because it doesn't bleed or pull up the paint when it's dried.

Are you ready to see the final result?! I hope so because I am going to bombard you with photos….

Dining Room Makeover with Grand Damask Stencil

What do you think?  It was really hard to get a full dining room shot, so I did try it with my panoramic feature on my phone so y’all could see the whole room, but it looks a bit distorted…

Dining Room Makeover with Grand Damask Stencil
stencil 95
Dining Room Makeover with Grand Damask Stencil

Now for the Before and after!

Dining Room Makeover with Grand Damask Stencil

I really dislike our lighting fixture in the dining room, and want to make or get a pretty new one….any ideas?  Have you tried out any wall stencils?  I really highly recommend them and my bathroom is next up on my to-stencil list!

 Items you might need to do this project (aff links):

  • Stencil Brush
  • Wall Stencil
  • Painters Tape

Visit my Project Gallery to see all my DIYs!

Make sure you don’t miss a thing! Follow Domestic Superhero on:

Facebook | Instagram | Pinterest | TikTok | Email

For NEW RECIPES delivered straight to your inbox, signup for our email list! 

College Football Door Hanger

Published Sep 17, 2013 by Allyson
This post may contain affiliate links. Read my disclosure policy.

DIY College Football Door Hanger

A few weeks ago one of my favorite blogs, Southern Color posted about a Pinterest Party they had, and they made the most adorable Collegiate Door Hangers!  Turns out, they were all from the south too, AND the creator of the blog is even from Atlanta! 

DIY College Football Door Hanger

I was so excited to make one of these (especially since I still had my 4th of July Wreath hanging on my do0r- oops), and although I had nearly all the supplies on hand, I don’t have a Silhouette machine, so I couldn’t make the logo cut-outs.  Sure, I could have done it by hand, but it would been a lot more difficult and it would save a lot of time to have the cut-out to trace. So……I sent Elizabeth from Southern Color a message and she was super happy and willing to give me cut-out to use!! Score! I was so happy!  She was so lovely and nice in person and it was so nice of her to do me such a big favor!  Once I had to cut-out, I made this wreath ASAP, and it was so quick and easy!  My husband went to Georgia and we live in the Atlanta area so of course I made a UGA wreath! Go Dawgs!

DIY College Football Door Hanger

I should add that I am not usually a bow type of person, and I tried to hang it up without the bow….but it just didn’t look complete. Now, I just love it with the bow!

DIY College Football Door Hanger

Want to make one yourself? Head over to Southern Color for the super simple tutorial!

Guest Post: Mother Goose Popcorn

Published Sep 16, 2013 by Allyson
This post may contain affiliate links. Read my disclosure policy.

Today we have a great guest post from Britney! She is sharing a recipe for Mother Goose Popcorn, and I love how playful it looks! 

_______________________________________________________________________

Hi all! I'm Britney from The Princess & Her Cowboys and I'm excited to share this fun family treat with you today!

 I wish I had some great story as to why we call this Mother Goose popcorn but I don't. That's just what we've always called it!

 To start, combine 2 cubes of butter, ¾ c sugar and ½ c Karo syrup (the clear kind). You're going to cook it until it reaches a soft ball, or 240 degrees on your candy thermometer.

 I need to get myself a candy thermometer so I had to look up ways to tell if it had made it to a soft ball. Get yourself some really cold water and spoon a little bit in. If you can mold it, then it's done.

 Pour over a large batch of popped popcorn, stir it up and there you go.

My favorite part of this is that we always got to choose the color of it, adding just a few drops of food coloring. Because it's fall/almost Halloween, I went with the orange.

Mother Goose Popcorn

2 cubes butter
¾ c plus 1 T sugar
½ c Karo syrup
Food coloring

Bring first three ingredients to a soft ball, or 240 degrees Fahrenheit. Pour over a large batch of air-popped popcorn and mix well.

Enjoy!

Britney blogs at The Princess & Her Cowboys all about crafts, DIY projects, thoughts and recipes. She loves to be with her family and doing anything active, preferably outdoors. She loves to get to know people from all over so stop on by and say hello!

35 Fall Recipes

Published Sep 9, 2013 by Allyson
This post may contain affiliate links. Read my disclosure policy.

35 Fall Recipes

I just love fall. Everything that encompasses fall, I love it. The weather, the football, the leaves changing, the festivals, pumpkins, Halloween, Thanksgiving, and the food, all make fall a really exceptional time.  Fall has so many fun seasonal foods, that I thought I would compile a list of great recipes.  Dessert, breakfast, dinner, snacks….there is something for everyone.

Breakfast

Pumpkin-Pancakes-Inquiring-Chef

Pumpkin Pancakes

DSC_3873small   PA030077 

Cream Cheese Pumpkin Spread & Baked Pumpkin Donuts

5-great-breakfasts-for-fall 

Raspberry Cornmeal Breakfast Cake

Pumpkin-Spice-Waffles-1024x806   pumpkin-bar-368-2 

Pumpkin Spice Waffles & Pumpkin Spice Bars

IMG_38491-600x450

Baked Sweet Potato Oatmeal for One

Sides & Soups

Squash soup3

Squash Soup

Roasted-Carrots-Thyme-Nutmeg-text

Roasted Carrots with Thyme and Nutmeg

Sriracha Glazed Brussels Sprouts 4

Sriracha Glazed Brussels Sprouts

Sweet Potato Casserole 500 1549    Kartoffelsuppe-400

Sweet Potato Casserole & Potato Soup

Main Dishes

aida-mollenkamp-gnocchi-recipe-590x885   Skinny Mushroom Stroganoff (3) 

Sweet Potato Gnocchi w/ Brown Butter Balsamic Sauce & Skinny Mushroom Stroganoff

rfinal-1024x1024 

Pumpkin Chili

pastasauced     butternut-rav

Rotini w/Butternut Sage Sauce & Butternut Squash Ravioli in Browned Sage Butter

    9704708563_75980bb02a_z   Chicken Pot Pie

Pumpkin Macaroni and Cheese & Chicken Pot Pies

LasagnaSoupRecipe1_zpsf5e5d6ab

Lasagna Soup 

                  Harvest-Butternut-Bowtie-Pasta-with-Bacon-1-300x200     recipe_image   

Harvest Butternut Bowtie Pasta w/Bacon &  Pumpkin, Black Bean, & Jalapeno Quesadilla w/Pumpkin Chipotle Crema

creamy-pumpkin-pasta-767093

Creamy Pumpkin Pasta

Dessert

9385265807_78ab89e10f_c

4 Ingredient Fudgy Pumpkin Pie Brownies

pie

Mini French Apple Pies

pumpkin cheesecake with salted caramel sauce1     pumpkin-spice1-694x1024

Pumpkin Cheesecake w/Salted Caramel Sauce & Pumpkin Spice Krispie Treats

8133667728_5509ab27ce_c

Halloween Candy Bark

caramel-apple-spice-cupcake

Caramel Apple Spice Cupcakes

 gourdoughs-carney-copycat-doughnut-1-685x1024     Cranberry-Cheesecake-Brownies-1

Apple Pie Donuts & Cranberry Cheesecake Brownies

dessert   img_2471copy2

Pumpkin Cream Cheese Coffee Cake & Two Bite Apple Pies

IMG_1921fc

Salted Caramel Mini Apple Cake Bundts

mini apple pies

Mini Apple Pies

Anything look good to you?!  What is your favorite fall food?

DIY Lamp Shade Makeover

Published Sep 3, 2013 by Allyson
This post may contain affiliate links. Read my disclosure policy.

For the last month or so, I have been turning my son’s nursery into a big boy room! I've done so many projects for it, but haven’t shared many yet.  There are tons of posts to come on this big boy room, but today I am going to share how I recovered a lamp shade for his room.  This project was so easy! It took less than 30 minutes, and I love how it turned out!

DIY Lamp Shade Makeover

Last month, I was browsing Hobby Lobby and I found some super cute bright orange chevron fabric. I bought a couple yards, knowing I would be able to incorporate it into my son’s new room since it matched the color scheme I was planning.  Up until that point, I had pretty much removed all the nursery decor from his room, except for the little lamp we use every night while reading before bed.  Not just any lamp, a jungle animal lamp.  It had to go. I pulled out an old lamp from the closet, and found the chevron fabric.  I quickly looked up ‘how to recover a lamp shade’ and there was about a million results (actually more).  Little did I know how easy it would be….

What you need:

  • old lamp shade
  • chevron fabric (or fabric of your choice)
  • hot glue and glue gun
  • paper to trace on (to make a pattern). I used kraft paper; I have a giant roll which I use for everything
  • a pencil or pen (to trace with)
  • iron
  • Spray Adhesive (optional)

DIY Lamp Shade Makeover

DIY Lamp Shade Makeover

What to do:

  • Follow this great tutorial from Fat Orange Cat! She has step by step directions and seriously made it so easy to figure this out! I didn't do that last step of her tutorial (adding ribbon), but everything else was spot on!

DIY Lamp Shade Makeover

This project was super easy and cheap too! All I ended up having to buy was the fabric, which made this lamp under $5 total!  Total win if you ask me!

Guest Post: Black Forest Cake Smoothie

Published Sep 2, 2013 by Allyson
This post may contain affiliate links. Read my disclosure policy.

Today we have our next guest post from Jackie! This smoothie looks delicious so keep reading to hear all about it!

Hello Domestic Superhero readers! My name is Jackie and I am guest posting today from my blog Foxy Whole Foodie. I started my blog in March of 2013 to document my love of whole food recipes – and along the way I also started getting fit for the first time in my life. Growing up, I was never athletic and I actively avoided physical activity (gym class was a particularly stressful event, that I would do anything to get away from). But as I’ve learned more and more about healthy living, I’ve grown to love exercise as a valuable part of that healthy lifestyle. So, like my tag line says, my blog documents my adventure finding a life fueled by whole foods and fitness. Along the way, I share lots of whole foods recipes, as well as stories about my life.

One of the first big steps I took towards a healthy lifestyle was drinking green smoothies. It was the first thing I ever blogged about and it’s definitely a daily habit that I can’t live without. I feel like it starts me off on the right foot for the day and helps me make healthy choices as the day goes on. Recently, I read an article on Greatist about drinking cherry juice can help reduce sore muscles and thought that incorporating cherry juice into a smoothie would be a great idea! 🙂

In addition to my morning green smoothie, I sometimes use smoothies as a workout-recovery tool – so I thought up this recipe to incorporate protein for post-workout recovery as well as the cherry juice to reduce muscle soreness. And the combination of chocolate and cherry tastes just like a Black Forest Cake! 🙂 This is definitely a dessert you can feel good about indulging in.

Black Forest Cake Smoothie

”Black Forest Cake” Smoothie
Serves one.

  • 1 to 1 and ½ cups cherry juice (start with 1 cup and add additional if needed to get the smoothie to the right consistency)
  • 1 cup kale or spinach (optional – but I promise you can’t taste it!)
  • 1 frozen banana (or 1 fresh banana and ½ cup ice)
  • 1 scoop chocolate protein powder (or 1 scoop regular protein powder with 2 tablespoons cocoa powder, or omit the protein powder all together and just use the cocoa powder)

Black Forest Cake Smoothie

Blend all ingredients together to smoothie consistency and enjoy! This is a great dessert-style smoothie but I also had it for breakfast one morning when I was feeling indulgent – and it’s a healthy indulgence! 🙂

If you like smoothie recipes, check out some of my others below:

~Peachy Green Smoothie Recipe
~Chocolate Milkshake Smoothie Recipe

Free Printable- "You are the..."

Published Aug 26, 2013 by Allyson
This post may contain affiliate links. Read my disclosure policy.

A couple years ago I was wondering around in Whole Foods, and I stumbled across their greeting card section.  It was a very small rack, but it had the best cards.  Most were fronted with an inspirational quote, or a really meaningful message, and I wanted to buy all of them.  I didn’t though. Instead I snapped a couple pictures on my phone of the ones I really liked, and figured I’d look them up later.  Flash forward a few years, and I was clearing the old photos off my cell phone before I turned it in for my new phone upgrade.  I put all those old photos in a folder on my laptop, and didn’t really look through them for a while….a long while.

I opened that folder a few weeks ago, and remembered all those cards that day at Whole Foods.  It just so happens that I am redecorating my son’s room (from baby to big boy!), and I thought one of the card fronts would be perfect for his room….a really great quote from H. Jackson Brown, Jr. 

FREE Printable in 5 colors! You are the high in my noon, the flap in my jack, the jelly in my bean, the hop in my scotch, the fortune in my cookie, the grand in my canyon, the bees in my knees, the zig in my zag, the rock in my roll, the fox in my trot, the pow in my wow, the gee in my whiz! - h. jackson brown, jr.

I decided to learn how to make a printable, something I take major advantage of, but had never made myself.  Have you seen all the FREE printables on Pinterest?  There are so many, for pretty much everything you could imagine.  People design them, then put them out there for people to print for free.  You can print them at home, or you can print them somewhere like Staples or Kinkos.  Last year I printed all of my Christmas labels and they were totally cute.  My kitchen menu plan? Free.  My yearly calendar? Free. The list goes on and on.   Check out my free printable board on Pinterest for some major inspiration.  Anyway, it turned out pretty easy! I paired this lovely quote with my other best friend, Chevron. How nice to see you again...

FREE Printable in 5 colors! You are the high in my noon, the flap in my jack, the jelly in my bean, the hop in my scotch, the fortune in my cookie, the grand in my canyon, the bees in my knees, the zig in my zag, the rock in my roll, the fox in my trot, the pow in my wow, the gee in my whiz! - h. jackson brown, jr.

For this printable, I made them in 5 different colors, so if you are interested in printing them, hopefully one coordinates with your décor. These are perfect for a kid’s room or playroom…or probably even someone you really just like a lot.  It’s easy to print them too. I am going to post the links below, and all you do it click on them.  Each one will open in Google Docs, and then you just download the image, and print it (still confused? Scroll all the way down for further explanation).  I opted to have mine printed at staples so the quality of print was high.  For all 5 it was around $2 to print.  Totally cheap.

FREE Printable in 5 colors! You are the high in my noon, the flap in my jack, the jelly in my bean, the hop in my scotch, the fortune in my cookie, the grand in my canyon, the bees in my knees, the zig in my zag, the rock in my roll, the fox in my trot, the pow in my wow, the gee in my whiz! - h. jackson brown, jr.

Time to get the goods! Click on your color to open in Google Docs (and then download, print).

Navy Printable

Red Printable

Orange Printable

Grey Printable

Green Printable

Having trouble printing in Google Docs? Click on the link above, and this is what you see next….

FREE Printable in 5 colors! You are the high in my noon, the flap in my jack, the jelly in my bean, the hop in my scotch, the fortune in my cookie, the grand in my canyon, the bees in my knees, the zig in my zag, the rock in my roll, the fox in my trot, the pow in my wow, the gee in my whiz! - h. jackson brown, jr.

Which is your favorite color? I am majorly digging the orange!

One Pot Mexican Quinoa Bowls

Published Aug 25, 2013 by Allyson
This post may contain affiliate links. Read my disclosure policy.

One Pot Mexican Quinoa Bowls are healthy, delicious, and come together super fast - perfect healthy dinner!

I’m not going to lie, these Mexican Quinoa Bowls are amazing.   I saw this recipe months ago over on Pinterest, and I knew I had to make it immediately.  A few months later one of my friends sent me the recipe saying she had made it, and was currently shoveling it into her mouth.  Must be good, right?  I ended up making it that same week, and I was annoyed with myself for not making it sooner!  It is so good.  I love Mexican food, but not the calories that usually come with it.  This Mexican Quinoa has a dash of cheese, which is just enough to satisfy those cheesy Mexican cravings and not add a bajillion calories.  Top it with heart healthy avocado (or don’t, if you are allergic like me) and a dollop of Greek yogurt or sour cream.  So delicious.

One Pot Mexican Quinoa Bowls are healthy, delicious, and come together super fast - perfect healthy dinner!

I still talk to people daily who haven’t tried quinoa or say they didn’t like it when they made it (usually plain).  If you fall into one of these categories I urge you to try it again, with one of the recipes on my blog.  Head all the way to the end of this post and you can see a compiled list of all the yummy quinoa recipes I have shared.  Give one a try!  Also, if you are like my family and eat tons of quinoa, I suggest buying it at a place like Costco or Sams.  Costco has huge 4lb bags for $10.99 (prices may vary depending on location), which breaks down to $2.75 per pound.  At normal grocery stores a 1lb box/bag is anywhere from $7-$12….this is a huge savings.

Print
Mexican Quinoa Bowls
Ingredients
  • 2 cloves garlic minced
  • 2 jalapeños seeded and finely chopped
  • 1 cup uncooked quinoa rinsed well and drained
  • 1 ¼ cups vegetable or chicken broth
  • 1 can 1 ½ cups black beans, rinsed and drained
  • 1 14.5 oz can diced tomatoes (with juice)
  • ¾ cup corn
  • ½ teaspoon kosher salt
  • ¼ cup chopped fresh cilantro optional
  • 1 quarter of a lime juiced
  • To serve: salsa sour cream/Greek yogurt, shredded cheese, tortilla chips, and avocado
Instructions
  1. 1. Add a small bit of oil to a medium-sized pot set over medium heat. Add garlic and jalapeños; cook just until fragrant (about a minute).
  2. 2. Add quinoa, broth, beans, tomatoes, corn, and salt. Bring to a boil. Reduce heat, cover and let simmer for 25 minutes, or until quinoa is cooked and liquid is absorbed.
  3. 3. Remove from heat; stir in cilantro and lime juice.
  4. 4. Spoon into bowls and serve with desired toppings.
Recipe Notes

Makes: 4-6 servings
Recipe from kitchensimplicity.com

One Pot Mexican Quinoa Bowls are healthy, delicious, and come together super fast - perfect healthy dinner!

Want more quinoa recipes?!  Check these out:

Quinoa Fried Rice

Spinach and Feta Quinoa Cakes with Lemon Dill Sauce 2

Buffalo Quinoa Mac and Cheese 4

You can also connect with me here:

Thanks for visiting!

- Allyson

How to Soften Butter...Quick!

Published Aug 21, 2013 by Allyson
This post may contain affiliate links. Read my disclosure policy.

How to Soften Butter..Quick! A baking tip from Domestic Superhero

If you are like me, you probably don't plan out the exact time you will be cooking or baking something.  Usually when I decide to bake, it's a spur of the moment, "Oh, I feel like some cake...", kind of thing.  Several baking recipes call for room temperature butter, or softened butter.  The only time this happens for me is when I go grocery shopping and forget to put the butter away..which probably more appropriately would be called, "spoiled butter."  Like many people, I just don't have time to let my butter sit out on the counter for an hour to soften!  Usually I just toss it in the microwave, and we all know how that ends up...totally melted.  I usually just use it like this, but in my experience I have noticed it changes the outcome of the recipe a bit....

Have no fear, I have the best tip to share with you!  You can soften butter in the time it takes you to get all your other ingredients out! Actually, that's not true...It will take you a much longer time to get the rest of your ingredients ready.  Softening butter will take you 16 seconds...that's it!

Maybe you have heard of this tip before, but I hadn't, and I am here to share it with you!

What you do....

1. Leave butter in wrapper. It must NOT be a foil wrapper.  It should be some type of paper wrapper. Place your butter stick on a microwave safe dish.

2. Heat for 4 seconds on high. Flip it to the next side and heat for 4 more seconds. Do this for each side for a total of 16 seconds*.

*The time may vary ever slightly depending on your microwave power, but I have tried this on a couple microwaves and it works well.

That's it! Now you won't have to bake with messy melted butter, or clumpy too cold butter!

Like this? Like Domestic Superhero on Facebook for more revolutionary tips!

Loaded Buffalo Bleu Cheese Fries

Published Aug 18, 2013 by Allyson
This post may contain affiliate links. Read my disclosure policy.

Loaded Buffalo Bleu Cheese Fries

This recipe pretty much had me at hello.  My husband and I are crazy about buffalo sauce, and anytime you can add bleu cheese, cheddar cheese, and potatoes to it, it’s going to be amazing. Being a vegetarian though, it’s harder to find good ‘buffalo’ recipes.  Most people cover chicken and wings in buffalo sauce, but I have found it’s more about the sauce, and less about the vehicle.  You know what tastes great with buffalo sauce?  Broccoli. Shocking? Not really…it’s all about the sauce!

Typically if you ordered something like this at a restaurant, it would include bacon. This recipe does not.  If you would like to add bacon, I am sure it would make a tasty addition. 

Loaded Buffalo Bleu Cheese Fries

The hardest part of this recipe is making your own fries. It’s not hard, but it is time consuming.  I would say it’s worth it to try to make them yourself, but if you are short on time, I’d suggest just using frozen steak fries.  Have you tried Alexia fries? They are delicious.  I think next time I make this I will use frozen fries…it’s just such a time saver.  This combination would be perfect in a baked potato too! Wow, I am totally trying that next time.  Bake your potato, top with all this cheesy buffalo goodness. RIP.

Loaded Buffalo Bleu Cheese fries are perfect for game day or Breaking Bad Sunday nights (or whatever your guilty pleasure show is at the moment).  Also, if for some crazy reason you dislike bleu cheese, just leave it off.  Serve these with homemade ranch. You can thank me later.

Use this Homemade Buffalo Sauce Recipe as well!

Loaded Buffalo Bleu Cheese Fries

Print
Loaded Buffalo Bleu Cheese Fries
Prep Time
5 hrs
Cook Time
1 hr
 
Course: Side Dish
Cuisine: American
Servings: 4
Ingredients
  • 3 pounds unpeeled russet potatoes cut into wedges
  • 3 tablespoons vegetable grapeseed or canola oil
  • 1 teaspoon salt
  • 1 teaspoon pepper
  • ½ teaspoon garlic powder
  • 1 cup buffalo wing sauce I like Franks Wing Sauce
  • 2 tablespoons butter
  • 4 ounces freshly grated sharp cheddar cheese
  • 4 ounces crumbled bleu cheese
  • 4 green onions sliced
Instructions
For Fries
  1. Preheat oven to 450 degrees F.

  2. Place cut potatoes in a large stock pot and cover with cold water. Bring to a boil and once bubbling, only boil for 5 minutes. After 5 minutes, drain potatoes.

  3. Place in a large bowl and drizzle with oil, salt, pepper and garlic powder. Gently toss with your hands or two spatulas to evenly coat.

  4. Spread on a baking sheet in one layer. Roast for 25-30 minutes, then flip and roast for 25-30 minutes more. You want the potatoes to be deeply golden and crunchy on the outsides!

  5. Remove potatoes from the oven and switch on your broiler to the highest setting.

For topping
  1. Heat buffalo wing sauce and butter in a small saucepan over low heat until combined.

  2. Drizzle a bit of wing sauce over the potatoes and sprinkle both cheeses evenly over the top.

  3. Place under the broiler for 2-3 minutes, until cheese is bubbly and golden. Remove immediately and sprinkle with scallions.

  4. Serve with ranch and remainder of buffalo sauce on the side.

Loaded Buffalo Bleu Cheese Fries

DIY Nursery Wall Art and a Nursery Tour

Published Aug 13, 2013 by Allyson
This post may contain affiliate links. Read my disclosure policy.

DIY Nursery Wall Art and a Nursery Tour - this is the easiest and most saught after wall art! Perfect for a gift or your own room!Back in January one of my friends, Stacey, announced she was pregnant with number 2!  I was super excited for her….especially when she started talking nursery décor as I like to live vicariously through my friends who are decorating their nurseries. It’s so fun to brainstorm ideas with them, and Stacey had a theme in mind that was going to feature one of my favorite decorating colors, grey!  She ended up choosing navy and green for her accents, and the combo was perfect.

DIY Nursery Wall Art and a Nursery Tour

While browsing pinterest one day I came across the cutest nursery, which had the cutest wall art! I was in love, but had no baby to share it with!

DIY Nursery Wall Art and a Nursery Tour

I wasn’t shocked to find out that this blogger made them herself, and I wanted to share the idea with my friend, because I thought she would love it too! She did love it, and I encouraged to make her something like that for her nursery….but as time went on, I told her I would just make it for her!  I ended up finding the CUTEST fabric at Hobby Lobby and then she decided to incorporate it into her color scheme, and do a retro car theme in the nursery! Love!  I didn’t take photos while making these canvases, but it’s not very difficult to explain or make.

DIY Nursery Wall Art and a Nursery Tour

I used 4 16 x 20 canvases. I found the fabric at Hobby Lobby, and covered the canvas, stapling it to secure it.  As for the monogram, I found these cardboard letters at JoAnn’s, and then painted them.  Originally I planned to paint them green, but then Stacey and I agreed that we liked them better in white.  I used some Liquid Nails Glue to secure them.  ‘Walker’ is painted on the green fabric, and this is the only one I had a lot of trouble with.  We really wanted to replicate the font that was used in the inspiration above, but I didn’t have a Silhouette (fancy cutting machine), which would cut out the name for me.  After trying several things, and failing, I finally reached out to one of my blogging friends,  and she made a printable PDF for me!!  Next, I had that printed onto cardstock.  Then I used an exacto knife to cutout the name, and make a stencil.  Then I painted it using craft paint.

DIY Nursery Wall Art and a Nursery Tour

I love the vintage car fabric. Last time I was at Hobby Lobby they still had it, too!

DIY Nursery Wall Art and a Nursery Tour

Do you love them as much as I do? It would be so easy to change up for whatever nursery theme!

Ok, now lets see what Stacey did with the rest of her nursery…..

DIY Nursery Wall Art and a Nursery Tour - OMG I LOVE THIS GRAY CRIB!! I love her grey crib and green/white/navy bedding!

DIY Nursery Wall Art

Opposite of the crib she has a nice cozy rocking chair, and a bright window!  She chose navy window treatments, and can you see that vintage car sign peeking out from the behind the chair?! Love it!

DIY Nursery Wall Art and a Nursery Tour

I absolutely love her grey matching dresser! It has slight distressing and goes perfectly in the nursery. She hung the canvases above the dresser and they look great! The dresser is doing double duty as a changing table, which is convenient and maximizes space.  We did the same thing in our nursery a few years ago!

Anyway, I am just in love with this whole nursery!  Wondering who is occupying this lovely space? My friend, Stacey had her beautiful baby boy, Walker on July 8th! He was 8lb 6oz and 22 inches long. Walker is lucky to have an awesome big brother, Braxton, who is 2.5!  Congratulations to their lovely family!

kids

Things you might need to make this DIY project (aff links):

  • 4 16 x 20 canvases
  • Liquid Nails Glue
  • Silhouette or other stencil cutout machine
  • acrylic paint
  • cardboard letters
  • exacto knife
  • chevron fabric
  • vintage car fabric
  • navy dotted fabric

Visit my Project Gallery to see all my DIYs!

You can also connect with me here:

Thanks for visiting!

- Allyson

Skinny Mushroom Stroganoff

Published Aug 11, 2013 by Allyson
This post may contain affiliate links. Read my disclosure policy.

Skinny Mushroom Stroganoff
I am going to be honest and tell you right off the bat that I have never actually tried Beef Stroganoff.  It wasn't a meal that was ever cooked for me, and the only time I have ever seen someone eat it was while I was on vacation in Russia (it’s quite popular over there)…but it didn't really appeal to me.  By the time I really started cooking, I was a vegetarian and I never gave it a second thought.  Flash forward to now, and in comes Mushroom Stroganoff (skinny style!).  I frequent Skinny Taste, do you?  If you answered yes, we are on the same page, if you said no, you should probably add that to your list of food blogs to check out.  All of Gina’s recipes are made over to be lower calorie and still taste delicious at the same time.  She uses nutritious ingredients and makes over traditional recipes along with coming up with new recipes as well.  Check it out, she’s awesome.

Anyway, I saw this recipe for Mushroom Stroganoff and I figured I had to try it.  It’s vegetarian and includes mushrooms, a creamy sauce, and pasta too…totally up our alley.  I added it to the menu plan and never looked back.

Bear with me because it’s sort of difficult to make this look appetizing, but trust me, it tastes delicious! I made a couple substitutions just because I wanted to use a couple things on hand and it came out great. It really felt like I was eating a calorie heavy sauce (aka totally creamy), but I knew it wasn't which made it taste even better.  I ended up using wheat noodles, and part of me wished I used the white noodles…I will likely try those next time.  This comes out to less than 270 calories (and 7 points+ on WW!) for a cup and a half of pasta…total score!

Skinny Mushroom Stroganoff

Print
Skinny Mushroom Stroganoff
Ingredients
  • 1 tablespoon butter
  • ½ cup chopped onion
  • 2 tablespoon unbleached all-purpose flour
  • 2 cups fat-free less-sodium vegetable broth (or beef if you're a carnivore)
  • 1 tablespoon Worcestershire sauce
  • 1 teaspoon tomato paste
  • 12 oz sliced baby Bella cremini mushrooms*
  • 3.5 oz Shiitake mushrooms*
  • ¼ teaspoon thyme
  • salt and pepper to taste
  • 2 tablespoon white wine or sherry
  • ¼ cup reduced-fat sour cream or Greek yogurt
  • 8 oz uncooked noodles Ronzoni Smart Taste, Healthy Harvest or No-Yolk
  • 1 tablespoon minced fresh flat-leaf parsley for garnish
Instructions
  1. 1. Cook noodles in a pot of salted water according to package directions, I like to under-cook them a bit so I can mix it with the sauce and let it finish cooking.
  2. 2. While the water starts to boil for the noodles, heat a large nonstick skillet over medium-high heat. Melt butter over medium heat, add onions to the pan and cook 2-3 minutes over medium-low heat.
  3. 3. Add flour and stir with a wooden spoon for 30 seconds. Gradually add broth, Worcestershire sauce, and tomato paste, stirring constantly. Add mushrooms, thyme, salt and pepper; stir and cook 4-5 minutes or until thickened and bubbly, stirring constantly.
  4. 4. Add wine and bring to a boil. Reduce heat, and simmer 4 minutes. Remove from heat and let stand 30 seconds.
  5. 5. Stir in sour cream (or Greek yogurt), add noodles and mix well. Garnish with parsley if desired.
Recipe Notes

*feel free to use whatever mushroom blend you want

Skinny Mushroom Stroganoff

You can also connect with me here:
      
Thanks for visiting!
-Allyson
 

Skinny Mini Key Lime Pies

Published Aug 6, 2013 by Allyson
This post may contain affiliate links. Read my disclosure policy.

Skinny Mini Key Lime Pies are the perfect individual dessert! Quick and easy to make, with a ton of flavor!

Skinny Mini Key Lime Pies are the perfect individual dessert! Quick and easy to make, with a ton of flavor!

These Skinny Mini Key Lime Pies are going to be the STAR of your next party, event, or potluck! They are so simple to make, and super delicious! Everyone will be asking you for the recipe!

Skinny Mini Key Lime Pies are the perfect individual dessert! Quick and easy to make, with a ton of flavor!

You may have noticed from the recipes I usually post, I am not a baker. I don't claim to be a baker, in fact, I usually warn anyone who is going to eat anything I've baked.  However, there are a couple things I can do well, so I just do them over and over.  The best banana bread? Check. Various muffins? Check. The occasional themed dessert (Sopapilla anyone...)? Check.  However, things usually stop there.  Another reason I don't bake a lot is because we don't eat a lot of sweets at my home.....we'd much rather break into some chips and salsa, but with all that said, I love key lime pie....but am I really going to eat a whole key lime pie (don't answer that)?  Cue individual pies, and this recipe...

Skinny Mini Key Lime Pies are the perfect individual dessert! Quick and easy to make, with a ton of flavor!

I didn’t want to feel too guilty eating these little mini pies, so I skinnied them up (well, as skinny as you can make a pie, come on!), and made them into individual servings so I couldn’t serve myself half a pie.  They turned out great, I didn’t notice anything different with the taste of the skinny version compared to the regular full fat version. Honestly, 'I’m not going to be calling them healthy, but it’s worth a splurge once in a while.  These Skinny Mini Key Lime Pies are the perfect summer treat!

These were soooo easy to make! Pretty fast, minimal ingredients, inexpensive, and so tasty!

Skinny Mini Key Lime Pies are the perfect individual dessert! Quick and easy to make, with a ton of flavor!

If you like Key Lime then be sure to checkout these Key Lime Pie Shots (mini desserts) and Key Lime Pie Dip!

More desserts from Domestic Superhero that you might like:

  • Waffle Iron Caramel Apple Pies (10 minute recipe)
  • Carrot Cake Trifle (shortcut and homemade recipes)
  • Butterfinger Cheesecake (Slow Cooker)
  • Instant Pot Almond Joy Cheesecake
  • S’mores Stuffed Brownie Bites

Make sure you don’t miss a thing! Follow Domestic Superhero on:

Facebook | Instagram | Pinterest | TikTok | Email

For NEW RECIPES delivered straight to your inbox, signup for our email list! 

Print
Skinny Mini Key Lime Pies

Skinny Mini Key Lime Pies are the perfect individual dessert! Quick and easy to make, with a ton of flavor!

Servings: 12 pies
Ingredients
For Graham Cracker Crust
  • 1 ½ cups graham cracker crumbs
  • 5 TBS butter melted
  • 1 teaspoon lime zest
  • 2 TBS of sugar
For Key Lime Cream Cheese Filling
  • 2 ounces cream cheese softened (could also use neufatchel cheese to lighten up more)
  • 1 TBS lime zest
  • 1 egg yolk
  • ½ cup key lime juice or lime
  • ⅛ teaspoon salt
  • 14 ounce can low fat sweetened condensed milk
Instructions
  1. Preheat the oven to 350º.

  2. In a small bowl mix graham cracker crumbs, sugar, melted butter, and 1 tsp. lime zest. Mix until completely combined.

  3. Place cupcake liners in cupcake tins.

  4. Add 2 TBS of the graham cracker mixture and press down in each cupcake liner.

  5. Bake for 8 minutes, remove from oven, and let completely cool.

  6. With a stand or hand mixer combine softened cream cheese, salt, and lime zest. Mix until combined.

  7. Add low fat sweetened condensed milk and mix until incorporated and no lumps of cream cheese remain.

  8. Mix in egg yolk and key lime juice until incorporated.

  9. Pour mixture into cooled graham cracker cupcake liners ¾ of the way full.

  10. Bake for 15 minutes at 350º.

  11. Remove from oven and place in refrigerator for at least 1 hour. Top with fresh lime zest and lime garnish if desired. Serve.

Recipe Notes

This recipe yielded 12 mini pies for me, however depending on how much graham cracker mixture you put into the tins, you could make more or less. I did have a bit of extra filling, so if you go ahead and use 2 cups of graham cracker crumbs, you could probably yield 15 mini pies!

DIY Chalkboard Serving Tray

Published Jul 29, 2013 by Allyson
This post may contain affiliate links. Read my disclosure policy.

Chalkboard Serving Tray

Since we moved into our house last year, I have been looking for a nice serving tray that would be able to carry a ton of stuff back and forth from the kitchen to the dining room or outside to the patio.  I looked high and low, but never found anything that really fit the bill.  Then, one day I was browsing one of my favorite DIY blog, Shanty 2 Chic, and came across a genius do it yourself idea of making a serving tray, and having it be partly chalkboard so you can label whatever is on it, if needed.  I had to make it!

I literally ran out to Home Depot the same day, and picked up my supplies...

  • Chalkboard Spray Paint
  • A 2×12 (8 feet long) wood board- Confession, I found my wood in the scrap section which was a major score, but only enough for one tray...good enough for me!
  • 2 sturdy handles (also found at Home Depot)
  • ScotchBlue Painter's Tape
  • Minwax Finishing Wax
  • Minwax Wood Stain, in Jacobean

I only ended up purchasing the scrap wood piece, the chalkboard spray paint, and the handles.  All in all this put this project around $16, which I consider a steal.

How to make the Chalkboard Tray:

First up you need to sand your wood and make sure you get all the edges and sides smooth.  You definitely don't what sharp edges or shards of wood sticking out to poke people (or your furniture).  Once smooth, use a small paint brush (an old one preferably), to saturate your wood piece with whatever stain you choose. Make sure to cover all the corners and sides (I didn't do the bottom).  I wanted my wood very dark, so I put on a very heavy coat, waited about 30 minutes, then wiped it down.  Then, I applied another coat and repeated the wait/wipe down.  I left it overnight to dry.

Next, I used ScotchBlue Painter's Tape to section off the area of wood that I would spray with the chalkboard paint:

DIY Chalkboard Serving Tray

After the tape was in place, I used the chalkboard spray paint to fill in the exposed area.  I did 2 coats in all, and that seemed to give great coverage.  I let the chalkboard paint dry for about an hour, and then I prepped the board by running the side of a piece of chalk side to side, covering the entire painted area.  Then erased.  This gets the surface ready to be used.  I have seen lots of chalkboard projects online, and then people get upset because the paint 'doesn't work', when it is probably the DIYers that aren't following the instructions on the can!  Read the instructions and follow them!

Next, I removed the painters tape and got some wax ready.  I used the wax on the stained wood ONLY (do not use on chalkboard paint), to seal the stain in.  **I actually did this step last, because I noticed that when I wiped the chalkboard surface off, there was chalk residue on the wood. I didn't like it, so I wanted to seal the stain to prevent this from happening again**  

If you haven't use wax before, it's really easy to work with. I use it on all of my furniture once I am done painting etc.  All you do is ball up a paper towel or old rag, and then dip it in the wax. You want to smudge it around in there so you get some wax on the towel.  Then wipe that wax onto the wood. Even though it's clear you should be able to tell where the wax is.  Once you cover all the stained wood with wax, let it sit for directed amount of time (usually 10-30 minutes).  Then use a clean towel and start rubbing the wax 'off'.  You will notice it starting to shine a bit, and it will be smooth to the touch.  If it feels tacky or sticky, you need to keep buffing.

Next up I screwed on my handles.  I loved the look of these chunky gate handles.  They are huge and angled, and they stole my heart right when I saw them.

DIY Chalkboard Serving Tray

And it was done!   I took tons of pictures of this, because I really wanted to capture every angle!  Using this as a taco bar was perfect!

DIY Chalkboard Serving Tray

DIY Chalkboard Serving Tray

DIY Chalkboard Serving Tray

DIY Chalkboard Serving Tray

DIY Chalkboard Serving Tray

The options for this serving tray are endless! It would be adorable with cheese, fruit, and nuts, like Shanty 2 Chic modeled.  Or you could do things like using it to serve drinks, dessert bar, hot dog/hamburger dressing station, make your own salad, make your own burrito bar, ice cream serving station.....the list goes on and on and on and on....get it?!

DIY Chalkboard Serving Tray

Even when I am not serving anything on it, I have it sitting on top of my farm style dining room table.  I put my plants on top of it, and I just love it!I highly recommend getting a Chalk Ink Markerfor writing on this.  Regular chalk is messy, and this marker makes it super easy to write, and clean up!

Do you love it as much as I do?!

Make sure you don’t miss a thing! Follow Domestic Superhero on:

Facebook | Instagram | Pinterest | TikTok | Email

For NEW RECIPES delivered straight to your inbox, signup for our email list! 

Blueberry Basil Margaritas

Published Jul 22, 2013 by Allyson
This post may contain affiliate links. Read my disclosure policy.

Blueberry Basil Margaritas - only a few ingredients and super delicious!

During the summer I love going to BBQ's and outings where special cocktails are in abundance.  I love coming up with new combinations for fun drinks, and this summer I am on a total Margarita kick.  I decided to make a margarita similar to my Strawberry Basil Margaritas and it did not disappoint.  Some of my friends actually said they liked this one better than the Strawberry version!  Like the Strawberry Basil Margaritas, these are super easy to make, and only require a couple ingredients.  I am a huge believer in the frozen cans of limeade, they seriously are perfect for making pitchers of margaritas.

Anyway, for this recipe I browsed around Pinterest for some inspiration, but all the drinks with blueberries were all using/making a simple syrup type of thing with the blueberries. I didn't have time for that, and thought it probably wasn't necessary for what I had in mind.  I just put the blueberries in the bowl, sprinkled a bit of sugar over the top, and then smashed it all together with the potato masher (if you don't use this thing, you should!).  Luckily I was right and my method worked great, and it was quick!

Blueberry Basil Margaritas - only a few ingredients and super delicious!

Also, if for some reason you have an aversion to tequila, I have made this drink with vodka as well. I used the exact same ingredients/instructions, just substituted vodka as the alcohol.Blueberry Basil Margaritas - only a few ingredients and super delicious!

Print
Blueberry Basil Margaritas
Ingredients
  • 1 can 12 ounces frozen limeade concentrate (+2.5 cans of water)
  • 1 cup blueberries rinsed
  • ¼ cup sugar
  • 8 basil leaves
  • 2 to 2 ½ cups tequila gold or silver (or vodka if you prefer)
  • lime for garnish
Instructions
  1. 1. Place rinsed blueberries in bowl and top with sugar. Use potato masher or muddler to mash the berries with the sugar until well mashed. Pour blueberry mixture into the pitcher (or you could strain if you don't like a lot of fruit bits in your drinks, personally I don't mind).
  2. 2. Empty the limeade concentrate into a pitcher. Add 2 ½ cans of water. Add 16-20 ounces (your preference), or 2 ¼ cups cans of tequila
  3. 3. Crumple the basil a little in your hands or muddle it a bit (this will help the basil flavor release into the drink) and add it to the pitcher, too.
  4. 4.Place the pitcher, covered, in the fridge for at least 2 hours. Serve in glasses garnished with lime and basil if desired.
Recipe Notes

These drinks do end up having lots of fruit bits in them. Personally I like it, but I know some people might not. You could avoid this by straining the blueberry mixture before you pour it into the pitcher. If you do that, I would put some additional whole blueberries into the pitcher before putting it into the fridge.
Also, you can use vodka in the recipe instead of tequila if you desire.

Blueberry Basil Margaritas - only a few ingredients and super delicious!

Like summer cocktails as much as I do? Check out these other drinks from Domestic Superhero:

basil lemonade (12) edited   blueberry basil margaritas 6 (2)   Watermelon Marg 1

IMG_6832   Peach Margarita 3   Strawberry Moscow Mule

Pomegranate Limeade 1    cranberry margs  Strawberry-Basil-Margaritas-3.jpg

Mixed-Berry-Mojitos-1_thumb.jpg  Blackberry-Mojito.jpg

You can also connect with me here:

Thanks for visiting!

- Allyson

Artichoke and Tomato Frittata

Published Jul 17, 2013 by Allyson
This post may contain affiliate links. Read my disclosure policy.

Full of vegetables and eggs, this Artichoke and Tomato Frittata is fresh, healthy, and delicious! It's the perfect one skillet breakfast!

Full of vegetables and eggs, this Artichoke and Tomato Frittata is fresh, healthy, and delicious!

I really love making frittatas because they are so easy and you can pretty much throw anything into them.  We always have eggs around our house, so if some night I have no clue what to make for dinner, I can usually turn to some sort of frittata.  This Artichoke and Tomato Frittata is perfect!

Artichoke and Tomato cooking

For this particular frittata, I knew I wanted to use tomatoes because I had a bunch in the fridge that would have gone bad otherwise, and I hate wasting food.  I didn't see much else to use in our fridge, but I knew we had some canned artichoke hearts in the pantry. Score! I LOVE artichokes!  Mixing them together with a little Parmesan cheese and we had a winning dish!  Serve this with some toast or English muffin on the side (I love making a little frittata egg sandwich), and you have a perfectly easy and delicious weeknight dinner.

Artichoke and Tomato Frittata in the skillet

If you have never made a frittata, don't be intimidated! It is pretty much one of the easiest things to make!  Don't like some of the ingredients in this one? No problem, put in whatever you want! As long as you have the egg base down, you can make a frittata with anything (I really love spinach and feta, too!).

Full of vegetables and eggs, this Artichoke and Tomato Frittata is fresh, healthy, and delicious!

More EGG recipes you might like:

  • Egg Salad Lettuce Wraps (KETO/low carb)
  • The Best Egg Salad Recipe
  • Air Fryer Hard Boiled Eggs (no boiling)
  • Mexican Baked Eggs (One Skillet)
  • Make-Ahead Egg & Cheese Breakfast Sandwiches

Make sure you don’t miss a thing! Follow Domestic Superhero on:

Facebook | Instagram | Pinterest | TikTok | Email

For NEW RECIPES delivered straight to your inbox, signup for our email list! 

Artichoke and Tomato Frittata sliced
Print
Artichoke and Tomato Frittata
Prep Time
5 mins
Cook Time
20 mins
 

Full of vegetables and eggs, this Artichoke and Tomato Frittata is fresh, healthy, and delicious!

Servings: 8 servings
Ingredients
  • 7 eggs beaten
  • 1- ounce Parmesan freshly grated
  • ½ teaspoon black pepper
  • Pinch salt
  • 1 teaspoon butter
  • 1 can artichoke heats chopped
  • 2 to tomatoes chopped (I used plum, but any type is fine)
Instructions
  1. Preheat oven to broil setting.
  2. In medium size bowl, using a fork, blend together eggs, Parmesan, pepper, and salt. Heat 12-inch non-stick, oven safe saute pan over medium high heat. Add butter to pan and melt. Add artichokes and tomatoes and cook for 2-3 minutes, stirring frequently. Pour egg mixture into pan and stir with rubber spatula. Cook for 4 to 5 minutes or until the egg mixture has set on the bottom and begins to set up on top.
  3. Place pan into oven and broil for 3 to 4 minutes, until lightly browned and fluffy. Remove from pan and cut into 6 servings (or however many desired). Serve immediately with pepper and salt on the side for additional seasoning.
Recipe Notes

Don't want to ditch the meat? Add sliced ham to the egg mixture for a nice addition.

The Best Chocolate Chip Banana Muffins

Published Jul 15, 2013 by Allyson
This post may contain affiliate links. Read my disclosure policy.

The Best Chocolate Chip Banana Bread and Muffins

If you haven't tried The Best Banana Bread or Muffin recipe, (you are seriously missing out) this is the perfect time to go ahead and make it!  If you happen to have a small sweet tooth, like I do, then you might like the addition of chocolate chips to this recipe.  The recipe is the same, however you toss in a couple handfuls of chocolate chips to liven them up!  This recipe can be made in muffin tins, or as a loaf.  A loaf will take more time to cook, but is equally delicious.  These make the perfect housewarming gift!

Print
The Best Chocolate Chip Banana Muffins
Ingredients
  • 3 or 4 ripe bananas smashed
  • ⅓ cup melted butter
  • 1 cup sugar can easily reduce to ¾ cup
  • 1 egg beaten
  • 1 teaspoon vanilla
  • 1 teaspoon baking soda
  • Pinch of salt
  • 1 ½ cups of all-purpose flour
  • 1 cup chocolate chips
Instructions
  1. No need for a mixer for this recipe.
  2. Preheat the oven to 350°F (175°C). With a wooden spoon, mix butter into the mashed bananas in a large mixing bowl.
  3. Mix in the sugar, egg, and vanilla.
  4. Sprinkle the baking soda and salt over the mixture and mix in.
  5. Add the flour last, mix. Fold in chocolate chips.
  6. Pour mixture into a buttered 4x8 inch loaf pan or muffin tin. Bake for 1 hour for the loaf, or 22-25 minutes for the muffins. Cool on a rack. Remove from pan and slice to serve.

The Best Chocolate Chip Banana Bread and Muffins

Spinach and Feta Quinoa Cakes with Lemon Dill Sauce

Published Jul 9, 2013 by Allyson
This post may contain affiliate links. Read my disclosure policy.

Spinach and Feta Quinoa Cakes with Lemon Dill Sauce are the perfect healthy easy meal!

Today I have yet another quinoa recipe, because really, do they ever get old?! No way!  If you haven't jumped on the quinoa bandwagon yet, you are totally slow, but it's never too late!  While quinoa seems to be a fad food right now, it's definitely going to stick around. It's one of the most complete foods, and is super healthy and great for your body.  It's also so versatile and can be used in so many dishes!  Don't believe me?  Check out this Buffalo Quinoa 'Mac' and Cheese, for a healthy spin on the traditional favorite. Or how about some Strawberry Goat Cheese Quinoa Salad as a perfect side for those summer dinners?  Want more inspiration? See more quinoa recipes at the bottom of this post.  In particular I really like Bob's Red Mill Organic Whole Grain Quinoa.

Anyway, like I said, I am going to share another quinoa recipe with you- Spinach and Feta Quinoa Cakes.  I love quinoa cakes because they are quick and easy, and so filling. I have made them several different ways, but my husband agreed with me that this is one of the best recipes we have tried.  The spinach and feta go perfect together (the Greek were onto something here!), and topped with the cold lemon dill yogurt sauce, they taste amazing!  These would definitely freeze up well if you wanted to make a large batch and save some for dinner another time.  Serve these quinoa cakes alongside some roasted veggies or a heap of steamed broccoli and you have an awesome meal!

Spinach and Feta Quinoa Cakes with Lemon Dill Sauce are the perfect healthy easy meal!

5 from 2 votes
Print
Spinach and Feta Quinoa Cakes with Lemon Dill Sauce
Ingredients
  • ½ cup plain Greek yogurt reduced-fat or whole
  • 2 tablespoons finely chopped scallions
  • 2 teaspoons freshly squeezed lemon juice
  • 1 tablespoon + 2 teaspoons chopped fresh dill divided
  • Coarse salt and freshly ground black pepper
  • 1 tablespoon extra-virgin olive oil
  • ½ cup finely chopped onion
  • 2 garlic cloves finely chopped
  • 5 ounces chopped baby spinach
  • 2 large eggs beaten
  • 1 ¼ cups cooked quinoa
  • 2 ounces crumbled feta cheese
  • ¼ teaspoon grated lemon zest
  • ½ cup bread crumbs
Instructions
Directions for Sauce
  1. Whisk together the yogurt, scallions, lemon juice, and 2 teaspoon dill in a small bowl. Season to taste with salt and pepper. Cover and refrigerate the sauce for at least 1 hour to allow the flavors to meld.
Directions for Quinoa Cakes
  1. Heat the olive oil in a large skillet over medium heat. Add the onion and garlic and cook, stirring often, until softened, about 4 minutes. Add the spinach and cook, stirring often, until wilted, about 3 minutes. Transfer the mixture to a medium-size bowl.
  2. Add the eggs, quinoa, feta, 1 TBS dill, lemon zest, and ¼ teaspoon black pepper and mix well. Mix in the bread crumbs and let the mixture sit for a few minutes to allow the bread crumbs to absorb some of the moisture.
  3. Wipe out large skillet, and add 1 TBS oil. Heat for a few minutes.
  4. Form quinoa patties about 2 ½ inches in diameter and ½ inch thick. Place the patties in skillet, in batches if necessary. Cook the patties until they’re browned on the outside, 4 to 5 minutes per side, and then flip.
  5. Serve warm with lemon-dill yogurt sauce.
Recipe Notes

You could bake these too if you would like!

Spinach and Feta Quinoa Cakes with Lemon Dill Sauce are the perfect healthy easy meal!Love quinoa like I do? Check out these other great quinoa recipes!


You can also connect with me here:

Thanks for visiting!

- Allyson

Honey Baked Goat Cheese

Published Jun 26, 2013 by Allyson
This post may contain affiliate links. Read my disclosure policy.

While living in Greenwich, CT there was this little restaurant that we would frequent called Bang.  We mostly went there just for their fried goat cheese because it was a.m.a.z.i.n.g.  Well, eventually I moved, and I figured out that a lot of restaurants make delicious fried goat cheese. I've seen them in ball form and log form, and I don't discriminate based on shaped...they all taste the same {delicious}.  After we moved to Atlanta, my husband took me to this great restaurant, Ecco, where they are known for their Honey Goat Cheese Balls.  Of course I ordered that, I would never miss out on my beloved goat cheese!  Now, these balls were amazing...definitely the best I have ever had.  The delicate and sweet honey drizzled over the fried goat cheese balls and topped with cracked pepper....um, make it a double!  These balls were to die for.  Anyway, I had to try to recreate them, but I didn't want to actually fry the goat cheese. I've seen various methods of baking the goat cheese and still having great results, so I went ahead and tried that.  They ended up coming out really tasty!

*Tip- Quality honey is a MUST. I love the Savannah Bee Company! Their honey is thebomb.com

Savannah Bee Company

Anyway, this recipe is easy! Try it out for a great appetizer or salad topper!

Honey Baked Goat Cheese

Honey Baked Goat Cheese

Honey Baked Goat Cheese

Print
Honey Baked Goat Cheese Balls
Ingredients
  • 1 log goat cheese honey variety or plain, slightly frozen
  • ½ cup panko bread crumbs
  • 1 egg beaten
  • 1 TBS basil chopped
  • 2 teaspoon fresh cracked pepper divided
  • 1.5 TBS honey you can be more liberal here if you like
Instructions
  1. 1. Preheat oven to 475 degrees.
  2. 2. In a bowl, place the goat cheese log, basil, 1 teaspoon pepper, ½ TBS honey. Mix together with a fork until well combined. Using a TBS measuring spoon, spoon out little balls and roll in hands to form balls. Once all the balls are formed, set aside.
  3. 3. Beat the egg in a medium bowl and set aside. In another medium bowl place panko bread crumbs.
  4. 4. Dunk the cheese balls into the egg wash, then coat them in the breadcrumbs and set on slipmat on baking sheet. Continue until all balls are coated.
  5. 5. Place the baking sheet in to freezer and freeze them for 30 minutes. Remove and then brush the tops with olive oil to prevent from drying out while baking.
  6. 6. Bake for 8 minutes, checking at 6 minutes and every 30 seconds after to prevent burning.
  7. 7. Drizzle remaining honey over cheese balls and then sprinkle remaining pepper over top.

Honey Baked Goat Cheese


One Pot Wonder Tomato Basil Pasta

Published Jun 24, 2013 by Allyson
This post may contain affiliate links. Read my disclosure policy.

One Pot Wonder Tomato Basil Pasta made in just one pot and in less than 20 minutes! It is the easiest and tastiest dinner ever!

Tomato Basil Pasta made in just one pot and in less than 20 minutes! The easiest dinner ever!

When I saw this recipe for one pot tomato basil pasta a few months ago, I was very skeptical.  I mean, I have never seen a pasta dish cooked in 1 pot, without even having to strain the pasta.  However, if Martha Stewart is putting it in her magazine as an 'amazing' recipe, then I am going to believe that the people over there have tested it out and approved.  So, I added it to my menu plan a few weeks ago and never looked back.  

A great thing about this one pot tomato basil pasta is that it's likely you already have all the ingredients in your pantry and fridge.  It's also very inexpensive, doesn't use a lot of ingredients, and it's done in under 30 minutes, which, in my book, classifies it as a quick meal.

One Pot Wonder Tomato Basil Pasta

Like I said, I was skeptical, but as this was cooking, it was literally filling my house with a delicious aroma, and it looked so good.  Not only did it look good though, it tasted 'amazing' , just as Martha Stewart said.  By cooking the pasta in the vegetable broth, it really took on a nice flavor and it came out with a super different texture (the pasta).  

It wasn't hard, yet it wasn't mushy...it was pasta perfection.  I still think it's crazy that you just throw everything into the pot and let it do it's thing...but it works, trust me!  I have eaten a lot of pasta in my 29 years, and this was good....really good.

One Pot Wonder Tomato Basil Pasta

I'll probably be cooking this once every couple weeks, that's how good it was.  Try this now, you won't regret it. 

Speaking of One Pot pastas, you HAVE to get yourself a skillet/pot like the one I have – it’s amazing. No longer do I have to use a HUGE pot, and then worry about washing it, nor do I have to squeeze everything into my shallow sided skillet and have the sauce bubble over – this high side skillet is seriously made for these one pot pasta dishes. The cleanup is a breeze too – you can toss it in the dishwasher, but I really prefer to hand wash because it takes 15 seconds max, and then it doesn’t cramp up my dishwasher!

I love serving this pasta with Baked Chicken Meatballs or even these Air Fryer Meatballs!

One Pot Wonder Tomato Basil Pasta

Do you like ONE POT recipes as much as I do?! See these these other amazing recipes:

  • Spicy Basil Chicken {One Pot }
  • One Pot Spicy Thai Zoodles
  • One Pot Spaghetti with Meat Sauce
  • One Pot Cheesy Pumpkin Pasta
  • Quinoa Fried Rice (One Pot)
  • One Skillet Lemon Artichoke Chicken
  • Hamburger Casserole (one skillet)
  • One Skillet Spicy Pasta (Jalapeno Parmesan)

Make sure you don’t miss a thing! Follow Domestic Superhero on:

Facebook | Instagram | Pinterest | TikTok | Email

For NEW RECIPES delivered straight to your inbox, signup for our email list! 

Print
One Pot Wonder Tomato Basil Pasta
Prep Time
2 mins
Cook Time
15 mins
 

Tomato Basil Pasta made in just one pot and in less than 20 minutes! The easiest dinner ever!

Course: Main Course
Cuisine: American
Keyword: one pot wonder tomato basil pasta
Servings: 6 servings
Ingredients
  • 12 ounces linguine pasta however, I think you could just do the 16oz box and be fine
  • 1 can 15 ounces diced tomatoes with liquid ( I used fire roasted for a little kick)
  • 1 large sweet onion sliced thinly
  • 1 TBS minced garlic
  • ½ teaspoon red pepper flakes or a lot more if you like it spicy!
  • 2 teaspoon dried oregano leaves
  • 2 large sprigs basil chopped
  • 4 cups vegetable broth
  • 2 TBS extra virgin olive oil
  • Parmesan cheese for garnish
Instructions
  1. Place pasta, tomatoes, onion, garlic, basil, in a large stock pot. Pour in vegetable broth. Sprinkle on top the pepper flakes and oregano. Drizzle top with oil.
  2. Cover pot and bring to a boil. Reduce to a low simmer and keep covered and cook for about 10 minutes, stirring every 2 minutes or so. Cook until almost all liquid has evaporated – I left about a half ince of liquid in the bottom of the pot – but you can reduce as desired .
  3. Season to taste with salt and pepper , stirring pasta several times to distribute the liquid in the bottom of the pot. Serve garnished with parmesan cheese.
Recipe Notes
  1. I ended up cooking mine for a total of around 20 minutes. I brought it to a boil, and then let it simmer until almost all the 'sauce' was soaked up into the noodles. There was a tiny bit left, which in my opinion was the perfect amount. This time is really going to depend on how low/high you have the simmer. Watch it closely.
  2. You can add other veggies to this as well, and probably even add meat if you don't want to leave it out. However, this dish was perfect with the above ingredients, so try it out!

How to Quickly Ripen Bananas for Banana Bread

Published Jun 19, 2013 by Allyson
This post may contain affiliate links. Read my disclosure policy.

One of the first things I ever learned to bake was Banana Bread, and I feel like over the years, I have found the best banana bread recipe which I pretty much make it all the time.  We don't eat many bananas at my house, but I definitely buy them all the time.

So, last weekend we were going to a BBQ and I had volunteered to bring dessert.  I had recently found a recipe for Banana Cake that was similar to banana bread, but more cake-like.  I decided to give it a go, but when Saturday approached, I realized that I didn't have any overly ripe bananas to make it! No!!!! How could this be?!  Well, sure enough there are tons of tips and tricks to ripen bananas at an accelerated rate on Pinterest and the internet, so I picked one and gave it a go!

What do you know, it actually worked!  After the bananas were 'ripe' they were super sweet and perfect for banana bread.  The texture was a bit stringy, but that didn't make any difference once they were mashed and in the cake. I promise this is the easiest thing you will ever do....

How to Quickly Ripen Bananas for Banana Bread or other baking

 So, in more words....

1. Get your bananas and preheat oven to 300 degrees.
2. Put your bananas on a LINED baking sheet. They will leak a bit and that's a mess I don't want to deal with (and you shouldn't have to either).
3. Bake bananas at 300 degrees for about 40 minutes, or until the skin is dark brown/black. 
4. Remove and let cool for at least 30 minutes before using.

Done!

Need some banana inspiration?  How about using this tip to make one of these easy recipes....

Greek Yogurt Strawberry Banana Bread

Greek Yogurt Strawberry Banana Bread

The Best Banana Bread and Muffins

The Best Banana Bread and Muffins

Banana Bread with Warm Blueberry Compote

Banana Bread with Blueberry Compote

DIY 4th of July Burlap Wreath

Published Jun 17, 2013 by Allyson
This post may contain affiliate links. Read my disclosure policy.

In just a few weeks we will be celebrating the 4th of July, and I wanted to add a little red, white, and blue decor to the house.  Immediately I thought about our front door wreath and thought it would be perfect to spruce up!  A few months ago I made a spring burlap wreath on our front door....

Spring Burlap WreathIt was so easy to make with this Burlap Ribbon, and I also loved how it would be so easy to change around for different times of the year.  I secured the numbers and flowers with wire, so they could easily be removed and changed out.  However, when thinking up a 4th of July Wreath, I decided to just leave them on, and add some additional flowers.

4th of July Burlap Wreath

4th of July Burlap Wreath

I found the flowers at the dollar store and the little flag in a pack of 3 in the dollar section at Target.  So for just a couple bucks, we now have a festive wreath! 

For basic Burlap Wreath Tutorial visit the original post here.


Cookies and Cream Cheesecake Cupcakes

Published Jun 12, 2013 by Allyson
This post may contain affiliate links. Read my disclosure policy.

Cookies and Cream Cheesecake Cupcakes

For as long as I can remember, I have never liked Oreos.  They get stuck in my teeth, they have a weird chalky feeling in my mouth, and they are just too sweet.  Then, I got pregnant, and all those feeling disappeared.  Suddenly I loved chocolate (wasn't a big fan before), and wanted to eat anything sweet I could get my hands on!  It wasn't until late in my pregnancy I had something Oreo flavored, and I loved it.  Flash forward 3 years later, and I don't really eat Oreos anymore...but, when I saw a recipe for an Oreo Cheesecake Cupcake, I knew I had to make it! First off I love cheesecake, and it seemed like a delicious mix.

So I whipped up these Cookies and Cream Cheesecake Cupcakes and didn't look back. I always thought it was hard to make cheesecake (it's not!), so I have never tried it, but boy was I wrong (and totally missing out!).  This recipe made about 35 cupcakes for me, but it would depend on how high you fill the wrapper.  I just used a standard muffin tin, which allowed a whole Oreo to fit at the bottom.  I loved how you could see the Oreo through the bottom of the wrapper too!  I had to give a ton of these away, or else I would have eaten them all!  Everyone raved about them (even my husband who generally doesn't like cheesecake!), so I hope you like them as much as we did!

Cookies and Cream Cheesecake Cupcakes

Cookies and Cream Cheesecake Cupcakes

Print
Cookies and Cream Cheesecake Cupcakes
Servings: 30 cupcakes
Author: Allyson
Ingredients
  • 42 cream-filled sandwich cookies 30 left whole, and 12 coarsely chopped
  • 2 pounds 4 8-oz packages cream cheese, room temperature (I used 2 low fat and 2 regular)
  • 1 cup sugar
  • 1 teaspoon vanilla extract
  • 4 large eggs room temperature, lightly beaten
  • 1 cup sour cream
  • Pinch of salt
Instructions
  1. 1. Preheat oven to 275°F. Line standard muffin tins with paper liners. Place 1 whole cookie in the bottom of each lined cup.
  2. 2. With an electric mixer on medium high speed, beat cream cheese until smooth, scraping down sides of bowl as needed. Gradually add sugar, and beat until combined. Beat in vanilla.
  3. 3. Drizzle in eggs, a little at a time, beating to combine and scraping down the sides of the bowl as needed. Beat in sour cream and salt.
  4. 4. Stir/fold in chopped cookies by hand.
  5. 5. Divide batter evenly among cookie-lined cups, filling each almost to the top. Bake, rotating pan halfway through (around 11-12 minute mark), until filling is set, about 22-25 minutes.
  6. 6. Transfer to wire racks to cool completely. Refrigerate at least 4 hours (or up to overnight). Remove from tins just before serving.
Recipe Notes

Cupcakes should be refrigerated if not eating/serving. They will spoil if left out for a long period of time. These should keep well in the fridge for up to a week (though, the longer they sit, the soggier the cookie gets on the bottom-but it still tastes good!).

Cookies and Cream Cheesecake Cupcakes

Like this recipe? Head over to Domestic Superhero on Facebook for more!

Recipe from Martha Stewart's Cupcakes

You can also connect with me here:
      
Thanks for visiting!
-Allyson


Sriracha Glazed Brussels Sprouts

Published May 29, 2013 by Allyson
This post may contain affiliate links. Read my disclosure policy.

Up until last year, I had never even had Brussels sprouts, but for some reason I had a bad mental image of them.  People always talk about how they aren't very tasty, or grew up hating them.  Well, I think things have changed, or maybe cooking styles have changed, because if you cook these little green vegetables right, they are so delicious!  First I tried roasting them with olive oil, salt, and pepper.....success!  I think the key is letting them get a little brown and crisp on the outer layers.  A little burn is good in the case of Brussels sprouts!  Next, I tried roasting them again, but this time tossed in a Caesar dressing.....success!  These were little explosions of flavor and I highly recommend that method of preparing.  More recently, I wanted to spice them up...so where did I turn?  Sriracha!  Have you jumped on the Sriracha bandwagon yet? No?  Yes? Regardless, this is the perfect recipe to try.  

This dish blends sweet (honey!) and spicy (sriracha) for the perfect flavor combination.  Even if you are a Brussels sprouts hater, try this out and let me know what you think...I *think* you might be swayed in the other direction.  This Sriracha glaze would be perfect for other things as well...chicken, tofu, fish, other veggies...you name it, I bet it would be tasty.

Sriracha Glazed Brussels Sprouts

Oh, by the way, The Savannah Bee Company is the bomb.com.  Their honey is so so so good! If you can't make a trip to Savannah, pop on over to their website and order some.  I love the Sourwood, but all the flavors are to die for.  AND, if you do by chance make it to Savannah, bee (haha) sure to stop at their store and do a honey sampling. LOVE! 

Sriracha Glazed Brussels Sprouts

Print
Sriracha Glazed Brussels Sprouts
Ingredients
  • 1 bag of Brussels Sprouts or about 3 cups, cut in half
  • 1 tablespoon extra virgin olive oil
  • 1½ tablespoons honey
  • ½-1 teaspoon sriracha
  • ½ of lime the juice
Instructions
  1. Heat the oven to 375 degrees.
  2. 1. Trim the ends off the brussels sprouts and then slice them in half.
  3. 2. On a baking sheet, toss the brussels sprouts with the oil and season lightly with salt.
  4. 3. Place in the oven and roast for 10 minutes. Toss and roast for 10 more minutes.
  5. 4. Meanwhile, whisk together the honey, sriracha and lime juice until combined. After the brussels sprouts have roasted for 20 minutes, pour the glaze over them, toss to combine, and roast for 2 minutes more.
  6. Serve immediately

Recently I made some Sriracha Popcorn...ch-ch-check it out!


Crispy Pressed Tofu with Garlic & Mint

Published May 19, 2013 by Allyson
This post may contain affiliate links. Read my disclosure policy.


Crispy Pressed Tofu with Garlic & Mint

After pressing the water out of the tofu, the marinade is made, and then the tofu sits in the marinade for as long as you want (preferably over an hour-I did mine overnight).   

Mint Tofu 1

Then you cook it up, and it's done.  It's really easy, and tasty.

Print
Crispy Pressed Tofu with Garlic and Mint
Ingredients
  • 2 14-ounce packages extra-firm tofu
  • 4 large garlic cloves smashed
  • 1 ½ teaspoons sea salt or kosher salt plus more to season
  • ½ cup packed fresh mint leaves chopped
  • zest of 1 lemon
  • 3 tablespoons fresh lemon juice
  • ½ teaspoon red pepper flakes
  • 2 TBS extra-virgin olive oil
Instructions
  1. 1. Drain tofu with EZ Tofu Press or between books/towels if you have no press.
  2. 2. Slice each piece of tofu crosswise into 4 (½-inch) thick slabs.
  3. 3. Mash the garlic to a paste with the salt. In a large bowl, whisk together the mint, lemon zest, lemon juice, garlic paste, and pepper flakes. Whisking constantly, drizzle in the olive oil.
  4. 4. Toss the tofu with the marinade, cover with plastic wrap, and let it sit at room temperature for 30 minutes, or refrigerate it for up to 12 hours.
  5. 5. When you are ready to cook, preheat a large skillet over medium-high heat for several minutes. Lift the tofu from the marinade and place it in the pan. Reserve the marinade. Press tofu down with spatula while cooking. Some liquid will come out, that is good. Cook for 5 minutes, then reduce the heat to medium and continue to cook until the tofu is well browned, a few more minutes. Flip the tofu over, and cook until the tofu is browned on the second side and cooked through.
  6. 6. Transfer the tofu to a serving platter. Pour the oil out of the pan, then add the reserved marinade. Stir and simmer for 1 to 2 minutes, scraping up the browned bits from the bottom of the pan; pour over the tofu and serve.


  • « Previous Page
  • 1
  • …
  • 19
  • 20
  • 21
  • 22
  • 23
  • …
  • 25
  • Next Page »

Hi! I’m Allyson

Welcome to Domestic Superhero where you will find lots of recipes & food goodness! Let's connect on social media, and be sure to subscribe to my email so you won’t miss a post!

More About Me →

  • Facebook
  • Instagram
  • Pinterest
  • Twitter
  • TikTok

Footer

↑ back to top

About

  • About Me
  • Contact
  • Disclosure & Privacy Policy
  • Featured On

Social

  • Facebook
  • Instagram
  • Pinterest
  • Twitter
  • TikTok

Recipes

  • Dinner Ideas
  • Desserts
  • Drinks
  • Appetizers

Disclaimer

Domestic Superhero is a participant in the Amazon Services LLC Associates Program, an affiliate advertising program designed to provide a means for sites to earn advertising fees by advertising and linking to amazon.com

Copyright © 2025 Domestic Superhero. Privacy