I am super excited to have Ginger guest posting for me today! She has a great tutorial for making your own nursing cover! I am no pro sewer, but it looks so easy that maybe I could even do it! Let's see....
Hey there Domestic Superhero Readers! I'm Ginger from Gingerly Made where you can find tons of creative tutorials for "Crafts, Food, and Family." My girls are huge inspirations for me as I am often crafting
either with them or for them.

Congrats to Allyson and her family on the newest member of their family! In celebration, I thought I would stick to a "baby/new mom" topic. The birth of a new baby is always exciting! And let's face it, sometimes it can be overwhelming. There are so many decisions to be made like what kind of stroller and car seat are you going to use, disposable or cloth diapers, bottle or breast, and countless others.
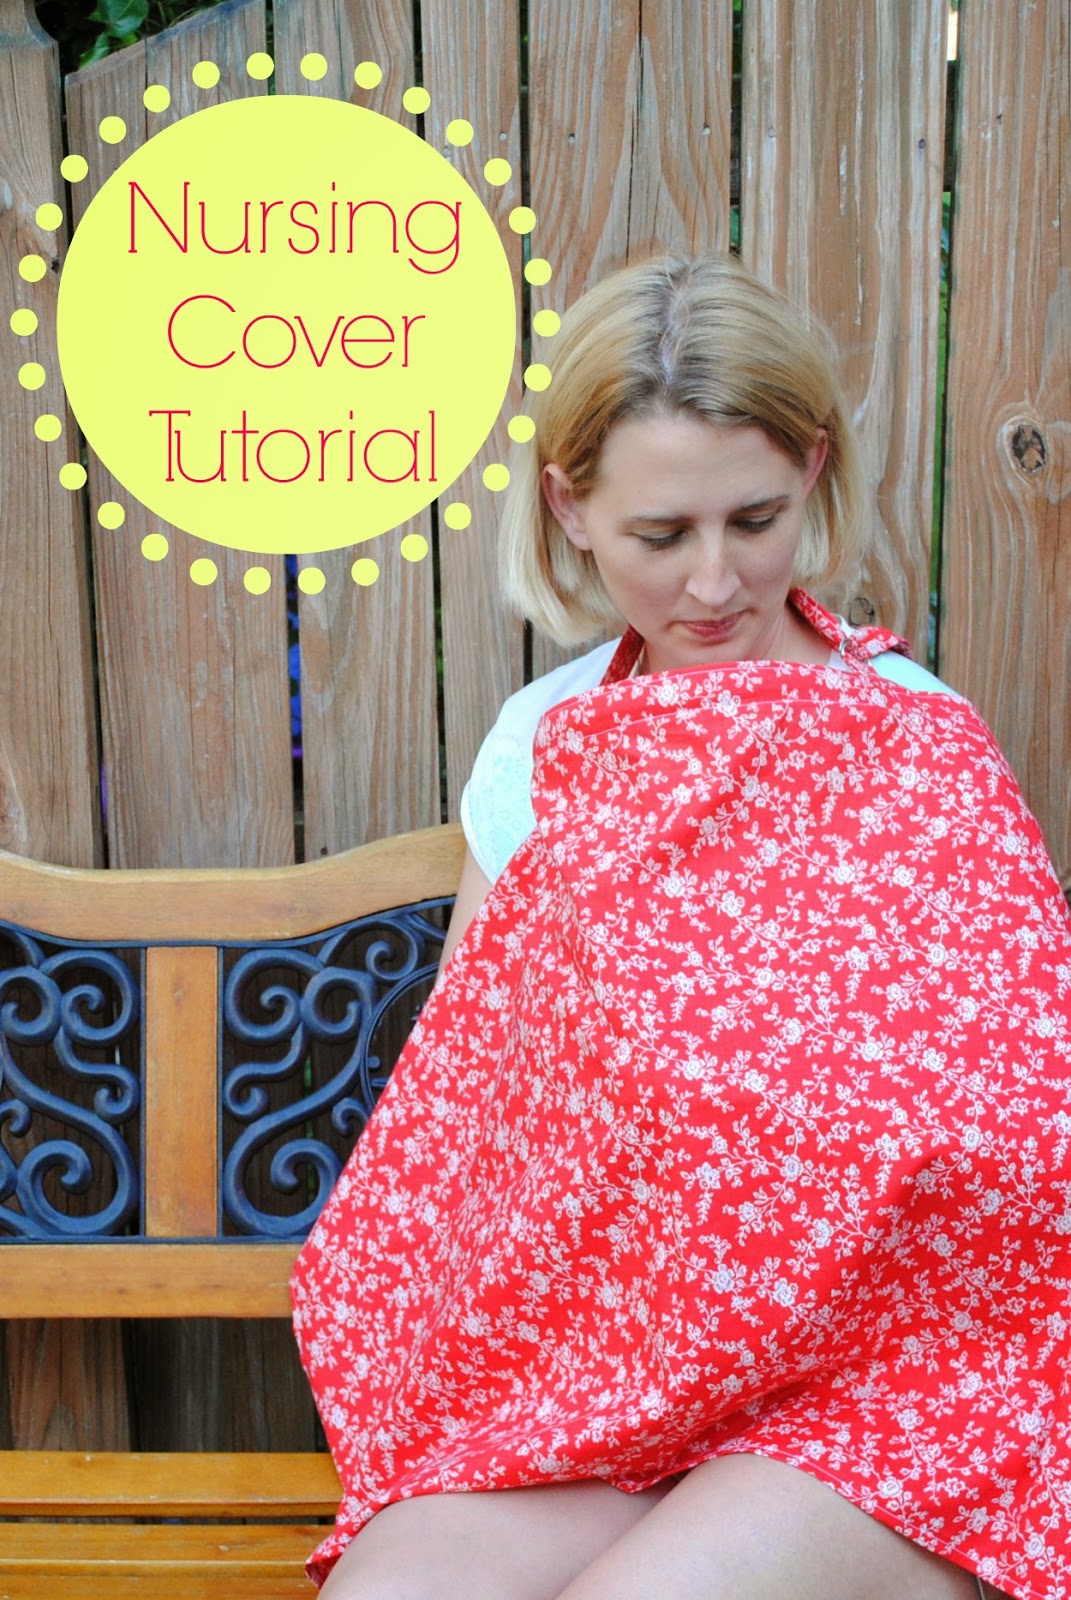
For me, one of the decisions I made was to nurse my children. It was both wonderful and well... not so wonderful at times. Besides latch issues and night wakings, I had trouble with the modesty of it all. I could not successfully cover myself with a blanket and when I tried, couldn't see baby to help her with those latch issues. I eventually found out about nursing covers. It was the perfect solution to my modesty problem. So perfect, I began making my own.
For those who may be interested in nursing covers for yourself or a friend (they make GREAT gifts), I have a sewing tutorial for you today to show you how. It's all straight-line sewing so don't fret. If I can sew it, so can you! Just hang in there with me as we go through this together.
Materials:
1 yard fabric
15 inches boning
1 set of D-rings
thread to match your fabric
iron & ironing board
pins
18" ruler
Cut your yard of fabric to make 1 large rectangle 26 inches tall and the full width of your fabric, typically 42" wide. I like using the full width for extra coverage on the side. With the remaining fabric you'll cut the straps - a 7" x 3.5" rectangle and a triangle 28" long, 4.5" at the base and 1.5" at the top.

Fold your two strap pieces in half so the long sides are together; right sides together. Sew the long sides together and inverse. You may need to use a safety pin or turning tool to help you turn the fabric (especially the long triangular piece).
Press so the seam in centered on both pieces.
On the long strap, top-stitch the down one side, across the top (narrow side), and back down the other long side.
For the shorter strap, top-stitch the sides. Fold in half so the raw edges are lined up. Sew back and forth a couple of times across about .5" from the fold. This gives you a loop to place the D-rings later.

Put the straps aside. And take a breath. That was the long part of the process - the rest goes by quick.
Grab that big piece of fabric and bring it over to the ironing board. Fold down and press in place one of the shorter sides about ¼". Fold over again sealing the raw edge in the fold and press.
Repeat for the other short side. And sew a straight line down both lengths.
Repeat for the bottom (longer length) of fabric.
Last bit and your almost done! For the top of the nursing cover, we are going to have much the same process as the sides and bottom, but different measurements and we are going to add the straps, so hang in there with me as I try to talk you through it.
The first fold should be a little large than the ¼" we used before, closer to a ⅓". Then the second fold, that seals in the raw edges needs to be 1". Press well.
Fold your fabric in half and use your fingernail to make a slight crease on the fold marking the center of your fabric. Unfold.
Place your ruler on the fabric so that the 7.5" mark lines up with your crease. 7.5 because it is half of 15 and that is where our 15" piece of boning will go. Now slide the raw edges of the straps under the fabric so that the center of the straps are at the 1" and 15" marks. Flip each of the straps up and pin in place. (See pictures)

When placing the long strap, make sure the back (seam side) is facing down at first. Then when you flip the fabric up, it will be face up. Basically you are making sure the back of the strap is not facing out or the front of the nursing cover.
With straps pinned in place, top stitch the bottom and top of the 1" fold of fabric back-stitching at the beginning and end.
You now have a sleeve for the boning to fit into. Slide it in place.

Stitch lengthwise down the middle of each strap between the other stitch line on your straps sealing the boning into the middle of the nursing cover. Back-stitch to reinforce.

And that's it for the sewing!! YAY!
Add D-rings to the loop on the short strap and you are DONE! You just made your first nursing cover!
Although I am no longer nursing my children, I am still really passionate about these covers because they were so helpful to me. I hope they are equally as helpful and liberating to you too.

Thanks for having me today! I hope you enjoyed this fun summery treat recipe. I'd love if you stopped by Gingerly Made sometime. You can follow me on Facebook, Twitter, and Pinterest too.
Other posts you might be interested in:

Mari says
Great share, I think I may add this to things to make as gifts!!! Thank you 🙂
Allyson says
Ginger did a great job with these! Happy you liked them!
LInda says
I am confused by straps. I sewed down long sides and turned right side out. This leaves short sides unfinished. When is the narrow end of long strap hemmed?